Printing Tips

Check out my printing tips if you're having problems printing to the right size
If you'd like to support this site and all the free things I post- please check out my Don't Eat the Paste Mandala collection coloring book for 9.99 at Amazon.

Thursday, February 28, 2013

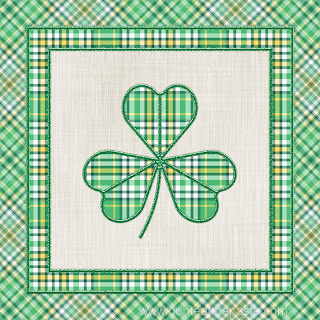
Shamrock Box

Shamrock and plaid

For me, the first sign winter is almost over is that February ends. The stores fill with green for Saint Patrick's Days and chocolate bunnies and eggs for Easter. I can look at the snow and think "Soon, this will be a garden and yard again!"

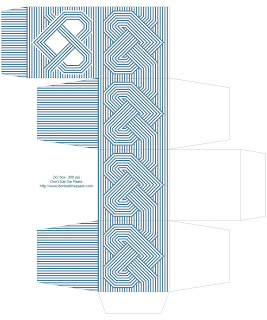
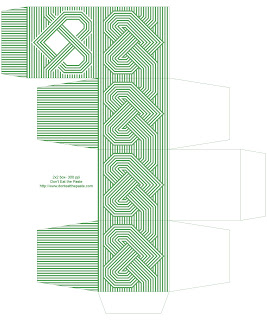
I hope you like this printable box. Click on the image for a larger version, print on card stock, cut out, score, fold and glue!
Printable shamrock box

Today we made chocolates. It was a lot of fun and very very messy. We filled them with jam made by a friend of mine. If they turn out well I'll post instructions later. 

Tuesday, February 26, 2013

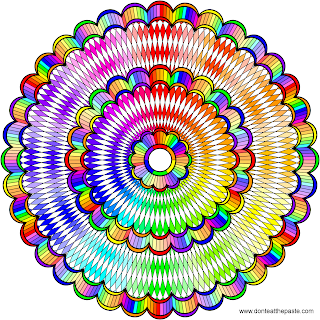
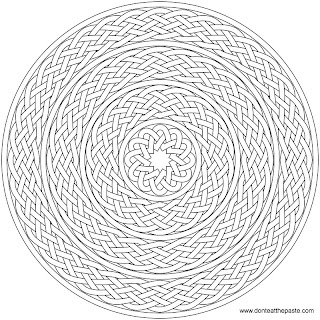
Intricate mandala to color

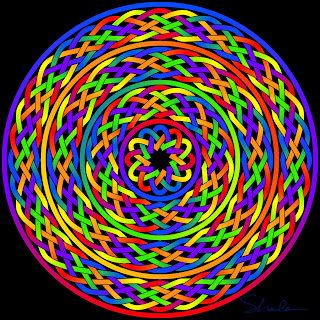
Color Wheel mandala
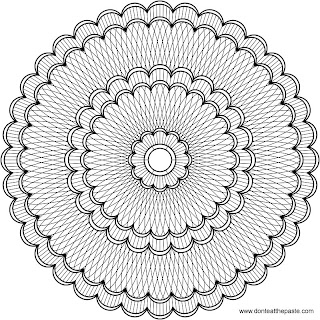
This mandala is one I started 3 days ago. Then decided I didn't like the center, and it took a long time to color even doing it digitally. Then after I had the colored version just done, it wasn't just right. So I had to recolor it. I do like the color wheel effect now that it's done! This is for the people who really love intricate designs and have very sharp pencils or fine tipped pens!
Click on the image for a larger version to print.

Small JPG version-
mandala to color

Large transparent PNG version-


Sunday, February 24, 2013

Fur Rondy Outhouse Races (photo post)

Person with a fur hat getting ready to watch the outhouse races.
Fur Rondy or Fur  Rendezvous is an annual winter festival held here in Anchorage. People wear lots of fur and fake fur hats. You'll see lots of animal head gear, both made from real animals with heads and claws intact and stuffed fleece versions. Various events take place all over the city including a fur bikini contest, a Duck Tape ball, a carnival complete with rides, ice sculptures and tons of other things. Including outhouse races.

William and Turnip Girl watching the races.
Yes, we do that here. Race outhouses. Teams build outhouses, usually sponsored by local businesses or organizations. It's a fund raiser and riotous fun to watch. The outhouses are mounted on skis, and one person sits on the "throne" (with straps because spills tip overs do happen). The outhouses can be very clever jokes, or just completely silly potty humor. The images are resized for quicker loading, but clicking on the images will bring up bigger versions to see more detail. If you were a racer and want a full sized version of one of the photos, just email me at shala AT donteatthepaste *dot* com.
Getting ready at the starting line
The teams start at the startling line, and the runners take them to the other end of the short track, turn around, and run back to the line. 


It was chilly, and we missed the parade that kicked off Fur Rondy events in the morning. But TG was thrilled we had made it to the races when we spotted this outhouse.
Yes, that's a T.A.R.D.I.S. outhouse racing down the street. 
I had to laugh out loud at this very unlikely race.
The name of the other outhouse is Poo Houze


My husband got a kick out of this entry.
The name painted on it was Kulluk! 
So it's time to wrap up the photo part of this because you really don't want to see all 70 some odd photos I took. So I'll leave you with a apottopissin (a pot to piss in)

It was very crowded, and when we got downtown and parked, a nice lady with a dog from Missouri asked us if anything was going on, she was afraid she missed any Fur Rondy excitement, and followed us to the races. Since the races take place on the same street/block as Grizzly Gifts, I also ran in there for a minute to pick up some extra lip balm for my husband. He's picky, he likes the kind I make, or the kind made by Silverbear Sundries who do sell at Grizzly Gifts. A man from one of the villages came up to us selling a jar of smoked salmon, and Michael bought it. 

It was fairly chilly out, and my feet were freezing.When everyone else was chilled, we went to Kobuk Coffee Co. and got some tea, and the traditional rum cordials which are a family tradition when we are downtown (non-alcoholic). Then we went to Peggy's for dinner. Driving back, we got to see the fireworks over the harbor, and it was snowing which didn't photograph well but it was beautiful.

Saturday, February 23, 2013

My husband wants Quadra-Fire Pellet Stoves (with a t-shirt giveaway!)

This is a Sponsored post written by me on behalf of QuadraFire for SocialSpark. All opinions are 100% mine.

You don't have to tell me pellet stoves are awesome. In fact, I'll offer you a cookie if you don't. Why? Because last winter when it got to double digit negatives, I heard just how awesome they are and why we should have one or more from my husband. I do agree though, they are pretty wonderful and when it's really cold, I start planning where we will put the first one. He's saying the living room, because when he's home, his feet are kicked up on a table while he plays games in there. I say the computer room because I'm home almost all day working in the office! We both think the master bedroom for sure.  They are a great popular heating alternative,

QuadraFire Pellet Stoves are attractive and built to fit many types rooms and designs. They are also built to make absolutely the best use possible of the fuel provided. Follow Quadra-Fire on Facebook, Twitter and Pinterest for decorating ,home improvement, eco-friendly and DIY ideas. 

Why pellets instead of a wood stove? Because of the bio-mass pellets, which burn completely and make efficient use of the material to create heat and because bio-mass is made from recycled and reclaimed materials. It can be industry scraps making the most of our resources.

Pellet Stoves are Awesome

Leave a comment about why you like QuadraFire and you can win a notebook made with recycled materials (sorry, I don't know if it's college ruled or not!) and a Quadra-Fire t-shirt. This one is a short entry time, you have until 10 pm Pacific Wednesday, February 27th to enter.

Quadra Fire T-Shirt

Visit Sponsor's Site

Friday, February 22, 2013

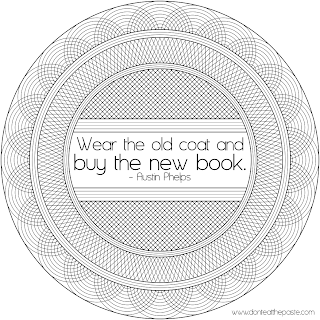
Wear the old coat printable reading quote

Wear the old coat and buy the new book quote

"Wear the old coat and buy the new book" -Austin Phelps
The image above is shareable on FB from my page. (which recently hit over 900 fans WOOT!)

The image below is printable. Click on the image for a larger version and print it! As usual, I recommend Astrobrights paper. Mostly because it's what I use for all my black and white quotes and it's so cheerful and pretty.

My husband will tell you that much to his annoyance, that's exactly what I do. I have sweaters that are darned in mismatched colors and sometimes look very much like a tatterdemalion in my long skirts, old sweaters and worn out shoes. But given 100 dollars and a choice of things, I'd rather have a half dozen books than a few new shirts. It's where the choice between crafty items and books comes up that it gets hard. My old coat is still warm. 

I also posted some brick stitch bead patterns on BellaOnline Beadwork for St. Patrick's Day.


Thursday, February 21, 2013

Potassium-rich foods and meal ideas


Potassium is an essential nutrient you don't think about until you feel the effects of not having enough. That can be through diet or in my case, because of medication. For me, it shows in an awful pins and needles feeling in my feet, hands and face. Supplements aren't the best choice in my case so in the last few months, my family has been planning meals around my need for extra potassium. When we eat out, I make choices that will have more potassium.

Fortunately, that doesn't mean that I have to eat a ton of bananas. It does mean that I had to do a bit of research.
High Potassium Choices-
Bananas
These are the go-to, quick snack with potassium. One banana has nearly 25% of the US recommended daily allowance. But if you're like me, bananas are good but not all the time.

Lentils
One of my family's favorite meals is lentils*. That one is just perfect. It can be made in large quantity, freezes and reheats well, and everyone likes how it tastes. 1 cup of cooked (boiled) lentils has as almost as much potassium as a banana. They can also be used in a lot of chilis and soups easily just to up the potassium a bit.

Tomatoes
Tomatoes vary by how they are served of course, but a cup of tomato sauce has as much potassium as a banana as well. Knowing that about tomatoes is handy when we are going out to dinner. Spaghetti is a great choice!


Spinach
Yay for spinach on the list of high potassium foods. I actually strongly dislike most cooked spinach just as a side dish, but love spinach salads and like spinach as an ingredient. It can also be chopped fine and mixed into things like meatloaf easily. Popeye had the right of it.

Yogurt
I love yogurt, and I like yogurt with bananas sliced into it, or bananas dipped in low-fat yogurt.


Less potassium but still good sources:
Potatoes
Only just under half as much potassium as tomatoes, lentils or bananas, but also very widely available and easy to incorporate into meals. They are high carb and a starchy food but they are also a good source of Vitamin C. Potato chips, high fat and high carb are better for you than corn chips. I mentioned how much potassium they had to my optometry specialist, and he told me about a friend of his that went on a month long trek using chips as his primary source of energy and nutrition!

Cantaloupe 
Cantaloupe has more potassium than potatoes, but less than bananas. It's a nice, sweet treat and a favorite in my family.

Alaskan Fish!
Almost all fish is a good choice, but some specific types come in a bit higher, including salmon, halibut and cod which are 3 of my favorite locally sourced fish. Yum.

It's easy to remember those foods because they are some of my favorites.

*Lentils are great because they cook up so fast and can be used in place of beans in a lot of recipes. Sometimes I do season them for a turkey and lentil chili, but my family's favorite is when I cook them with sausage and a ton of cumin. This is TG's favorite lentil meal-


TG's Cumin and Reindeer Lentils

2 cups of dry lentils
4 cups of water
2 Tablespoons of cumin
1 onion minced
- Rinse  and pick over lentils and put all in large pan- bring to a boil, turn down heat and simmer for 20 minutes

Dice 1 reindeer summer sausage (optional- skip if you're a vegan)
Add 1 can of stewed tomatoes
1 tsp. granulated garlic
1/2 tsp. cayenne
1/2 tsp. black pepper
2 tsp. salt
2 cups of rinsed long grain rice
3 cups of water
summer sausage

Bring back to a boil, turn down heat, cover and simmer for 20 minutes. Take off heat and fluff with a fork.

Serve with hot sauce, salt and pepper to taste.

She does occasionally add in other things because she likes lots of color. Peppers and other high acid foods should be added in halfway through the rice part after the lentils are cooked through. You may well prefer less cumin and spices, if you prefer things not as strongly spiced, start with half of the amounts.


Wednesday, February 20, 2013

Finding your #perfectfit apartment (with a giveaway!)

This is a Sponsored post written by me on behalf of apartments.com for SocialSpark. All opinions are 100% mine.

 photo Apts_PrfctFit_rgbjpg_zpsf00a594a.jpg

There is no place like home. I remember my first apartment, eating a peanut butter sandwich at midnight and not being worried about waking someone else up. It was pretty wonderful, my kitchen, my peanut butter, my own place. The problem is that it was tiny. The kitchen was a corner of the main living area, the living room was 15 x 7 feet, so with a couch on one wall and a tv on the other, there was just room to walk through it. 

Skeleton Key Cross stitch

Looking at apartments.com would have been so much better if had been available then. The site is really easy to navigate, you can pick your options. Once you put in the town or city and state, a dropdown menu gives you an option of neighborhoods,.You can choose how many rooms and bathrooms you need and the amenities you're looking for in an apartment as well as the price range. Then you can click on the results to see photos of the apartment, information about the complex and pricing. 

This Anchorage complex is a good fit. It's close to my dad's house, has a fitness center, garage and high speed internet. This is a great way to search for your next apartment.

Follow @aptscom on Twitter for lots of rental and home tips. 

GIVEAWAY! Would you like to win a $25 dollar Visa gift card? Check out apartments.com and find an apartment you love, and leave the link in a comment below. For an extra entry, follow @aptscom on Twitter and tweet @aptscom which apartment you love. Include #AptsWin in your tweet. Paste the tweet URL in a comment. 

I'll randomly choose a winner on Friday,March 8th, 2013.

Everyone gets the cross stitch pattern shown above. A key makes a nice simple design for a housewarming gift or for yourself.

Visit Sponsor's Site

Monday, February 18, 2013

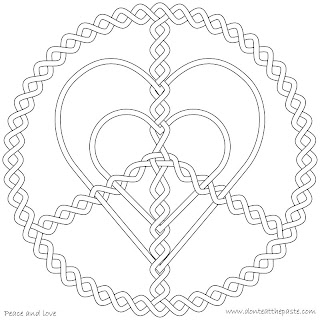
Peace and Love- Coloring Page

Peace and Love
This peace and love coloring page has lots of wide open space to color in. You can see how I colored it digitally above. I like the way the hearts and peace symbols entwine!

I hope you enjoy it!! Click the images below for larger versions.

Small jpg version:

Peace and love coloring page

Large transparent PNG:

peace and love coloring page

Saturday, February 16, 2013

Printable Lace Box in 5 colors


I hope you enjoy this intricate lacy designed printable box. It's in 5 different colors: purple, pink, green, orange and blue. Click on the images for a larger version to print and assemble. Print on card stock, cut out, score fold lines, fold, glue!


Tuesday, February 12, 2013

Nested Braids embroidery pattern and coloring page

Rainbow braids

Nested braids coloring page and embroidery pattern- the outer 3 braids are 6 strand braids and the center is a 3 strand braid. Click the images for a larger version and print. If you embroider, both the embroidery version and the coloring page can be embroidered, but the embroidery version is simpler. The 4 braids can be used as frames or accents singly or all together as shown. Braids can also be considered knotwork and look very similar.

Embroidery version-
braided or knotwork embroidery pattern

Small JPG version:
braid or knotwork coloring page
Large transparent PNG version: (great for digital scrappers to use as a digital stamp)
knotwork or braids coloring page


Sunday, February 10, 2013

Simple Heart Knot Coloring Page

rainbow heart knot

This one is a very simple heart knot to color. I really like the way it splits warm and cool colors in a rainbow palette! I hope you enjoy it just as much.
Click on the image and print.
Small JPG version:
Heart Knot to color

Large transparent PNG version:

In other rainbow heart knot news, I was considering this as an addition to my Spoonflower fabric collection, what do you think? It's resized to show the pattern. 


Friday, February 8, 2013

Book Review- Jeaneology


Jeaneology by Nancy Flynn is written for teens and has projects for recycling torn or old jeans into new things. Since my teenage daughter is a big fan of upcycling and sewing, it seemed like something she would enjoy.

I was right. It's written at a close to beginners level. The author does assume at least basic hand sewing skills, and that was my first very pleasant surprise about this book. We have a lot of sewing books, but most modern books focus strongly on machine sewing. They never seem to take into account young sewers like my daughter who can use a sewing machine but honestly prefers to sew by hand. The instructions are written so they can be used by both hand sewers and machine sewers. The beginning section includes useful information like explaining about bias tape and other tools you may need and how to pick the right hand sewing or machine sewing needles for working with denim.

The layout is image heavy with clear illustrations, and spiral bound with a heavy paper cover so it can lie flat. There is a full color photo of every project, and interspersed throughout the book are trivia, facts and tips about jeans. This was one of my daughter's favorite parts of the book.

The projects are well organized, starting with clothing in a chapter called Rocking Rags. Converting jeans into a maxi skirt or a mini skirt, making shorts and a great set of tips for distressing or customizing an existing pair of jeans. I absolutely loved the photo of the star stenciled jeans that were discharged using a bleach pen.

Mean Jean Accessories has headbands, gadget pockets and the nice big purse that's pictured on the cover as well as some great casual jewelry projects for making the most of even small scraps. This was my favorite chapter because it's a good way to use jeans your family gives you that are torn or stained.

Blues You Can Use has gift ideas and projects that are functional. This chapter had my daughter's favorite project, an oven mitt. It also has projects like coasters, place mats and a cute little key fob.

As a crafter, I love the ideas in this book for upcycling and using jeans. My daughter loved it just as much. The projects are a good mix of things to do with whole intact pairs of jeans and pairs that have seen better days. 25 projects total, all very well illustrated with good text instructions.

Published by Zest Books - Teen Reads with a Twist.


I received a complimentary copy of this book to review, I received no other compensation, and my review is my honest opinion of the book. You can read more about my review policy here.

Thursday, February 7, 2013

Knotted Heart Printable Box- 5 colors


Yesterday was one of those days worked quite how I wanted after drawing a knot for a friend (I'll post that in a few days as a coloring page). Today it came together the right way. I hope you enjoy this printable gift box. There are 5 colors available. Click for a larger version. Print on card stock, cut out, score folds, fold, and glue!

Knotted Heart in Orange-
Knotted Heart printable gift box- available in 5 colors!
Knotted Heart in Pink-
Knotted Heart printable gift box- available in 5 colors!
Knotted Heart in Blue-
Knotted Heart printable gift box- available in 5 colors!
Knotted Heart in Green-
Knotted Heart printable gift box- available in 5 colors!

Knotted Heart in Purple-
Knotted Heart printable gift box- available in 5 colors!


Tuesday, February 5, 2013

The Bunda- crochet pattern

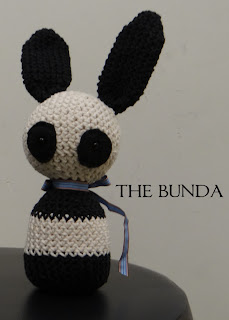
The Bunda, a crocheted bunny panda

The Bunda is what you get when you simply can not decide if you're making a panda or a bunny.
This little stuffie is a bit bigger than what I usually make because it has an important difference.
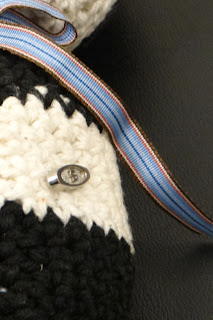
how to put a music box into a crocheted animal

It has a music box in it! The music boxes I use are 18 notes and completely encased in plastic, made by Sankyo. They can be found at a lot of hobby stores, but I got mine from CRSPinner's Variety Store on Ebay because she had the specific song* I most wanted. She has a great selection of songs and they are listed alphabetically.

The Amazing Turnip Girl helped me with the design. She's the one who decided it should be one of my limbless almost peg like designs, and that it should absolutely have big felt circles around the eyes.

You will need:

  • Ecru or white worsted weight yarn- I used Peaches and Cream Ecru (1 ball)
  • Black or if you like, a different color!  (1 ball)
  • Size G hook, if you work loose, use a size F instead
  • Yarn needle
  • Stuffing
  • Weighted stuffing of some sort, some people use plastic pellets. I use high density plastic BB pellets
  • scrap of fabric about 3x4 inches
  • sewing needle
  • sewing thread- black or to match your contrast color
  • black felt or felt to match your contrast color
  • 2 safety eyes or buttons
  • ribbon (optional)
  • music box (optional)
Start by hand sewing a little pocket to hold the pellets with the scrap of fabric. I just used 2 rows of a running stitch to make mine. That will keep the pellets in one place inside the stuffing, it can be very plain sewing because it's going to be hidden. I like high density plastic BB pellets because they are very smooth and rounded but they can also be expensive. Other people use plastic pellets that are made for stuffing, they weigh less by volume. One friend uses snippets off of plastic canvas projects, and I've even heard of people using aquarium rocks. Just something that's going to be a little heavy, and that's safe if it gets wet.
Cut 2 eyes out of the felt. This pattern can be printed at 100 dpi, or you can do it by eye to make two rounded tear drop shapes that are about 1.5 inches tall by 1.25 inches wide.


ch= chain
st= stitch
sl st= slip stitch
sc= single crochet
dec sc= insert hook in first stitch, yarn over, pull up loop, insert hook in second stitch, yarn over, pull up loop, yarn over, and pull through the 3  loops on the hook. 
Repeat ** means repeat what is between the asterisks. 
American terminology

Ears- Make 2:
With black yarn
Magic ring or chain 2
Round 1: Sc 6 times in ring, sl st to join.
Round 2: Ch 1 (doesn't count as first stitch here or throughout) sc in first st, sc in next 2 sts, ch 1, sc in next 3 sts, ch 1, sl st to join.
Round 3: ch 1,  2 sc in first st, sc in next st, 2 sc in next st,  ch 1 and skip ch 1 loop, 2 sc in next st, sc in next st, 2 sc in next st, ch 1, sl st to join
Round 4: ch 1, sc in first st, sc in next 4 sts, ch 1, skip ch 1 loop, sc in next 5 sts, ch 1, sl st to join.
Round 5: ch 1, 2 sc in first st,  sc in next 3 sts, 2 sc in next st, ch 1, skip ch 1 loop, 2 sc in next st, sc in next 3 sts, 2 sc in next st, ch 1, sl st to join.
Rounds 6-15: ch 1, sc in first st, sc in next 6 stitches, ch 1, skip ch 1 loop, sc in next 7 stitches, ch 1, sl st to join
Round 16: ch 1, dec sc over first and second stitches, sc in next 3 stitches, dec sc over next 2 sts, ch 1, skip ch 1 loop, dec sc over next 2 sts, sc in next 3 sts, dec sc over next 2 sts, ch 1, sl sto to join.
Round 17-18: ch 1, sc in first st, sc in next 4 sts, ch 1, skip ch 1 loop, sc in next 5 sts, ch 1, sl st to join.
Break off yarn leaving a long tail for sewing it to the head. Fold ear in half at base and stitch closed to create a taper.

Head:
With white yarn
Magic ring or ch 2
Round 1: sc 6 times in ring, sl st to join (6 sts)
Round 2: ch 1, 2 sc in first st, 2 sc in each st after, sl st to join. (12 sts)
Round 3: ch 1, sc in first st, 2 sc in next st, *sc in next st, 2 sc in next st*, repeat ** around, sl st to join. (18 sts)
Round 4: ch 1, sc in first st, sc in next st, 2 sc in next st, *sc in next 2 sts, 2 sc in next st*, repeat ** around, sl st to join (24 sts)
Round 5: ch 1, sc in first st, sc in each st around, sl st to join (24 sts)
Round 6: ch 1, sc in first st, sc in next 2 sts, 2 sc in next st, *sc in next 3 sts, 2 sc in next st*, repeat ** around, sl st to join (30 sts)
Round 7: ch 1, sc in first st, sc in next 3 sts, 2 sc in next st, *sc in next 4 sts, 2 sc in next st*, repeat ** around, sl st to join (36 sts)
Round 8: ch 1, sc in first st, sc in each st around, sl st to join (36 sts)
Round 9: ch 1, sc in first st, sc in next 4 sts, 2 sc in next st, *sc in next 5 sts, 2 sc in next st*, sl st to join (42 sts)
Round 10-14: ch 1, sc in first st, sc in each st around, sl st to join (42 sts)
Round 15: ch 1, sc in first st, sc in next 4 sts, dec sc over next 2 sts, *sc in next 5 sts, dec sc over next 2 sts*, repeat ** around, sl st to join (36 sts)
- While the hole is still big enough, it's time to sew on the ears and place the eyes. The ears are sewn into place 5 rows from the center top, one on each side. They need to be sewn at the base, then slightly up the side facing the center to stand up. The image below shows the base in red and the stitching on the side in green. Cut a small hole in the center of each felt circle, and push the safety eye through that, then into the face on round 14 between 2 stitches. The other eye on mine is 10 stitches away. Don't sew down the circles yet!

Round 16: ch 1, sc in first st, sc in next 3 sts, dec sc over next 2 sts, *sc in next 4 sts, dec sec over next 2 sts*, sl st to join (30 sts)
Round 17: ch 1, sc in first st, sc in each st around, sl st to join. (30 sts)
Round 18: ch 1, sc in first st, sc in next 2 sts, dec sc over next 2 sts, *sc in next 3 sts, dec sc over next 2 sts*, repeat ** around, sl st to join (24 sts)
Round 19: ch 1, sc in first st, sc in next st, dec sc over next 2 sts, *sc in next 2 sts, dec sc over next 2 sts*, repeat ** around, sl st to join. (18 sts)
Round 20: ch 1, sc in first st, dec over next 2 sts, *sc in next st, dec sc over next 2 sts*, repeat ** around, sl st to join (12 sts)
Break off yarn, leaving a tail for sewing. Using the thread and needle, stitch the felt into place.

Body:
The music box comes in 2 pieces, the box itself, with a winder taped to it. The winder screws into place and it's easy to tell when your done screwing it in because then you're winding it up! 

Ch 2 or make a magic ring
With black yarn-
Round 1: 6 sc in ring, sl st to join
Round 2: ch 1, 2 sc in first sc, 2 sc in each st around, sl st to join (12 sts)
Round 3: ch 1, sc in first st, 2 sc in next st, *sc in next st, 2 sc in next st* repeat ** around, sl st to join (18 sts)
Round 4: ch 1, sc in first st, sc in next st, 2 sc in next st, *sc in next 2 sts, 2 sc in next st* repeat ** around, sl st to join (24 sts)
Round 5: ch 1, sc in first st, sc in next 2 sts, 2 sc in next st, *sc in next 3 sts, 2 sc in next st* repeat ** around, sl st to join (30 sts)
Round 6-9: ch 1, sc in each st around, sl st to join (30 sts)
Switch to white yarn
Round 9-10: ch 1, sc in each st around, sl st to join (30 sts)
Round 11: If you are using a music box- otherwise work as for round 9. Ch 1, sc in first st, sc in next 25 sts, ch 1, skip 1 st, sc in next 3 sts, sl st to join- mark ch 1 loop with a scrap of yarn(30 sts)
Round 12-14:  ch 1, sc in each st around, sl st to join (30 sts)
Switch to black
Round 15: ch 1, sc in each st around, sl st to join (30 sts)
Place the music box by putting the key through the chain 1 loop, and then putting the music box into the body, line up the key hole with the key and screw the key into place until it starts winding the music box. Put the plastic pellet bag in the other side of the body to keep the weight even. 
Round 16: ch 1, sc in first st, sc in next 2 sts, dec sc over next 2 sts, *sc in next 3 sts, dec sc over next 2 sts*, repeat ** around, sl st to join (24 sts)
Round 17: ch 1, sc in first st, sc in each st around, sl st to join (24 sts)
Round 18: ch 1, sc in first st, sc in next st, dec sc over next 2 sts, *sc in next 2 sts, dec sc over next 2 sts*, repeat ** around, sl st to join (18 sts)
Round 19: ch 1, sc in first st, dec sc over next 2 sts, *sc in next st, dec sc over next 2 sts*, repeat ** around, sl st to join. 
Round 20: ch 1, sc in each st around, sl st to join, break off yarn.

Stuff the head and body firmly, and pack stuffing around the edges of the music box to round it out some. Use a dowel, back end of a crochet hook or a knitting needle to stuff it around and between the pellet bag and music box. Stitch head to body, adding in more stuffing before doing the last couple of stitches. Tie off securely and pull all ends to the inside of the Bunda. If you pull it tight, then cut close, when you let go, the yarn end disappears into the toy. If the head is still a little floppy, tying a ribbon around the neck will help.

Because of the weighting, this does stand up well even with the over sized head. 

* The song is You and Me Against the World, which was one my mom used to sing to me. I'm making a second Bunda with the same song so my kids each have one to someday share with their children.