Printing Tips

Check out my printing tips if you're having problems printing to the right size
If you'd like to support this site and all the free things I post- please check out my Don't Eat the Paste Mandala collection coloring book for 9.99 at Amazon.

Monday, October 31, 2011

Pumpkin Butter- recipe and printable page


My family always gets pie pumpkins for Halloween. They don't make the best carving pumpkins, but they have a lot of seeds for their small size and the best pumpkin "meat" for making pumpkin butter.
Pumpkin butter doesn't have all the fat that pumpkin pie filling has and it's a fantastic source for vitamin A and C. It does have a fair amount of sugar, but I don't mind that as much knowing that it's not all empty calories. 
Pumpkin butter is not a good candidate for home canning because it doesn't have the acid necessary to keep botulism from growing. So I put it in the freezer. We carve our pumpkins on Halloween itself and put them on plates with led lights in them. I leave them out over night because it's just cold enough here to do that. They won't rot, but without the plates they might freeze to my stairs (it happened once! They were stuck there until a passing moose came up the stairs to eat them)

Click on the images including the one above for larger versions.

Pumpkin Butter - make 5-6 pints
Ingredients:

3 Pie Pumpkins
1 Tablespoon Pumpkin Pie Spice
1 Tsp. Cinnamon
1 cup brown sugar
Apple Juice

To Make Pumpkin Puree
Cut pumpkins in half and scoop out the center fiber and seeds. Pie pumpkins have a lot of seeds, so set them aside to toast and eat or to plant next spring.
Cut off and discard stems and cut the pumpkins into chunks.
Steam in 1/2 cup water until soft. Pull out chunks and scrap the pumpkin meat off the skin. Discard pumpkin skin and put the pumpkin back into the pan.
Use a stick blender or potato masher to make a nice soft puree.

Add spices and sugar, simmer over low heat, stirring often until it's cooked down by about half.
If it gets too thick, add some apple juice, if it's too thin to use as a spread, keep cooking it down.
Let cool and ladle into freezer safe containers. Put one in the fridge for immediate consumption and the rest in the freezer.


My family loves to eat grilled pumpkin butter and cream cheese sandwiches. We butter two slices of bread and spread pumpkin butter over one (plain butter side down). Then cut 1/4 slices of firm cream cheese and put that on the pumpkin spread. Put the other piece of bread over it, butter side up. Put it in a frying pan over medium heat and cook until it's browned and toasted on one side, flip over, repeat. The cream cheese melts at a fairly low temp so by that point,it's ready to serve. 

For the seeds- my daughter likes chili pumpkin seeds, so after cleaning off all the fibery bits, we toss them with olive oil and 1 tsp. good chili powder, 1/4 tsp each garlic powder, cumin, onion powder and oregano. Then spread them on a cookie sheet and toast until just barely browned. 

Sunday, October 30, 2011

Skull mandala to color

Click on the image for the larger version to color.

Yay! Halloween is tomorrow. Yesterday we went out for some Halloween fun. TG dressed as a white mage from Final Fantasy in a cape she designed and sewed by hand herself. She was very secretive about her costume. Just insisting "I have it." and refusing to answer any questions. It turned out lovely.
William decided on a quickie adventurer type and collaborated with his sister for his last minute costume. I'll post my pumpkin butter recipe tomorrow for everyone planning to cook their jack-lanterns.

Saturday, October 29, 2011

Dotted Halloween 2x2 Printable Box

I like dots! There are a lot of dot themed printables on this site because I like dots so much. Halloween colors, but I may recreate this box in colors that can be used for other holidays. Click the image above for a larger version, cut, score, fold, glue!

Book Review - 101 Tees

101 Tees ; Recycle + Refashion + Revamp by Cathie Filian is a collection of ways to personalize and style tee shirts into fashion statements that reflect who you are.

Unlike other teeshirt revamping books, this one isn't about how to deconstruct or slice up a shirt. The emphasis is instead on ways to decorate and embellish a tee shirt. The results are colorful, unique and fun. Just as importantly, the results are modest and wearable by young ladies.

The techniques include applique, embroidery, printing, painting, stenciling, using iron ons and beads. While there are no illustrations, they are well explained. There are patterns and stencils in the back.

The examples are trendy looking with a DIY vibe. One of my favorites is the hand stamped Giggles shirt. The same technique could be used to set up a shirt with a favorite quote. Other favorites are the two toned dyed shirts. One of the most energizing and lovely ideas through out the book is untypical design placements and elements. Instead of centering motifs and embellishments, they are placed at angles on shoulders, off to the side, or in other places. It's a great design element that's very appealing.

Scattered flowers go up the side of one shirt. Ruffles are used to create both fashion looks in sharp pleats and very girly looks in soft form. The bleach discharged robot shirt is one my son wants to make, but instead of the negative stencil robot, he plans to use gears and bolts. A butterfly design combines painted and appliqued shapes in different sizes. Some shirts show as an example how you can take a shirt already printed with a pattern or design and embellish it in different ways. Screen printing on top of a patterned tee shirt for example, or embroidering details on a shirt with a motif.

A lot of the tee shirts in the book aren't plain tee shirts. They have shaping and details that you might not find in your closet. However, the ideas are workable on a variety of shirts, and it's a great book for ideas to create your style from thrift store shirts. Since most of the techniques don't require expensive or specialty equipment, it's an inspiring collection of ideas for teens. My teen daughter really likes the book, it's one both of us will use and keep in mind when we are at thrift stores. We both have our own style. Mine tends more to the feminine, her's is more funky. The ideas in this book appeal to both of our styles.

You can get this book directly from the publisher, Lark Crafts
My reviews are always my personal and honest opinion. You can read more about my review policy here.

Thursday, October 27, 2011

A printable Hershey's miniature box for Halloween

Hello to everyone who found my site through Parents.com's 100 Days of Holidays!
To everyone who is a regular reader (jumps up and down excitedly) look at that!! It's so wonderful to be a collection that includes a lot of artists that I admire so much. I'm at 9 in the 19 Halloween Printables.
This set is higher dpi than the Halloween Bats Hershey's Miniature Slide Box. Click on the images for larger versions and print at 8x10. I recommend Chrome browser for in browser printing.


Assembly instructions-
I hope your Halloween is wonderful!

Fox and Owl Coloring Pages

These were inspired by this design which I posted on Spoonflower.


Here are a pair of coloring pages, click on the images for bigger versions.


Wednesday, October 26, 2011

Another Halloween coloring page

I hope you like this little kitty and pumpkin coloring page for Halloween.  Click the image to download.


The font used is from Apostrophic Labs massive Komika family. Look here for the Komika fonts, Komika Boo is with the poster fonts. These fonts are free for personal OR commercial use. The readme that came with my download says " If you do use them in commercial projects in which you make some profit, please take the time to give a small fraction of that to your favourite charity."
It's a wonderful family of fonts that will fit all your comic book style font needs. Definitely recommended for digi-scrappers.

Book Review- Just Tacos

Just Tacos : 100 Different Recipes for Breakfast, Lunch and Dinner by Shelley Wiseman . The title describes the theme of this cookbook perfectly. Just tacos, but tacos made with ingredients that range from the expected like pulled pork to very unexpected ingredients like tuna with a wasabi mayonaise or fried avocado tacos.

The book starts with recipes for several kinds of tortillas since that's the part that holds a taco together. The recipes are mostly for corn tortillas made with masa harina. There is also one recipe for from scratch corn tortillas that you make the flour for, and 2 recipes for regular flour tortillas.

Then you get into the recipes. My family love tacos, and after my first leafing through the recipes, before I picked a couple try, I called a friend who really, really loves tacos and loves to cook and told him he needed this book.

There are several points in the book where the author goes into a bit more detail about a technique or an ingredient. All of them are chatty and informative. Each of the recipes has a serving suggestion listed for extras to serve on the side.

There is so much variation here. Literally a taco for any time of the day, any sort of mood. Vegetable (including several recipes that are vegan friendly), seafood, poultry, pork, meat (which mostly means beef but also includes lamb and sweetbreads), breakfast tacos and the final chapter which is Quesadillas, Sopes and Tostadas.

So many different flavor combinations, this is a keeper. I let my daughter pick the recipe she wanted to try and she picked the "Drunken Chile Con Carne" tacos. This is made with ingredients you'd expect like chiles and inexpensive steak, but also includes bittersweet chocolate and beer. My husband was extremely dubious of any recipe that called for beef and chocolate. Since the chile takes two hours to simmer though, he had lots of time to rethink that. The whole house smelled deliciously of the peppers and meat she used. The timer went off and he said "FINALLY!" then she went back into the kitchen to restart the timer (my timer only goes for an hour). When it was finally served, his reservations were gone. It tasted fantastic. She was able to follow the instructions easily.

I'm happy about the chorizo recipe. It's easy enough to make ahead and keep in the freezer to mix into all sorts of tacos without having the somewhat scary ingredients of the chorizo at my local grocery store. It tastes fantastic.

The table of contents is just that, it shows the chapters, not the recipes in the book. The index at the back is by type of taco and ingredient. So to find the recipe above, you wouldn't look under D for Drunken but under M for Meat. There are also a few beverage recipes in the book as well.

Very recommended for serious taco lovers.

You can get this book directly from the publisher, Taunton Press
My reviews are always my personal and honest opinion. You can read more about my review policy here.

Tuesday, October 25, 2011

Little Pumpkin Crochet Pattern

This cute diminutive pumpkin gets it's shaping from using different stitches.

I was going to use black safety eyes, but decided I really loved the scale of the buttons, which came from my button stash.

You will need :
small amounts of orange and green worsted weight yarn- I used Peaches and Creme Bright Orange and Bright Lime
Size F hook
Scissors
Yarn needle
Eyes- I used buttons.
Stuffing

ch= chain
sc=single crochet
hdc= half double crochet
dc- double crochet
st or sts= stitch or stitches
sl st= slip stitch

Instead of working in rounds, the body of the pumpkin is worked flat then seamed. The rows are worked alternately in the front and back loops of the stitches to create the ridges.

Chain 13 loosely
Row 1: Sc in second chain from hook, sc in next st, hdc in next 2 sts, dc in next 4 sts, hdc in next 2 st, sc in last 2 sts.
Row 2: ch 1 tightly (doesn't count as first stitch here or throughout), working in back loops of the previous row: sc in first 2 sts, hdc in next 2 sts, dc in next 4 sts, hds in next 2 sts, sc in last 2 sts.
Row 3: ch 1 tightly, working in front loops of previous row: sc in first 2 sts, hdc in next 2 sts, dc in next 4 sts, hds in next 2 sts, sc in last 2 sts.
Row 4: ch 1 tightly (doesn't count as first stitch here or throughout), working in back loops of the previous row: sc in first 2 sts, hdc in next 2 sts, dc in next 4 sts, hds in next 2 sts, sc in last 2 sts.
Row 5: ch 1 tightly, working in front loops of previous row: sc in first 2 sts, hdc in next 2 sts, dc in next 4 sts, hds in next 2 sts, sc in last 2 sts.
Row 6: ch 1 tightly (doesn't count as first stitch here or throughout), working in back loops of the previous row: sc in first 2 sts, hdc in next 2 sts, dc in next 4 sts, hds in next 2 sts, sc in last 2 sts.
Row 7: ch 1 tightly, working in front loops of previous row: sc in first 2 sts, hdc in next 2 sts, dc in next 4 sts, hds in next 2 sts, sc in last 2 sts.
Row 8: ch 1 tightly (doesn't count as first stitch here or throughout), working in back loops of the previous row: sc in first 2 sts, hdc in next 2 sts, dc in next 4 sts, hds in next 2 sts, sc in last 2 sts.
Row 9: ch 1 tightly, working in front loops of previous row: sc in first 2 sts, hdc in next 2 sts, dc in next 4 sts, hds in next 2 sts, sc in last 2 sts.
Row 10: ch 1 tightly (doesn't count as first stitch here or throughout), working in back loops of the previous row: sc in first 2 sts, hdc in next 2 sts, dc in next 4 sts, hds in next 2 sts, sc in last 2 sts.
Row 11: ch 1 tightly, working in front loops of previous row: sc in first 2 sts, hdc in next 2 sts, dc in next 4 sts, hds in next 2 sts, sc in last 2 sts.
Row 12: ch 1 tightly (doesn't count as first stitch here or throughout), working in back loops of the previous row: sc in first 2 sts, hdc in next 2 sts, dc in next 4 sts, hds in next 2 sts, sc in last 2 sts.
Row 13: ch 1 tightly, working in front loops of previous row: sc in first 2 sts, hdc in next 2 sts, dc in next 4 sts, hds in next 2 sts, sc in last 2 sts.
Row 14: ch 1 tightly (doesn't count as first stitch here or throughout), working in back loops of the previous row: sc in first 2 sts, hdc in next 2 sts, dc in next 4 sts, hds in next 2 sts, sc in last 2 sts. Break off leaving long tail to sew the piece.

Put eyes in place on different rows lined up on the dcs.

Stitch seam along the 12 stitch length making a tube that's tapered on both ends. Pass needle and thread through the sc crochets on one end, and gather them tightly to close the bottom. Keep needle on yarn. Stuff the pumpkin and pass the needle and thread through the stuffing, pull it just a little in and knot, then gather the stitches on top. Pull tight and tie off securely.

Stem:
With the green yarn, chain 2.
Round 1: 6 sc in first ch, sl st to first sc to join.
Round 2-4: ch 1 tightly, sc in each st around, sl st to first sc to join.
Break off leaving a tail. Weave tail through last stitches and pull tight, pass the needle and thread through the pumpkin to the bottom, go around a stitch, and pass back up through the top, knot securely in the bottom of the stem and weave end in.

So very quick and easy. I hope you enjoy this project!

Monday, October 24, 2011

Bat Knot to color

A brand new bat knot to color or embroider. Click on the image for a bigger version to color. I'll also be putting this on a box later.

A pair of mandalas to color


These were made using some of the seamless patterns I've been working on lately and a kaleidoscope effect created the radial symmetry. The end result is very pretty 12 sided designs to color. I hope you enjoy them! Click on the images for a large version.


Sunday, October 23, 2011

Another Pattern Coloring Page


For other pattern lovers. I hope you enjoy this. I find coloring in geometric patterns very meditative and relaxing. The pages are 8x10 png and you can use them for all sorts of crafty purposes. You can color them in to use as scrapbook paper, or use them as wall paper in a dollhouse. I think what I'll do is make a couple patches using iron fabric that can be colored in with permanent markers. Click on the images for larger versions.

Friday, October 21, 2011

Witch box and coloring page

Every year, I draw a new witch. This year is a different style than usual. I decided on a chibi witch with curls, based on the Turnip Girl, who has great big dimples and pretty brown curls. She decided it should be a box as well as a coloring page. Click on the images for the larger versions. The box is my 3x3x1 inch template. I'll post a photo of the box later. The orientation on the coloring page is set to be printed on portrait settings which is why it's sideways. If you click on "witch" in my labels, you'll find several witch themed printables for Halloween.


Thursday, October 20, 2011

Book Review - Vintage Craft Workshop

Vintage Craft Workshop by Cathy Callahan takes projects from the past and updates them to today's materials and style.

I've been collecting vintage craft books for years, and this book takes a lot of it's inspiration from my favorite time period, mid 1960s to the late 1970s. A heyday of crafting that matches today's recycling and DIY ethics perfectly. With themes that are whimsical and earthy both, based frequently in things found in nature interpreted in bright happy colors.

The whole book is filled with photos of vintage crafts as well as their modern versions and tidbits of information about groundbreaking artists and craft designers.

The crafts are wonderful. The author collected some of the best designers around for the projects.

Each chapter has a few projects with well written instructions and there is a pattern section in the back of the book.

Chapters and my favorite projects in them-
Burlap, which features that adorable mushroom pin cushion that's on the cover. It also has a cute fish purse inspired by a vintage photo that is one of my favorite projects in the book.

Raffia and Yarn has flower loom projects, wonderful crochet projects and my favorite project, designed by Diane Gilleland of CraftyPod, plastic canvas placemats that really make you rethink both canvas and raffia.

Crewelwork, Craft Kits and Appliques has a snail applique and embroidered pillow that's just wonderful as well as an apron with great big tulip pockets.

Craft Trends of the '60s and '70s is all about those crafts that you most associate with the era. Bottle cutting, macrame, string art, that sort of thing. The macrame plant holders are made more modern with nautical rope and knot tying techniques. They  are very clean looking and would fit into a masculine decorating scheme very well. I also love the glass bottle wind chimes.

Paper has a tissue paper painted mosaic pizza tray. If you can find a steel pizza tray, this would be perfect with marble magnets as a bulletin board.

Paper mâché has darling butterfly scatter pins made from one of my favorite craft materials, lightweight cardboard packaging. These would be wonderful as a gift pinned to a card and a great project to do with children for a grandparent. 


If you love vintage crafts as much as I do, you'll really enjoy this book.
Edited to add- The Turnip Girl also loved this book. In fact, the review would have been posted last week if she hadn't wandered off with it!


You can get this book directly from the publisher, Chronicle Books
My reviews are always my personal and honest opinion. You can read more about my review policy here.

13 Very Friendly Ghosts Mandala Coloring Page

These 13 ghosts maybe saying boo, but they aren't really scary at all with those happy smiles. I hope you enjoy this coloring page. Click on the image for the large version.

Tuesday, October 18, 2011

A pair of patterns to color

Click on the images for larger versions of these tiled patterns to color.
When I was a kid, I used to draw intricate patterns using a ruler and graph paper just for the fun of coloring them. Using the computer makes it all so much easier to design patterns to color!
Using the above pattern as an example, and a limited palette of 4 colors, I colored in these two with the same colors but different patterns.


In other news- I have a new Kindle book available for beaders and knitters. It's a pair of alphabet charts for 2.99, one small, and one large enough to use for word or phrase scarves.
You can find out more about it here.

Monday, October 17, 2011

Book Review - Quick and Easy Mexican Cooking

Quick and Easy Mexican Cooking- More Than 80 Everyday Recipes by Cecilia Hae-Jin Lee is based around the idea of quick to prepare, easy meals that are based off of traditional Mexican cooking.
The first part of the book explains a bit of the history of cooking and the author's history with Mexican cooking, followed by lists of the seasonings and essential ingredients, a glossary of ingredients and an introduction to Mexican cheeses and easier to find substitution suggestions.

Most of the recipes, with only a few exceptions, are cooked on a stove top, not baked or roasted in an oven.
The recipes are all listed with a descriptive name in English, followed by the Español  name. There are gorgeous, mouthwatering full color photos of much of the food.

It's separated by recipe type. Sauces, salads, soups, entrees by main ingredient type (poultry and eggs, pork and beef, fish and shellfish), desserts and snacks and drinks. Since the author was a vegetarian at one point, she offers tips on some of the recipes like the refried beans for adapting the recipe for vegetarians, and some of the recipes like the soup would be easy to adapt as well. It's not a vegetarian cookbook, but if you're planning a dinner with guest who don't eat meat, you can find flavorful recipes in this book to serve them.

The recipes are wonderful, easy to prepare using short cuts like canned beans and grocery store rotisserie chickens. Most of the prep time is in cutting up ingredients. All the recipes are things that can be made in about an hour, a few of them go a little over that in cooking time, but the prep time is a lot shorter.

What I like best about this cookbook, other than the easy to make recipes, is also how easy they are to follow. If you're an experienced cook, for some of the recipes all you'd need is the ingredient list. If you're more like my son who needs a recipe, this is one you could follow easily.

I've already used a few recipes in this book, and it's one I could see making almost every single recipe in it at least once. The chile spiced peanuts will be a favorite with my son and husband. My daughter and I will have lots of fun making and eating churros, and if you've never had fresh, homemade churros, I can't recommend them enough. Yum!

I'm a big fan of quick to cook recipes and my whole family loves Mexican food, this cookbook fits the bill.

You can get this book directly from the publisher- Chronicle Books You can get more information about my review policy here.

Sunday, October 16, 2011

Eyeball hair sticks!


These are quick and easy to make, and I think they make a delightfully creepy Halloween season accessory.
You will need:

  • Ping pong style eyeball favors- I got mine from a local party and costume supply store, a dozen for under 2.00
  • decent quality disposable chopsticks- either scavenged from a meal, or in my case, I found a big bag of them at a thrift store, 61.5 pairs for 5.50! (one was packaged all by itself)
  • Modelling clay
  • drill and a larger drill bit- I used my Fiskar's Craft Drill which is hand powered
  • E-6000 or similar glue
Not shown:
  • saw
  • 400 grit sandpaper
  • Craft knife
Make a rolled snake with the modelling clay then make a ring, set the eyeball firmly on the ring. This creates a good base to hold the round shape for drilling.
Drill hole in the eyeball. You only want it going through one side of the eyeball, and I really like my craft drill for drilling small plastic things because it's quiet, doesn't go fast enough to melt the plastic, and it's harder to accidentally go too far through it.

Saw off the connecting top of the chop sticks, and sharpen the tip a bit with the craft knife. Disposable chopsticks are reasonably smooth to begin with. Smooth it further with the 400 grit sandpaper so they won't snag hair.

Using the craft knife, enlarge the hole as necessary in the eyeball so the top of the chop stick will fit into it, shaving off bits of plastic. A little big is fine.

Put a dollop of glue on the top of the chop stick, and push it in the eye all the way until it hits the top of the eye. Repeat with the other chop stick. Set aside and let the glue cure.

If you want, you could add a dripping blood effect along the chop stick using red nail polish. 

Model is the Turnip Girl, but I made a pair for each of us yesterday. My husband finds them pretty creepy!


Saturday, October 15, 2011

Halloween stripe box and sign


I'll be posting a book review later! Hope you enjoy this box and printable sign for now. Also a blank page to decorate however you please. Click the images for bigger versions. The image above is a small web-sized version of the Eat, Drink and Be Scary sign.


Walking Dead fan? Check out my reviews of Zombie Cupcakes and Zombie Felties. Because zombies are cool.

Friday, October 14, 2011

Spiders coloring page with some information about spiders


One of the things I love about doing this page is how much I learn in the process of doing it. The books I'll read, the stuff I'll learn in trying out new projects, and the things I learn while researching something I want to draw. Today it was spiders. What started as a spider web for Halloween led me to research spiders and webs, to learn more about orb weavers, which are the spiders which weave what we think of as a typical web. When you see a Black Widow drawn on this style web, it's inaccurate. Black Widows do weave webs, but they aren't the spiral webs. They are more unstructured. 
Orb weavers aren't venomous. They have very bad eyesight despite having 8 eyes, and they come in so many varieties and colors! You can find photos here. Some have spikes, some are very hairy. So after I finished my web, I drew a basic body for an orb spinner that can be decorated as you please with colors, spots and spikes. Click the images for larger versions.


They start their webs with by catching a breeze and silk sailing from one side to another on a roughly horizontal plane. Then then anchor that thread. The first one is shown in blue, the anchor in red. Then they do the rest of the radials, reinforcing them and making them all stronger with non-sticky thread. After the radials are laid in, they start the web. So now you know the basics to draw or embroider your own webs.

Thursday, October 13, 2011

Book Coloring page

I love books. Really really love books. So I drew this coloring page. I hope you enjoy it. Click on the image for the bigger version. Can also be used for embroidery and other craft purposes!

Product Review-The Button Factory

I was thinking of doing a gift guide of some of my favorite things that I've gotten and used in the last year. This will absolutely be on that list,The Button Factory: Everything You Need to Instantly Create 25 Fabric-Covered Pins!


The kit comes with the parts to make 25 pins, backs and tops. You cut out a circle of fabric and put it face down and centered into a soft rubbery feeling mold, then put in the button top, dome side down and fold the fabric into it, then the pin back and use a plastic piece to push the pin back into the pin top, trapping the fabric  edges neatly between the two and you have a fabric covered pin! You can embroider the fabric for a nice hand made detail, or stencil or stamp the fabric. 

I embroidered over prints in the purple and rose fabric above. Just tracing the elements in the fabric, then cutting out the circle and setting it in the pins. If you're a fabric addict, these can be made with very small scraps. A 2 inch square is all you'll need. 

Because these go together so easily, they are a wonderful project for parties. If you're so inclined, you and your friends, or your daughter and her friends can embroider small designs and set them in pins. If counted cross stitch is what you like best, these won't work with standard 14 count fabric, it's a little too thick, but I think they will work fine with even count linen. 

Also included in the kit are 2 strips of fabric with 2 small scale designs on each strip and a booklet with the template for cutting the fabric circles and ideas for making and packaging pins.
 Here's a photo with a penny for scale to see the button size.
You can get The Button Factory: Everything You Need to Instantly Create 25 Fabric-Covered Pins! directly from the publisher, Chronicle Books or by clicking the Amazon.com affiliate link below.


Amazon.com affiliate links don't affect your cost, and provide extra income to me personally, which helps support my book addiction.

You can get more information about my review policy here.


The Doctor Who fabric is Studio Fibonacci's Doctors, Monsters and Friends available on Spoonflower. The purple flower and the forget-me-not are from my own Spoonflower designs.

Wednesday, October 12, 2011

Lightbox disabled!

Sorry about that everyone. I just noticed that Lightbox was put back in as an opt out. If you have a blog on Blogger and just hate Lightbox viewer, you can disable it in the dashboard at settings/formatting. Look for "Open images in Lightbox" and select No to disable the viewer.

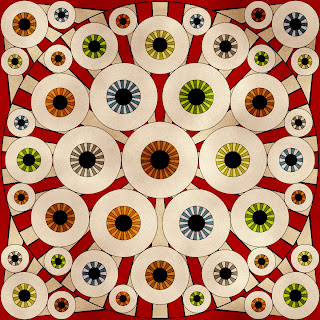
Eyeball coloring page

Eyeball mandala

I'll also be posting a box later with this eyeball mandala design. It's a lot of fun, reminds me of a "bull's eye" because of the dart board like section and the eyes. I hope you enjoy the coloring page! For more coloring pages, check out the link on the sidebar. Click on the image for the larger version.
Eyeball Mandala to color #adultcoloringpages


This mandala is in my self-published book -