Printing Tips

Check out my printing tips if you're having problems printing to the right size
If you'd like to support this site and all the free things I post- please check out my Don't Eat the Paste Mandala collection coloring book for 9.99 at Amazon.

Wednesday, March 31, 2010

New computer- getting caught up

Sorry I haven't answered comments over the last week. My computer decided suddenly it didn't much like having USB ports and started spitting out anything I put in them. After hours and hours of working on the problem, I finally decided it wasn't worth the time and frustration for a computer I was planning to replace anyway. So Mike and I discussed the budget, figured out what we could spend and got me a shiny new Windows 7 computer.
I should be back to my regular posting schedule starting tomorrow.
I did post a pattern for a cute ring yesterday on Beadwork at BellaOnline-
One of my daughter's favorite musicians is a lady who does a lot of video game covers and writes songs for snails. She plays several instruments and mixes her music herself. She also has a whole bunch of completely free songs available. Auriplane's Music


Friday, March 26, 2010

Easter Lily Printables

The image above can be used as a note card printed at 100 dpi. Click on the image to see the full sized version.
Also to print at 100 dpi.
In the Art Nouveau contest on Spoonflower, I came in 2nd, and a fairly close second, 29 votes behind the winner, Lucie Duclos who had a lovely floral design. Thank you to everyone who voted for me.
The current contest has a lot of great entries. The theme is daffodils, and you can vote using your Spoonflower account here. I'm pretty sure I won't come in on the top 10 of this one, much less win. My design doesn't really show it's detail in the fat quarter thumbnails. It was my inspiration for this Easter lily though. Here's a better view of my daffodil entry.


Last night was lovely. We got to go see Wizard of Oz as a family in the theater. It was the first time I've ever seen it on a nice big movie screen. 
Right before that, I was sent some paper plates to review, it turned out they were dual purpose. Well, triple purpose if you count someone's suggestion I use them to keep glitter under control. 

Wednesday, March 24, 2010

Butterfly Outlines


In 3 sizes, smaller, small and big. The two small ones are for making cards, embroidery, appliqué,  that sort of thing. The big ones are meant to be printed one half on regular sheet of paper, then you cut it out and use it for a template on 12x12 scrapbook paper to make butterfly decorations for a wall. You can either trace one side and then flip it over to trace the other side (no fold lines) or fold the paper in half and trace the outline on one half. The center body is the where the fold should be or where it should line up if you mirror it.
My example is origami paper and glitter on black cardstock. I just rushed it so the gluing isn't super neat, but hopefully you get lots of ideas to do much better things with it. I used Martha Stewart glitter which I love for the shades in comes in.
Click on the images for the full sized versions.
Not all butterflies. There is also a luna moth because I have a friend who much prefers moths!


Tuesday, March 23, 2010

Starfleet Badge craft pattern

My daughter is a geek.
Well, everyone in my family is to one extent or another. I consider myself a craft geek, full of trivia about glues, drills, techniques and history. My husband loves physics, my son loves games.
The Turnip loves science fiction.
She's 14 and her big bag of holding that she carries with her everywhere has in it usually a light saber, a communicator, a phaser and 2 sonic screwdrivers.
She can tell you how different effects in movies were made because she's the one they did the director and actor commentaries for. She watches all those extras.
I made her a Star Trek:TNG communicator badge out of craft felt.
I cut out 2 each of the shapes, the smaller ones in my diagram, then stitched them together using a blanket stitch and 3 strands of embroidery floss. Stitch a pin on the back and it was good to go.
Then I put it on and wore it until she noticed. She told me I looked like Troi (I'm wearing a square necked sort of low cut teeshirt today). She likes it a lot.
Here's the pattern I used for it, plus I did a slightly larger one that would work for appliques on fleece scarfs and such. Or you can use it as an embroidery pattern. Click on the image to download the full sized version.


ETA: Check out Abigail's great How to Sew Felt Microbe Stuffies project for more felty fun!

Monday, March 22, 2010

How to make an Alice band


It seems to be my week for hair, after posting the button bobby pin tutorial, I decided to make Alice in Wonderland style headbands for my daughter and I. They are super simple to make with basic handsewing skills and make good tv projects. They can be modified. She likes a bigger bow than I do for example.

You will need 1/2 inch ribbon, Fray Check or clear nail polish, 3/8 inch elastic and needle and thread and straight pins to make this project.
Cut 3 lengths of ribbon, 14, 8 and 1.5 inches. Apply Fray check or nail polish to the cut edges of all 3 pieces. Let dry.


For the bow, sew the edges together, and then flatten it so the seam is in the middle of the back. Pin that. Find the middle of the 14 inch piece and pin that as well.


 Place the center of the 8 inch bow part over the center of the 14 inch ribbon and repin through all 3 layers of ribbon. Wrap the 1.5 inch piece around both layers of ribbon and sew securely in place. I used back stitches and didn't go through the top layer of the wrapped ribbon. Whip stitch over the edge of the 1.5 inch piece to sew it down.
Now you just need to add the elastic. Fold over the edge of the 14 inch ribbon on end 1/4 inch, then pin the elastic to the middle of that and sew down securely. Check sizing here, you might need shorter elastic depending on the size of the head and how stretchy the elastic is. Fold the other end of the ribbon and sew on the elastic, checking to make sure you don't flip the elastic.


Confession time- I don't actually use a measuring tape when I make these. I use a paperback book. Up the front cover around to the bottom of the back cover lengthwise is the length of the band, one cover length for a bow size I like, cover plus depth of the book on both ends for an daughter sized bow then I wrap the center piece around the ribbon with an overlap to cut that. If I'm using a not very stretchy elastic it's the width of the paperback plus the thickness, if the elastic is stretchier, it's the width of the book. 
This makes a very charming easy to wear ribbon bow. 

Sunday, March 21, 2010

Button bobby pins and rings

The only decorative buttons I could find quickly in my huge box of beads and buttons were a package of small Halloween themed buttons so that's what I used.
You only need a few things to make very cute inexpensive button bobby pins and I'm sure you know how to make them. I'm posting the project mostly because of how I trimmed the shanks off the buttons.

If you look at all my supplies, you see inexpensive craft type buttons, decorative buttons, bobby pins and adjustable rings with glue on pads which I got very inexpensively from Rings and Things, the rings are 72 for 9.00, the bobby pins are 72 for 11.28. I used Household Goop which is a similar adhesive to E-6000. I use them interchangeably for most projects. The other thing you'll see is a pair of toe nail clippers.
I have a craft dedicated pair of toe nail clippers because they work really well for trimming small pieces of plastic like shanks on buttons and have a built in file for smoothing and texturing  surfaces. It's a trick I hit on while my son and I were discussing the best way to trim sprues from his plastic models and miniatures.
 
That's one untrimmed button and one that's trimmed so you can see them a little better. 
So after you get the decorative buttons trimmed, you just glue them to a plain button then glue that to the pad on the bobby pin or adjustable ring. Superglue will also work very well to connect plastics but my Superglue was super gunky. For younger kids, you'll want to do all the gluing because both glues have fumes.

My daughter and I are planning to do a table at least one of the local fairs this year so I've been looking for inexpensive things we can make to sell. We will package the bobby pins in sets of two on business cards.
If you're making bobby pins and they have a direction like my bats, make sure you make them opposites or you'll have two pretty button bobbies for the same side!
I also gave some of the ring blanks to my son, who will probably wind up making little toy gun rings using some of the weapons from his old toys and things like that. I told the kids if they like the adjustable rings well enough and they sell well, I'll also make them some sterling adjustable rings to decorate. 

Awareness Ribbons

Everyone in my family wears a red ribbon. Mike and the teens wear the stick on kinds and have them on all the jackets they wear with any regularity. It's the only accessory type thing Mike wears on a regular basis. No bracelets, necklaces, rings or pins. Just that awareness ribbon on the jackets he wears. Mike and I have friends with AIDS and we've both lost friends to it.
I wear lots of jackets or no jacket at all and decided to bead myself one that I could move from jacket to jacket or pin on my purse.
I'm not saying it's the only cause we support, but it's the one we wear ribbons for. I know other people wear other colors of ribbons. This is the pattern for the ribbon. Make it in the color you want, and if you want to make them for sale to raise money for your cause, by all means do. I did mine in brick stitch.

Since I knew I wanted to post this pattern, I also made up some boxes that you can package items you sell to raise money/awareness. There are so many ribbon colors to choose from, I chose red for AIDS awareness, yellow for the troops and pink for breast cancer. There is also a greyscale box that you can re-color in a graphics program. If you don't know how to do that and really want a specific color, just let me know.
Click on the images for the full sized versions.


Saturday, March 20, 2010

Currently... (heart bead pattern)


I posted a review of Jean Campbell's Steampunk Style Jewelry here. Just before Valentine's Day while I was working on bead patterns for the holiday, I graphed this heart with gears that I didn't wind up using. Hopefully you can!


For recent finished objects, I made a pair of earrings and a Legion flight ring.


I'm going to work on a non-trademarked ring in the same style as the Legion flight ring to post on BellaOnline. Something fun and springlike.

Recently posted reviews on Amazon:
Craft and Cookbooks-
Steampunk Style Jewelry by Jean Campbell
Chocolate Cakes- 50 Great Cakes for Every Occasion by Elinor Klivans
The Little House Cookbook- Frontier Foods from Laura Ingall Wilder's Classic Stories by Barbara M. Walker
My 1 inch circle punch, it's made by Uchida and this is the punch I used for the bottle cap necklace project.

Music-
Jamie Anderson's Three Bridges- a folk album Mike got me last year. It's one of my favorites
Boca 2008: Best of College a Cappella- a great collection of pop songs done a cappella
Jill Tracy's The Bittersweet Constrain another favorite album.

Friday, March 19, 2010

Affiliates and links

I decided to switch out the ads I had in my sidebar for affiliate links. The ones I chose were based on how much I liked the companies and products offered and how well I think they fit the content of my blog instead of what I was using for advertising on here.

The Container Store - Work Smart Office Sale
The Container Store, as crafters we all know the importance of containers, boxes, bottles, etc. I like the Container Store quite a bit for the wide range of containers they have and the fact you can narrow down your choices to just made in the USA containers. This is important to me because if it's made in the US I can be pretty sure that the people who made them were paid a fair wage for their work.


Sizzix die cutters are a great and reasonably inexpensive system for die cutting shapes out of card stock and decorative paper. Very handy for scrapbookers and other paper artists.


Okay.. I haven't tried any of their sprouting systems YET. I will absolutely. I love fresh sprouts with my family and recommend sprouting to friends with small children who don't like to eat vegetables because sometimes you can get children to eat veggies if they grow half their salad in a sprouting jar or similar sprouting system. Sprouting is very easy, and we use sprouts in place of lettuce on tacos and sandwiches. I plan to buy the 3 tray sprouter and see what I think of it. They have inexpensive sprouting jars and seed for beginner sprouting.
If you go down a bit further on the sidebar, I put in a favorites Amazon list. It only has a few things on it, one of my favorite singers, my favorite origami book, my favorite beading book. That sort of thing. Everything on it is something I own, use and recommend.

Links- I only have a few links up on my sidebar and all of them are my favorites, most of them you probably already know because they referred you here or because I've referenced them in a past post. One of the ones I don't think I've really mentioned is Amy's Rag Bag. The lady who runs this single person owner/operator business makes re-usable menstrual pads out of recycled materials. When my daughter made the switch to cloth we probably tried a half dozen different styles. This is hands down her favorite system. I wrote a tutorial on her system you can find here.
The coffee and soap I linked to in my side bar are both local Alaskan owned small businesses. Gladheart Acres makes the soap my family uses for every day stuff like hand washing and makes the only shampoo bars I really love. Blue Bonsai coffee makes my absolute favorite dark roasted coffees. I really recommend the Empress Blend and the Copper Tiger if you like dark roasted coffee.
I do have a links page that's linked from my main website, and I'm always willing to look at links and do reciprocal links from there.

Thursday, March 18, 2010

Art Nouveau box

The most recent fabric contest on Spoonflower is Art Nouveau style working with a pre-determined palette of colors. My entry is one I worked on with my daughter and she named it "DaisyShell" because the tiled effect reminds her of shells. You can see the other entries here and vote for your favorite if you have a Spoonflower account.
I liked the design we came up with enough to draw this box using the same elements The Turnip and I used in the fabric design. Click on the image for the full sized version. Isn't that palette great? I love palette based contests because they inspire me to work in colors I normally wouldn't.

Tuesday, March 16, 2010

Crocheted Scrubbie Pattern

While I was working on the ruffled flower pattern I thought that when it was all fluffy it would make a good scrubbie done in larger scale. So I made one in a similar style, just a bit more ruffly but still just one layer.
I think I used one ball of yarn total, but it may have been slightly more then that. It's done in worsted weight cotton with a size H hook. If you use a size G I'm sure you can do one with one ball of Sugar'nCream or Peaches & Creme yarn.
The soap in the picture is a bar of cold processed Vanilla Bean soap from SingingWolf Soaps. More on that after the pattern. This is a very simple pattern, and the scrubbie, made out of cotton isn't really scrubbie but it's nubbly and feels good to shower with.
With a size H hook, chain 40, slip stitch in first chain to make loop to hang it from.
Round 1: In that chain, ch 4 (counts as first dc and ch 1) *dc in same stitch, ch 1* repeat ** 6 more times for a total of 8 dc, sl st in 3rd chain on first ch 4. (makes a ring of dcs and ch 1 in the first stitch of the ch 40 loop)
Round 2-4: Sl st to first ch 1 sp, ch 4 (counts as first dc and ch 1), dc in space, ch 1, dc in space, ch 1, dc in space, ch 1, * in next space, dc, ch 1, dc, ch 1, dc, ch 1, dc, ch 1* repeat ** in each space around. Slip stitch to join round in 3rd ch of first ch 4 of the round.
After you've done 2 more rows the same way, you've got a lot of increases and it gets very ruffly and ball like. When you join the final round, break off and weave all ends in. 
It's pretty quick to make. If you use acrylic yarn or anti-bacterial yarn instead of cotton, I think it would work just fine in the kitchen as a dish scrubber or tawashi.

Becka, the creative mind behind SingingWolf soaps sent me a box of her soaps knowing that I'm a real soap junkie. I love artisan soaps that are mildly superfatted and made with all sorts of good oils for my skin. Her soaps are lovely to use and my children and I have been using them since we got them. I've noticed I don't have to use lotion as often while using her soaps, and they work well on my hair with a vinegar rinse afterwards. I can't recommend them enough. My husband uses Dr. Bronner's Peppermint and doesn't think clean is clean without a tingly feeling and she's working on formulating a soap for him and his love of his peppermint.  Actually, my daughter "borrowed" my bar of English Rose and I wound up trading a bar of Dragon's Blood with her to get it back. I love love love rose scented soap. 
You can find an almost complete list of free patterns for crochet that I've posted in the past here or by checking out my Ravelry page on the right.

Friday, March 12, 2010

Pi Day- Pie labels or gift tags

Pi Day is coming up, and today I drew some 2 inch circle tag pies that can be used to label jars of homemade filling or as small gift cards with pies you give as gifts. The example above is 5x7 inches at 100 ppi if you want to use it for a card or something. The tags themselves are 300 ppi in PDF format. You can download HERE.
The actual tags themselves have a circle of pie crust on the fruit pies so they can be written on and look like this.


Have a wonderful Pi day! We usually have pizza and pumpkin pie to celebrate. 

Thursday, March 11, 2010

Shamrock printable box and coloring page

I hope you like it. It uses my 3x3x1 inch box template. Print at 100 dpi on cardstock, score and pre-fold for best results. Click on images for full sized versions.
I actually did the coloring page first, and decided I like the design so much I should put it on a box. Here's the coloring page. You can use it for embroidery, woodburning, beading and other crafty purposes, or print it out to color. 

Buttons and bottle caps

Sorry it took a couple days. The buttons I used on the easy ruffle flower came to me very bright brass. I originally got them to use for crochet projects for my son who really really loves crocheted things and locally made art. Having a 19 yo son who likes it when I make things for him can be a little challenging at times.
I darkened the brass by holding them in pliers over a candle. If you move it around, you get a warmer, richer color. If you actually hold the buttons in the flame long enough to blacken, then wipe them off and hit it with a sealant you get that lovely patina that's on the button in the center of my flower.
There is a lot of glare in this picture, but the first button is unheated. The other 3 are heated to various degrees. The last one I sanded the hammer and sickle just a bit down to the base metal under the brass after darkening it which brought out the design a lot more clearly.
Now my daughter wants me to do it to enough of the bigger buttons to replace all the buttons on her overcoat which means I'll need to order more buttons! The buttons are from American Science and Surplus.
Bottle caps!
I posted a bottle cap necklace project at Beadwork at BellaOnline. No resin. I used Ranger's Glossy Accents which worked out very well.

The bottle cap on the Captain Jack necklace is from a bottle of Jack Black Blood Red Cola, which my daughter loves. Usually we make our own sodas from scratch, but occasionally we will buy non-corn syrup sodas. The Black Jack is a weird one, all the ones I've found online are corn syrup sweetened, but the one she drinks is cane sugar. They come in different bottles though, the long neck style bottles seem to have the corn syrup, the more old fashioned bottles that the Turnip's soda come in are cane sugar sweetened. All that to say (in a very long winded way) that the bottle cap has a skull and cross bones on it. Sometimes the cap just lends itself to what's going in it. When I showed it to my husband this morning, he was very sleepy. When he got home from work and took a look at it again he said "OH! Captain Jack SPARROW! I couldn't figure out why it looked nothing like John Barrowman!"
We have a couple local breweries, and one of them uses the Made In Alaska label on their bottle caps. I think I need to make some Alaskan themed necklaces.

Sunday, March 7, 2010

Ruffle Flower Crochet Pattern

 
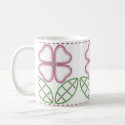
Ruffled Crochet Flower Pattern
This is such a very easy pattern, worked out of thread it makes a nice very fluffy accent for an accessory. I think worked out of worsted weight yarn it would be a great tawashi. Adjust hook size to match yarn type. 
For this thread flower, I used size 10 thread in 2 shades and a size 7 hook.
With main color, ch 8 sl st to join in a ring
Rnd 1: ch 1 (does not count as first sc), 8 sc in ring, sl st to join
Rnd 2: ch 4 (counts as first dc and ch), dc, ch 1, dc, ch 1 in same st, *in the next st, dc, ch 1, dc, ch 1, dc, ch1* repeat ** around. Sl st to join in 3rd ch on starting ch 4. (3 dc in each st)
Rnd 3: sl st to ch 1 sp, ch 4 (counts as first dc and ch), dc in same space, ch 1, dc in same st, ch 1, *dc in next space, ch 1, dc in same space, ch 1, dc in same space, ch 1* repeat ** around, sl st to join in 3rd ch of initial ch 4. (3 dc in each ch 1 sp)
Rnd 4: Repeat round 3 
Rnd 5: Change color if you wanted an accent color in a ch 1 or sl st to ch 1 sp. Ch 1 (does not count as first sc) sc in sp, ch 3, sc in next sp, ch 3, repeat around joining round with sl st. Break off and weave in ends.

For mine, I made a head band using a simple pattern.
Ch 8
Row 1: sc in 2nd ch from hook, ch 3, skip 2 stitches, sc in next st, ch 3, sc in first ch
Row 2: ch 5, sc in ch 3 loop, ch 3, sc in next ch 3 loop, ch 2, dc in last sc
Row 3: ch 1 to turn, sc in dc, ch 3, sc in ch 3 loop, ch 3, sc in 3rd ch on ch 5 from previous row
Row 4: ch 5, sc in ch 3 loop, ch 3, sc in next ch 3 loop, ch 2, dc in last sc

Repeat rows 3 and 4 until it's as long as you want for what your making.
Last row: Ch 1 to turn, sc in dc, ch 2, sc in ch 3 loop, ch 3, sc in 3rd ch on ch 5 from previous row
Break off and weave in ends.
Switch to contrast color, and sc across bottom. If you need a loop for a clasp, button, or elastic, this would be the time to add it. For the elastic on my head band, I used 2 sc, ch 3, 2 sc to make the 7 stitches. 2 more sc in corner. Work the sides by ch 3, skip dc,sc in sc, repeat until you reach the end of the side, 3 sc in corner, sc across short edge, 2 more sc in corner, repeat the ch 3, sc up the other side, 2 sc in last corner, sl st to join with first sc.
For my headband I made it 15 inches long  and used a narrow elastic stitched into the holes I left in the ends to join it.
Then I sewed the flower to the band attaching it with 5/8th inch button. The button I used is a USSR brass button I got from American Science and Surplus.
My next post, I'll explain how I got the gorgeous patina on the bright brass button.

Reviews I wrote in the last week

These will open in a new window. If they are helpful please vote yes on the review page!
Fiction-
Shalador's Lady by Anne Bishop. It's the last installment in the Black Jewels series.
Waking Up in the Land of Glitter by Kathy Cano-Murillo The Crafty Chica! Her first novel, it's very sweet.
DIY/Craft books
Delight in the Details by Lisa M. Pace, a paper crafting book that's just gorgeous
Martha Stewart's new sewing book, a huge book full of sewing techniques and simple projects
Non-book items
Rival Hot Pot Express, an inexpensive little electric pot to boil water in
Tazo's Passion Herbal Tea
Tazo's Wild Sweet Orange Herbal Tea
Market Spice Tea
Murray's Sugar Free Shortbread Cookies
my new sneaks! I found my pair on superduper deep clearance for 12 dollars.

Well.. back to working on my current crochet project!

Friday, March 5, 2010

Book Review- Delight in the Details

Lisa M. Pace wrote this lovely book Delight in the Details for card makers, scrapbookers and paper crafters.
Her style is towards the very ornate and elegant. The projects and ideas in this book are just gorgeous and impressive while being very simple to make, do and adapt.
It's a lovely book printed in full color throughout, and it's very inspiring.
The first chapter is about making a nice place to create in. Her studio is gorgeous and her ideas for organizing supplies is inspiring and lovely. From crystal dishes and spoons filled with glitter to old cupcake tins with natural weathering to keep beads in, there are some wonderful ideas for making your work space beautiful and functional.
The first few projects deal with sparkle and shine, detailing several ways to add sparkle to projects. Detailing how add glitter edging, completely covering things in glitter, adding subtle touches to patterned paper, using mica, wire and other embellishments. My favorite projects in that chapter are the shiny alphas which put me in mind of holiday decorator accents and the wire spray of flowers made with beads and wire.
The next chapter is paint and ink, with instructions for using chalks, waxes, and alcohol based permanent inks. This chapter is full of ideas that I'd never thought of. I've used waxes to refinish vintage frames for hanging in my house but never thought of them for smaller frames for paper crafts. The crackle paint distressed letters are lovely. My favorite in this chapter though hands down is the texture paste design which creates an embossed image that's accented with glitter and crystals.
Pattern and Texture come next, also full of wonderful ideas. My favorite in that chapter are the crepe paper rosettes and the miniature banner which I really plan on using very soon. The ruffle edging project would be amazing in a bridal card or a baby shower project.
The last chapter, Vintage Finds is full of ideas for little trinkets, old buttons and things of that nature. The button bouquet would be a lovely dimensional accent to a scrapbook cover or a box using buttons from favorite clothes. The vintage paper leaves are a nice idea for old books.
The whole book is amazing, cover to cover, with ample examples of what can be done with the basic techniques. The Amazon link is an affiliate link and helps pay some of the costs of maintaining this site. U.S.A. U.K.

Thursday, March 4, 2010

Native Arts Market and a printable box


Every year about this time, we have Fur Rendezvous. It's a winter carnival of sorts with a lot of uniquely Alaskan events. Including a carnival with rides which is just insanity in what's frequently -10 degree weather about the time it takes place.
Part of the fun every year is a big Native Arts Market. Artists from all over the state congregate in the Dimond Center selling their wares. Beadwork, drums, ulus, carvings. The knife in the picture is an ulu made by one of the artists of From Ancient Times. For an idea of scale if you haven't made this box design before, the top of the box is 4 inches across.
The design on this box is based off beadwork done on an outfit my Aunt Cecilia made for me as a baby. I'm half Athabaskan and the beadwork is done in traditional Athabaskan style, which means it's couched beadwork on traditionally tanned leather. The photo isn't me. That's my daughter modeling my old baby outfit. The blanket behind her is one I made with thrifted yarn that's still one of her favorites.


I hope you like this design as much as I enjoyed interpreting my Aunt Cecilia's beadwork digitally for you all. As usual, click on the images for the larger versions.
I posted a cup on Zazzle with this design if you're interested.

Monday, March 1, 2010

Duplicate stitch patterns- tattoos


Who didn't absolutely love the sock monkey tattoo on the Kia commercial? Duplicate stitch sock monkey tattoo was the win of the Superbowl commercials.
I've been meaning to graph out some duplicate stitch charts for adding duplicate stitch to your favorite thrift store sweater, or maybe even a sweater you buy from a thrift store just to put a duplicate stitch tattoo on it. I finally did a couple, but I'll absolutely be making more charts.
The sock monkey tattoo was duplicate stitch with a backstitch outline, so I graphed something like that.
There are blank banner versions and an alphabet, so you should be able to chart a very short word or maybe just initials in one of these. Click on the images for the full sized version. For how to do duplicate stitch, I love this tutorial by the purl bee.