Printing Tips

Check out my printing tips if you're having problems printing to the right size
If you'd like to support this site and all the free things I post- please check out my Don't Eat the Paste Mandala collection coloring book for 9.99 at Amazon.
Showing posts with label doctor who. Show all posts

Monday, June 16, 2014

Catching Up with June


Daphne DoAll LaChores and The Amazing Turnip Girl "900 years of time and space and I've never met someone who wasn't important."

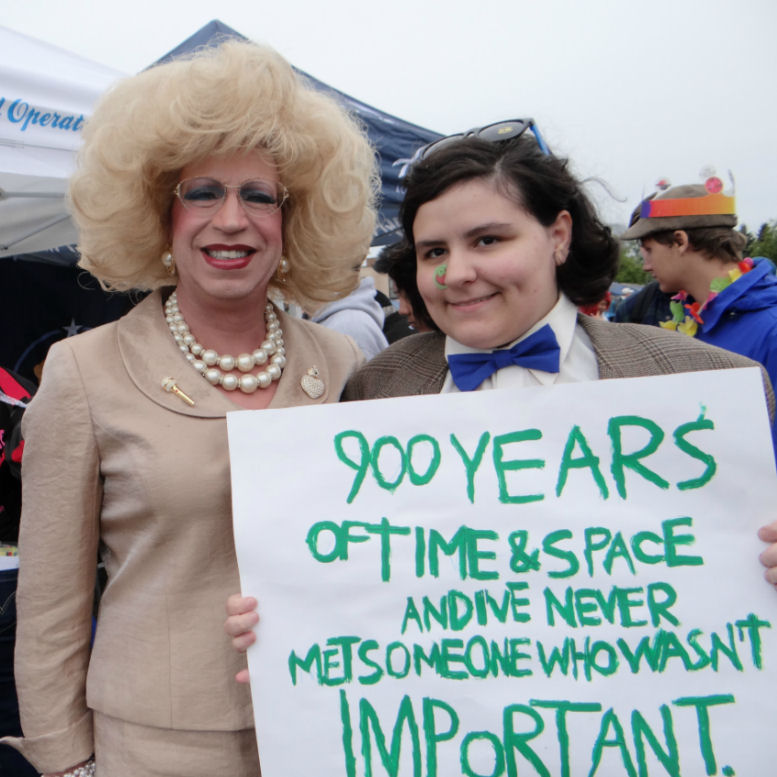
June gets to be really busy really fast. With festivals and fairs, and with things growing in the garden and other stuff that needs to be done. The photo above is from Pride Fest 2014. The woman to The Amazing Turnip Girl's left is Daphne DoAll LaChores- a short film about her was nominated for an Emmy in the Cultural category, and you can see that here. If you've never been to your local Pride Fest- it can be a whole lot of fun. It's been a family event for us since TG was very little, and it's something she looks forward to every year. The last couple of years, instead of having a parade, there is an Equality March, and TG dressed up like the Doctor and painted that sign to carry.

Captain Hook- OUAT, closet cosplay by The Amazing Turnip Girl

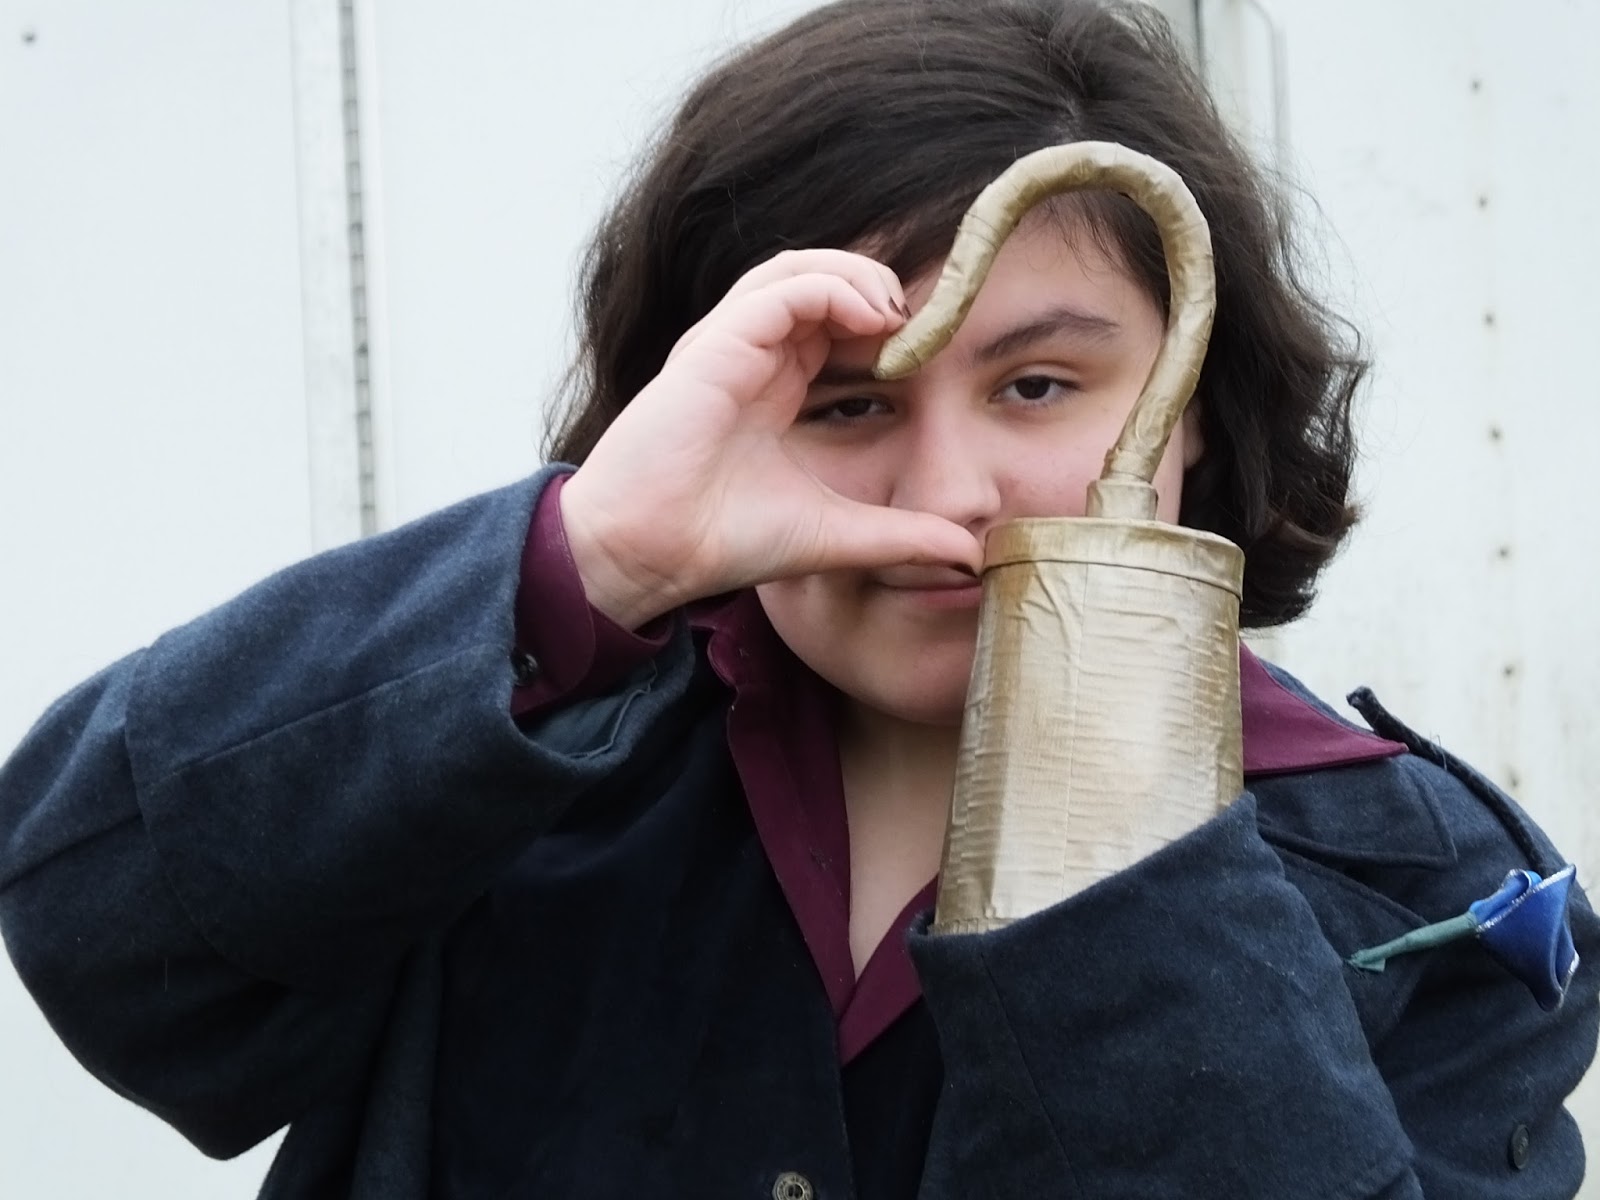
More Amazing Turnip Girl! This time at our local ren faire. The first day, even though she didn't know it, was a PIRATE theme. She had decided on her costume without knowledge of that, and closet cosplayed Captain Hook from Once Upon a Time. For people as seriously non-cosplay as I am- closet cosplay is when you put together a costume using what you have on hand, and what's in your closet rather than going all out for an exact replica. The hook is made from a plastic cup, a "gigantic twist tie" (I didn't see it, that's what she told me), layers and layers of the ends of various rolls of Duck tape, and spray painted. 

Lily swatch doll

The newest of my swatch dolls. Recently Spoonflower let people who ordered one of their knit fabrics try a swatch of their performance pique. I really love this stuff for swatch dolls, it prints gorgeously, and it's very soft feeling. A little trickier to sew, but worth the extra care. You can get this swatch here.

Today was dandelions- but what we did was gather seeds.
Just wrapped our fingers around the puff balls, pull, dump the little seeds and fluff into a gallon zip bag. Then after we had denuded a lot of dandelions of fluff and gotten some very odd looks from the neighbors- I brought the bag inside, closed it tight, and just started playing with it. Rolling it in my fingers, rubbing it, and shaking it. After a bit I wound up with about a 1/4 cup of seed defluffed. So now we are going to try sprouting the seeds. Also, somehow I wound up covered in dandelion fluff.

OH!!! and the BIG news!!!


Look look!!! Pre-orders are available now on Amazon, and the books are coming out in November and December.

Affiliate links help pay for this site, and seeing these ordered would also be personal exciting. Really.

So how is your month going?

Thursday, January 16, 2014

A Straight Line printable quote


A straight line may be the shortest distance between two points, but it is by no means the most interesting.
-The Doctor

I asked The Amazing Turnip Girl before putting in the quote "Should I put that it was the 3rd Doctor who said it, the author or just attribute The Doctor?" She replied "It's all the same Doctor." So there it is. But there is more information after the clickable and printable image! The version above is on my FB page if you want to share it.

The quote is from the first episode of the 11th season, written by Robert Holmes. That was also the very first Sarah Jane episode, and the first appearance of the Sontarans. So it was a very nifty episode in the history of Doctor Who, plus, that's just a really great quote. I hope you like my illustrated version.
If you're interested in seeing it, you can order the DVD from Amazon below. This is an affiliate link and using my affiliate links to buy things from Amazon helps support my site and my book addiction.
Thank you.

Friday, May 31, 2013

Superwholock First Rule cross stitch

First rule of Superwholock


I had another plan for today. But this idea tickled me. The above is a digital rendering of the cross stitch pattern below.

Superwholock is a name for that cross section of fandoms that love Supernatural, Doctor Who and Sherlock (BBC)-which would mean my whole family. We watch all 3 shows together, and get into long conversations about the shows and the characters. Yeah, we are a bunch of geeks. Happily so!

The pattern is 100 dpi, and I didn't make color suggestions because it's only 5 colors. Black, grey, blue, light blue and yellow. I think a metallic blending filament would be nice for the chrome on the Metallicar (fandom name for the Impala that Dean drives on Supernatural)

The first rule of Supernatural  is
Driver picks the music, shotgun shuts his cakehole. (my husband has the teeshirt!)

The first rule of Doctor Who is
The Doctor lies. (TG has the teeshirt!)

And finished off with the quote from Sherlock Holmes-
How often have I said to you that when you have eliminated the impossible, whatever remains, however improbable, must be the truth?

Click the image below for a larger version to print and use as a pattern. If you're a Superwholock fan, you didn't need the above to explain!
1 is black
2 is TARDIS blue (TARDIS)
3 is light blue (bee wings)
4 is yellow (bee stripes)
5 is grey (chrome on Metallicar)


Picking the season for Doctor Who was hard! Christopher Eccleston is my daughter's first Doctor. For lots of great geeky pins, crafty and humor, check out The Amazing Turnip Girl's board. It's my account, but she does all the pinning for that folder, and it's a geekfest. 10,000 pins and counting, she spends hours scouring the net and Pinterest for the best fandom nerd things out there.

Sunday, June 3, 2012

Super easy hand sewn fleece fingerless mitts tutorial

These are a great "sitting watching tv" project, they are inexpensive, easily personalized, and make nice gifts. The pair above was made from a scrap of fleece that I got in a bag of scraps from the thrift store.

You will need:

  • Fleece
  • Chenille or embroidery needle- size 20-22
  • Sharp scissors
  • Ruler
  • 1 skein Embroidery floss 
About fleece- It's a knit so it won't fray, which is why it's used for knotted blankets. It will have more stretch in one direction than the other, so check the stretch, you want the greatest amount of stretch to wrap around your hands, not in length of the mitts. The greatest amount of stretch is usually selvage to selvage (finished edges).  The mitts, as shown above, take 2 pieces of fleece 7x9 inches with the stretch along the 9 inch side. A 1/4 yard of fleece is 9 inches wide and about 60 inches long so you could make 3 pairs off a quarter yard of fabric. Since fleece goes on sale frequently, this makes it a very inexpensive project.

The reason I like the chenille or embroidery needles in that size for working with fleeces is that they are sharp enough to go through easily, and the eyes are the right size for 5-6 strands of embroidery floss. Because of how thick fleece is, using all the strands on a skein works well. 

Start by cutting 2 pieces of fleece that are 9 x 7 (8x7 for smaller hands) inches, making sure the greatest amount of stretch is on the 9 inch edges. Fold each piece in half, wrong sides together, and make 3/4 inch cut in the fold 1 inch from the top of the fabric. Make sure the cut is mirrored on the other piece so when they are laid together with the folds facing each other the slits and edges match up.

Unfold the pieces.

Test the thumb hole to see if you need to make the slit a little bigger. Cut only a little bit at a time.
The rest is very simple hand sewing in blanket or buttonhole stitch stitch. For the stitching, I make small knots and pull it through one layer then then stitch the two layers together to sandwich the knot and tail between the layers. For the single layer parts, I make small knots on the side, then stitch over the tail to keep it neat.

First, stitch up edges of the slit, because you want it to be a bit stretchy, leave some slack in your stitch. Take a couple stitches on each side of the slit to secure that edge and keep it from stretching too much.

Fold in half, and blanket stitch the 7 inch sides together. 

Now stitch around the top and the bottom, single layer, to make a finished edge tube. Make sure to leave some slack for stretching when you put them on.


The first pair I tried to make, I put the stitched edge on the inside with a thumb hole. My daughter liked the way they looked, but I didn't like the feel of the seam there. This pair is also a bit shorter. They can be shorter or longer, or have a strip of another fleece inset for decoration.


Today we went to our local renaissance fair. My daughter brought along the TARDIS she made out of duct tape so we could get lots of photos. Did you know that when you bring a TARDIS to something like a ren fair, lots of people will stop to talk to you about it? The basic shape was made from cereal box cardboard, then covered in duct tape. The windows are cut out of clear packaging plastic.


Tuesday, September 27, 2011

TG's Doctor Owl


Michaels had these wonderful vinyl owls to paint last time I went there. Unfortunately, they only had 2 at my local Michaels, so I bought one each for TG and William. This is the TG painted, a little 11th Doctor Owl. The background is my test print of a ditsy design for an upcoming Spoonflower contest.
EDIT: Ditsy Print Now Voting @Spoonflower
Just had to show it off. She'll post it to her Cut Out and Keep account later too.

Saturday, April 9, 2011

The Doctor Is IN printable art and coloring page

I know my family isn't the only one who is really looking forward to the new episodes of Doctor Who. If you've been considering a party, or if you are as Doctor crazy as my daughter, you might enjoy this printable art or the coloring version. Both are 300 dpi below. The version above is at 25%.
Instead of making them 8x10, I made them 8x10.5 so they will have a quarter inch border using US letter sized paper.
Click on the images for the full sized versions. For the one I printed for my daughter, I used a nice decorative paper vintage looking sheet from my stash. The font used is The League Of Moveable Type's Chunk.


Wednesday, February 16, 2011

Jeweled Printable Boxes

Inspired by Celtic jewelry design. 100 ppi, click on the images for the full sized boxes.
Hope you enjoy them!


It's been an interesting month so far for me. I won a couple small prizes in drawings. A gc for a local restaurant and I won one of the drawings at ilovetocreate. Unfortunately not craft supplies, glitter or glue. Fortunately, there was chocolate. Chocolate is always good. You can enter daily here.
Lots of happy mail and The Turnip Girl got the coolest hat ever from a friend of mine.

It's hard to see it, but that's a Police Box hat.You can see better pictures on Rosemary's Ravelry page. The photo was taken at a local restaurant the whole family loves. Glacier BrewHouse. She was defending her spent grain bread with olive oil from Michael in that photo. They bake it from grain leftover from the brewing process for the delicious beers they make. 
Michael got a raise, and it's just generally been a good month. But then William took a spill on the ice and they thought his elbow might broken. Turns out after hours in the ER yesterday it's badly sprained and bruised. So I'm still counting it as a good thing. Because he could have been hurt worse and wasn't. 

Sunday, January 30, 2011

How to make sugar cubes or shapes

My darling daughter prefers her coffee with brown sugar. She's also as I've said before, a bit of an Anglophile. Which means occasionally at least, she likes lumps of sugar instead of spoonfuls. Brown sugar cubes are awfully expensive.
So this weekend, we made a batch of sugar shapes for her.

Because the mold we used was fairly detailed, it's a bit hard to see what they are supposed to be. Here's a picture I messed with the contrast a bit and greyscaled. Hopefully it shows a little better. The contrast adjustment made it a bit grainy, but it is a bit clearer.
Because the only thing cooler than brown sugar cubes for my daughter is brown sugar daleks and TARDIS. 
You will need:
Brown sugar- we used an organic brown sugar that she really likes
water
an ice cube tray or small candy molds*
parchment paper lined cookie sheet
a place they can dry out safely

Wash your hands well. You could do this with silicone spatulas but it's a lot easier to do it by hand.
Put a cup of brown sugar into a bowl, and add a half teaspoon full of water. Mix it in well so that it's all just a bit moister than usual. Squeeze a handful and see if it sticks together. If it does, it's ready. If it's not, add in water just a sprinkle at a time until it does stick when you form it with your hands.
Pack your mold well, only 2 or 3 cavities at a time. Turn it out on the parchment paper. Continue until all the sugar is used. If you want to make more than that, do it the same way. If one breaks when you're popping it out of the mold, pick up the sugar the best you can and put it back into your bowl to use again.
After you get as many as you like made, put it some place safe and draft and humidity free to dry. The ones above we let dry for 5 hours. After they were dry, we put them in a tightly sealed container.
I couldn't find my paste coloring, but I think it would be fun to do a bunch of Go Go Dalek Rangers in the right colors!
The same technique works with other sugars, and the less detail there is in the mold, the better. The Cybermen in our ice cube tray had too much subtle detail to work well at all. Raw sugars or white sugars will need a little more water than brown sugar because brown sugar is so moist to begin with.
Hearts would be lovely for Valentine's Day, little roses would be sweet for a princess tea party.


*If you want cubes, I recommend using a mini ice cube tray. Otherwise, use your favorite small candy molds. The tray I used is a Doctor Who ice tray that we were given by a close friend who blames The Turnip for her Doctor Who and Torchwood addiction.

Thursday, December 30, 2010

Pixel Beading

I just posted an article on pixel beading using cube beads. I didn't really have room in the article for all the patterns that I made, so here is the full set if you'd like it.
Based off of these mood icons.
Click the image for the full sized, full set of patterns.

And as a bonus, this simple pattern for a Book of Spoilers necklace or pin. I'm beading this up for my daughter.


Sunday, October 31, 2010

Fezzes are cool - bead patterns and Halloween pics


I've mentioned before that my daughter is all about Doctor Who right? I mean, the rest of the family likes it of course. But her favorite color is TARDIS blue, she can name everyone who played the Doctor in order, including the people who were on Comic Relief. So her costume was decided ages ago.
She made the fez, and the bow tie, for the bow tie, she took apart a clip on we got at a thrift store and used the pieces for the pattern. The fez is made with broadcloth over buckram. The jacket and shirt are both from thrift stores, and she added the patches to the elbows. The sonic screwdriver is purchased from ThinkGeek.
I graphed out these two bracelet patterns. I'm going to make both for her for Christmas this year. I hope you enjoy them too. Odd count peyote. First picture is a preview, second picture is both bracelets vertically oriented for printing out the patterns. Click on the second image to download the full size pattern.


Monday, October 4, 2010

Recycled Ornaments

I recently had an opportunity to review Create Colorful Aluminum Jewelry for the Beadwork site at BellaOnline. It's a very inspiring book, and it inspired these ornaments.
It's made using a bottle cap, an empty soda can! I'm linking the tools I used to their pages on Amazon, it's an affiliate link, but mostly I'm linking them so if you want to know exactly what brand/type I used, you can see it. All of these punches should be available at your local Michaels.


You'll need:
An empty and rinsed out soda can
Old scissors you can cut a can with or tin snips
A bottle cap- also cleaned
An image- 1 inch square- 300 ppi looks best because you can get more detail in it. Print on cardstock or thick photo paper and seal with acrylic clear spray
2 inch punch- I used a 2 inch circle punch
Decorative punch- I used this star
Metal punch or a hammer and nail
1/16 inch hole punch or any hole punch really. That was just what I had at hand
Wire, string or decorative yarn
Decorative beads if you'd like
Eyelets or brads- I recommend brads, more on that later.
Dimensional glue- the clear kind that you can cover an image with
An old phone book - I use one for almost all my drilling and punching to protect the surface I'm working on.
Sandpaper or nail file

Cut the top and bottom off the can, then cut the can open. By the UPC is a good place to cut if you want to center designs for your ornaments. Flatten it by running it across the edge of a table working against the curve. It won't flatten the can completely, but it will be pretty close.
Punch out the 2 inch shape and the decorative shape. If you have any sharp or rough edges, smooth them with the sandpaper or nail file. My punches are punching out the shapes pretty cleanly and need very little finishing.
Punch a hole in the middle of the large shape, and in the middle of the bottle cap, and put them together with the open side of the bottle cap out. I used an eyelet on mine, but because of the thickness of the bottle cap and how it bowed slightly when I punched it, I plan to use brads next time. The dome part of the brad would be on the back of the can piece, and the little arms spread on the inside of the bottle cap.
Cut the image out using the 1 inch circle punch, a 1 inch circle punch will fit perfectly into a bottle cap. You can do fan ornaments like my daughter and I are making, or you can do pictures of your children. It would be a good grandparent gift!
Glue the image into the bottle cap, and cover with dimensional glue. You can add glitter or all sorts of little inclusions at this point. 
Let it cure according to instructions. 
After it's cured, punch a hole in the top of your decorative shape, and the top and bottom of your framing big shape. Use wire, thread or yarn to connect the pieces and make a hanger.
If you want to decorate the metal, you can use paint markers, or let your kids design them and color them after you cut out the pieces. 


My daughter wants a full set of the Doctors for our tree. This is the art for them, click on the image for the full sized 300 ppi version. Personal use only please!