Printing Tips

Check out my printing tips if you're having problems printing to the right size
If you'd like to support this site and all the free things I post- please check out my Don't Eat the Paste Mandala collection coloring book for 9.99 at Amazon.
Showing posts with label dolls. Show all posts

Wednesday, December 26, 2012

I hope your holidays were wonderful!


Yesterday, after a week of incredibly cold temperatures, it warmed up enough to snow. My daughter tried to catch snowflakes on her tongue.

I hope your holidays were wonderful!

Ours were very low-key. Just our little family and Dad.
TG asked for, and got more Doctor Who shirts for her mammoth collection (seriously, I think she has 20 or 30 Doctor Who shirts now!) as well as a Kindle of her own to read Sherlock Holmes and other things she loves.

Michael was hard, but I got him a hex impact driver which he's loving and gave it to him early. I also got him 2 Firefly shirts, and a shirt by a Juneau based artist/screenprinter who does great stuff in our fandoms. You can see her work on Etsy HERE. I also crocheted him a hat. This wound up being very challenging. He's been wanting me to make him a hat, but it had to be something very plain. No spike stitches, no fun textures, no ribbing, cables or any of the other techniques that are so much fun. Originally he wanted it in just one color. After I came to the conclusion that even a quick to finish hat was going to take me *forever* in just one stitch, in just one color (BORING!), we re-visited that.
So it's all in single crochet, with a stripe pattern that was fun to work out. This hat was made to fit his largish head, but I will post the pattern later. He asked if I was going to post the photo to crop it to just the hat. You get just the hat and his pretty brown eyes! It's in an alpaca/wool blend, so it should be very warm for cold Alaskan mornings.

William of course was the challenge. I did a lot of research and found out a watch of the quality that I wanted to get him was prohibitively expensive. I did find a mechanical skeleton pocket watch that was a lot more affordable and just the style he liked, very steampunk. It has a wooden bezel around it, and is encased in a glass globe instead of a hinged pocket watch case. He was thrilled. We also got him a soldering kit, Michael is going to teach him more about electronics, and he and I will do slide pendants together.

What did I get? Well, TG made me a new doll for my huge collection of original dolls from her. This one has a thread sketched face, not embroidery thread, but sewing thread instead, and is as usual, made from scraps and completely designed on the fly. She might make patterns for individual dolls, but never reuses a pattern and never uses other people's patterns.
It's Dean from Supernatural. Under the teeshirt is the anti-possession tattoo! This one is cookie cutter style and entirely too cute. I love the big green eyes!
Michael got me enameled cast iron cookware, William and Dad gave me embossing folders. TG knit for everyone else, Michael got a Deadpool Neko, Dad got a coffee cup cozy, and William got a necktie. William and Dad gave TG and Michael each video games.

We went out to eat at a local Chinese buffet restaurant. They served traditional dinner as well as there usual great layout of Chinese, Korean and Japanese food. It was pleasant, laid back and if it wasn't my mom's full out Christmas blitz, it does suit the 5 of us quite well.

Regular postings will start again soon!

Sunday, July 22, 2012

Some tips for hand sewing dolls

I'm not an expert on doll sewing, or on hand sewing. It's something that my daughter and I both enjoy quite a bit though and these are some tips that came up while I was showing my son how to make something recently.
Kokeshi Style Fabric Dolls
Swatch Dolls- my design on Spoonflower printed Kona cotton.
You can find the swatches for sale here.


I have sewing machines, enough to qualify as a collection and to make my husband steer me right past any we see at garage sales. But the reason I like hand sewing is that it's a quiet thing to do on evenings my family is watching television together. It's the same reason I knit with wood needles. My daughter just loves hand sewing. She can use a sewing machine, but prefers working in her room on hand sewn dolls and other things. Mostly dolls, she's been making dolls since she was about 3 or 4. They get more and more complex as time goes on.
Sherlock Holmes Doll
Sherlock Holmes- Designed by The Amazing Turnip Girl
I've been suggesting for years that The Amazing Turnip Girl start a blog for her dolls. A lot of them are fan based. She's done Doctors, comic book characters and video game characters. The doll above her most recent, Sherlock Holmes from the BBC series. I asked her if she ever draws patterns or if she just starts cutting. She says "Sometimes I make a pattern, but it's usually just a T shape." She's incredibly clever about the fabrics she uses, they come from thrift stores, old clothes and remnant bins.

My dolls are less interesting, as shown above. They are basically cookie cutter dolls printed on Spoonflower swatches. 
Stitching:
Generally, you'll use one of strand of thread and the smallest needle comfortable. You can used doubled threads but it makes a heavier seam and bigger holes in the fabric. My preference is a glazed cotton thread. It's smooth and easy to work with, try different threads and see what you like best. For hand sewing needles, my favorite are Clover Gold Eye sharps or quilting needles. 
Originally, I used back stitching for all my dolls, and TG used a running stitch. 
I've realized that while back stitch makes a sturdier seam, TG's dolls hold up just fine for her uses. Running stitch takes less time, but the problem is, it can be prone to gathering. So now I use a combination stitch. I start with a back stitch, and use a back stitch at every corner so my needle comes out at just the right place and the corners are reinforced. I also do a back stitch about every 5 stitches, which locks the thread so it doesn't gather.

It's very important for neat stitching and making sure everything lines up in small scale NOT to do a few stitches on the needle at a time. Put the needle in and pull the thread for each stitch. It makes neater stitches, and for small scale things, the little bit of extra time makes a neater finished product. For bigger things, there is more room for adjusting the slack. 

Clipping Curves and Corners:
Clipping curves and corners helps a lot when you're turning the doll inside out. For outside curves, it allows the seam allowance to spread a bit instead of gathering and puckering. For inside curves, it reduces bulk in the curve. For corners, it works the same way. You clip the seam carefully after sewing. For outside curves, you just need to make snips in the fabric. For inner curves and corners, you should actually cut out a wedge. Examples of good cuts are shown below in red. You'd continue clipping the seam all the way around.

Stuffing:
There are lots of kinds of stuffing. The most environmentally minded is using scrap fabric of course. If you're going to do this, cut the fabric up very fine to keep it from bulging or lumping up in one area.

My daughter likes regular, old fashioned polyester fill stuffings. You know the kind that look like a big cotton ball that you pull off bits of to stuff? She likes it because it stuffs more firmly, and it's neat and tidy to use it so she doesn't wind up with lots of stuffing bits on her bed where she sews. It's easy to wash and dry.

I prefer cluster stuffing. It's also made of polyester, but it acts sort of like down filling. The individual clusters shift around and have lots of room for air making very soft stuffed toys. It's easy to wash and dry, but like washing down filled coats and comforters, a tennis ball in the dryer helps distribute the fluff. TG doesn't like cluster fill because "It's messier."

Cotton batting has the advantage of being easily cold water washable and you can scent it easily with fragrance oils. It's a good choice for something like sachet type dolls that can be scented and put in a lingerie drawer or scented pin dolls.

Little plastic pellets are available for a bean bag type filling. A lot of people also use them in amigurumi to weight the bottom. I use polyester fill and high density plastic pellets for air guns in my amigurumi. 

Wool batting needs to be laundered a bit more carefully, but it's a really superior stuffing for heirloom toys. 

For the dolls above, since I don't plan to wash them, just wipe them occasionally with a wet cloth if necessary, I sewed tiny sachets filled with lavender and put it in with the stuffing. 

I use a long pairs of tweezers to fill nooks and crannies. A knitting needle will also help get stuffing into small areas.

You can buy the swatches for the dolls at the top from my swatch toy page on Spoonflower. Swatches are 5.00 each, but occasionally they go on sale, and once a year, Spoonflower has a free swatch day.

Monday, July 4, 2011

Crochet Little Kitty Pattern


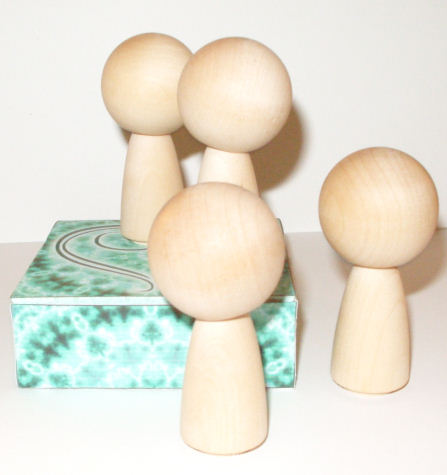
I like this style of doll because they are sort of like chibi figures. Very simple and quick to make and the details make the doll.

 In this case, one of the details are the eyes which I won from Suncatcher Eyes. If you don't know about Suncatcher Eyes, they are gorgeously hand-safety eyes that are like sparkling jewels. She has a bunch of variations. These are 9 mm cat eyes in pink. The eyes come with the washers to attach them. You insert the post of the eye into your project. With crochet projects, they fit easily between 2 single crochet stitches done using a size F hook. Slide the washer on the post on the inside of your project to lock the eye in place. Make sure you have them set just how you want them before sliding the washers on.

The other detail is a short length of ball chain with a bell attached. I got a whole bunch of short ball chains from American Science and Surplus, search for chainettes on the website. 100 6 1/4 inch lengths with connectors for 1.45. I use them for hanging my measuring cups and spoons as well as for craft projects. The bell is from my stash. A ribbon with a bell will work just as well.

As most my patterns, this is not worked in spirals, and the first ch doesn't count as the first stitch. Feel free to modify to fit your style. I don't mind the seam up the back, and prefer how tidy it looks when I chain 1 tightly, then work my sc in that space.

Supplies:
Size F hook (4mm)
Worsted weight yarn- I used Peaches and Cream (I think, unlabeled cone)
Yarn needle
Eyes, buttons, beads or safety eyes
ribbon or chain for a collar
stuffing
plastic pellets or plastic BB type ammo*

American terminology
ch= Chain stitch
sc= single crochet
dc= double crochet
hdc= half double crochet
sl st= slip stitch
st= stitch
sts= stitches
dec= decrease crochet, in this case it means to work 1 single crochet across two spaces. Insert hook in first stitch of dec and yarn over, pull loop through stitch, (2 loops on hook) insert hook in next st and yarn over, pull through stitch(3 loops on hook), yarn over, and pull through all 3 loops on hook.

When it says repeat ** that means to repeat the instructions between the asterisks.

Pattern is worked from the top down, and 3 pieces total. The head/body and the 2 ears. 

Ch 1 or magic ring.
Rnd 1: ch 1 (does not count as first sc here or through out) 6 sc in ring or first ch, sl st in first sc to join. (6 sts)
Rnd 2: ch 1, 2 sc in same st, 2 sc in each stitch around, sl st to first sc to join (12 sts)
Rnd 3: Ch 1, sc in same st, sc in next stitch, 2 sc in next st,*sc in next st, sc in next st, 2 sc in next st, *repeat ** twice more, sl st to first sc to join (16 sts)
Rnd 4: Ch 1, sc in same st, sc in next st, sc in next st, 2 sc in next st, * sc in next stitch, sc in next st, sc in next st, 2 sc in next st,* repeat ** twice more, sl st to first sc to join (20 sts)
Rnd 5-8: ch 1, sc in same st, sc in each stitch around, sl st to first sc to join (20 sts)
I placed my eyes in Rnd: 7. 
Rnd 9: Ch 1, sc in same st, sc in next st, sc in next st, dec in next 2 sts,* sc in next st, sc in next st, sc in next st, dec in next 2 sts, * repeat ** twice more. Sl st in first sc to join. (16 sts)
Rnd 10: Ch 1, sc in same st, sc in next st, dec in next 2 sts, *sc in next sti, sc in next st, dec in next 2 sts, * repeat ** twice more, sl st to first sc to join (12 sts)
Stuff head firmly with stuffing
Rnd 11: Ch 1, dec across next 2 sts, dec across next stitches, repeat around.  Sl st to first sc to join(6 sts)
Rnd 12: Ch 1, sc in same st, sc in each st around. Sl st to first sc to join (6 sts)
Rnd 13: ch 1, 2 sc in each st around, sl st to first sc to join (12 sts)
Rnd 14: Ch 1, sc in same st, sc in each st around, sl st to first sc to join (12 sts)
Rnd 15: Ch 1, sc in same st, sc in next stitch, 2 sc in next st,*sc in next st, sc in next st, 2 sc in next st, *repeat ** twice more, sl st to first sc to join (16 sts)
Rnd 16-20: Ch 1, sc in same st, sc in each st around, sl st to first sc to join (16 sts)

Stuff about halfway to 2/3 with stuffing, using a hook or pencil to stuff in the neck. Pour in the plastic pellets or plastic BBs. I use high density plastic bbs because they are fairly heavy and come in a bottle with a nice pouring spout for these. The extra weight at the bottom is what makes these stand nicely. Put a bit more stuffing over the pellets, and start doing the decreasing for the bottom, hold the pellets in place with your thumb while you are working, or add a scrap of fabric and tuck the edges to hold them in place.

Rnd 21: Ch 1, sc in same st, sc in next st, dec in next 2 sts, *sc in next sti, sc in next st, dec in next 2 sts, * repeat ** twice more, sl st to first sc to join (12 sts)
Rnd 22: Ch 1, dec across next 2 sts, dec across next stitches, repeat around.  Sl st to first sc to join(6 sts)
Break off yarn and put the tail on the needle and stitch through all 6 stitches, and pull tight. Knot securely and weave in end.

Ears: (make 2) 
Ch 6- counts as ch 3 and first dc. 
In 5th ch from hook, work a hdc, in next ch, a sc, ch 2, and down the other side of the chain do a sc in the same st as last sc, hdc in next ch, dc in next ch. 
Ch 1 (doesn't count as sc) sc in same st, sc in hdc, sc in sc, 3 sc in ch 2 space, sc in sc on other side, sc in next hdc, sc in top of the ch 3. Break off leaving a long enough tail to stitch the ears in place.

Refer to the photo, I cupped the ears slightly and stitched them on the sides of the head starting in the second round of the head. 

Add collar.


Friday, July 1, 2011

Book Review- Steampunk Softies

Steampunk Softies is by the same authors as Zombie Felties, Sarah Skeate and Nicola Tedman.
Softies are a bit bigger than felties, but use a lot of the same techniques for construction, and can be hand sewn.
The book starts with an introduction to the materials that are used to construct the dolls, as well as some fantastic tutorials for aging and distressing the fabrics.
The dolls are just wonderful. Most stand about 6 inches high, and the props and construction methods are very clever. The materials are for the most part, very easy to find, and some of the supplies are things you might normally throw away. The diminutive scale of the dolls makes them perfect for small scraps of fabric and leather. Mini brads, scraps of leather, plastic from deli containers, beads, buttons and toy compasses are all used in the detail of these lovely little dolls.
The dolls themselves are fantastic. Fantastic in the literal sense that they are creative fantasies. A little undersea manikin  looks like he mutated or was genetically created to live in the water, Floyd Fastknight explores the world with a compass for an eye and a case of maps. Chasity Storm is dressed in a cloud of lace and has wings that are reminiscent of the very first airplanes.
All the patterns are in the back of the book and full size, you trace them from the book on to a sheet of paper to cut out the parts for the dolls. Some of the dolls are very simple, the biggest challenge is the scale. Some are a lot more complex. These are not playthings, they are lovely little works of art. The techniques and the accessories used in making them can inspire your own characters and creations very easily.
My son is a big steampunk fan, and he was absolutely charmed by this book. My daughter, who is the serious doll maker in the family loved the techniques and pattern ideas.
You can get this book directly from the publisher, Andrews McMeel Publishing You can get more information about my review policy here.

Saturday, July 31, 2010

Book Review- All Dolled Up

All Dolled Up: Sewing Clothes and Accessories for Girls and Their 18-Inch Dolls

All Dolled Up by Joan Hinds
This collection of clothing designs for 18 inch dolls and their owners is charming and sweet. The part that impresses me most is the simplicity of construction. Joan Hinds has streamlined a lot of techniques for this collection.
The collection includes dresses, skirts, aprons and accessories as well as tips for scaling designs to suit dolls and girls both. Even the most complicated outfits wouldn't take more than a couple days to make and many of them could be done in an evening.
Skirts include a darling pleated skirt sewn on a pair of old jeans with a matching vest and a tiered gathered skirt.The dresses are wonderful. There is a simple jumper set that's just too cute made with the right fabrics.
The techniques include a method for making straps that doesn't use interfacing and an alternative to basting to gather fabric that is very clever and quick. 
The included video shows the sewing techniques that you'll be using to sew the outfits. Nancy Zieman hosts the video with Joan Hinds. 
Many of the techniques and patterns are things that can be very easily sized up so that Mom and daughter can having matching aprons or dresses and match the doll as well.
It also makes a wonderful introduction to sewing for children who are just getting interested in learning how to use a sewing a machine. The adult can sew the child's dress, and help the child with sewing a matching outfit for their doll. 
A lot of the clothes remind me of the things my mom used to make for me when I was 7 or 8. Classic designs that have stood the test of time, so if you do invest in the book,it's not unthinkable that you would make some of the same styles of clothes for your granddaughter that you might make for your daughter. 
You can get the book directly from the publisher at MyCraftivity.com or you can get it from Amazon here (Amazon is an affiliate link).

Monday, January 18, 2010

Thrift store happiness


I love thrift stores, vintage craft books and other things. One bags up fabric remnants and sells them for 4.99 which is very handy when you have a daughter who can spend hours hand sewing little dolls and other things.
I found the above amazing sheet of sweetness Saturday after we got the car back. My darling husband actually flinched when he saw it.
I've been debating what to do with it, I think I'll make grocery bags, but on Facebook, my good friend Rebecca suggested I hit it with glitter and turn it into my battle flag. My Naet refined the idea further with this suggestion "Haha, I love that idea ... glitter the fluck out of it and add a pink skull & crossbones. A sparkly rainbow unicorn jolly roger flag :)"
I love that idea too. But it will probably wind up being very cute grocery bags.
My daughter, The Turnip, makes handmade dolls. She's too impatient mostly for careful tiny backstitching, and doesn't follow or make patterns despite my pleading for patterns I could post here of her amazing creations. She embroiders eyes on them or she uses permanent markers to draw them on, occasionally she uses buttons. Most of them are fan based somehow, but some are just creations. For Christmas, she made all of us except Dad, dolls. She made Mike one based on one of his favorite comics, she made me a green witch, and she made William one based on a video game he likes. For Dad, she made him a cell phone case designed after the uniforms worn in ST:TNG. She loves to sew. She loves thrift stores for sweaters to make things with, her own wardrobe (she's fond of suits, ties and button down oxford shirts) and fabric for her dolls.
This is the doll she made me for Christmas.

I love it so much.

Thursday, October 22, 2009

Doll coloring page and Spoonflower

Spoonflower is holding a doll panel contest. They got 77 entries including my design for 2 kokeshi style dolls. One is a blonde, the other is a brunette and a half yard makes up 2 10 inch dolls. A fat quarter makes the blonde doll. If you'd like to see my design and the other designs in the contest you can see them here.Whichever design wins will be put up for sale by Spoonflower.
Because I really love that doll... I did a coloring page that little girls can decorate.As usual, click on the design for the full sized version.

In other news, yesterday I had a plan to make shortbread and read Oscar Wilde. Instead I spent way too many hours working on a digital scrapbooking kit. I don't even do digital scrapbooking.It's Halloween themed, and as soon as I can stand looking at it again, I'll zip it up and upload it for you all.

Sunday, August 16, 2009

Stuffed Magazine and kokeshi dolls

While I was out having coffee with Miss Teri Friday night, I picked up the second issue of Stuffed Magazine by Stampington and Company, the same wonderful company that does Somerset Studio.
It's wonderful. The sort of high quality photography you expect from this company and the projects are lovely and artistic. There are a lot that are just pure inspiration and the techniques are varied. There are hand sewn dolls and a pattern for a Coraline type doll that just thrilled my daughter, and amigurumi that made me very happy. Sock dolls and furry monsters. It's a great magazine if you are into making stuffies, and really, who isn't? I think I must make myself a Coraline style mini-me.


In amigurumi news, I'm working on a pattern for a base for a Momiji style amigurumi. (you know, all the Japanese words I know are craft related?) Ideally, I'll take notes so I can post the pattern for a simple doll form that will have a channel in the bottom that you can put rolled notes into. I could do it for cards, but I think rolled notes will be easier. Momiji are secret message dolls, they are shaped a lot like kokeshi dolls and have a space in the bottom for a wee note.

Speaking of kokeshi dolls, blank kokeshi can be a little expensive, but Miss Teri found a dowel cap and doll form combination that's got great proportions for beading kokeshi style dolls.

I didn't get the packaging from her on Friday to find out what exactly she got that fit together that perfectly, but I will ask. The dowel caps make perfect really big cute heads don't they? You could paint them, or wood burn them, or use thread crochet to cover them, or do what I'm planning and bead them like my little ninja. First one I want to do will be a little green alien, but I look at them and see Guardians of Oa too.