Printing Tips

Check out my printing tips if you're having problems printing to the right size
If you'd like to support this site and all the free things I post- please check out my Don't Eat the Paste Mandala collection coloring book for 9.99 at Amazon.

Tuesday, April 15, 2014

Printable Mini Baskets

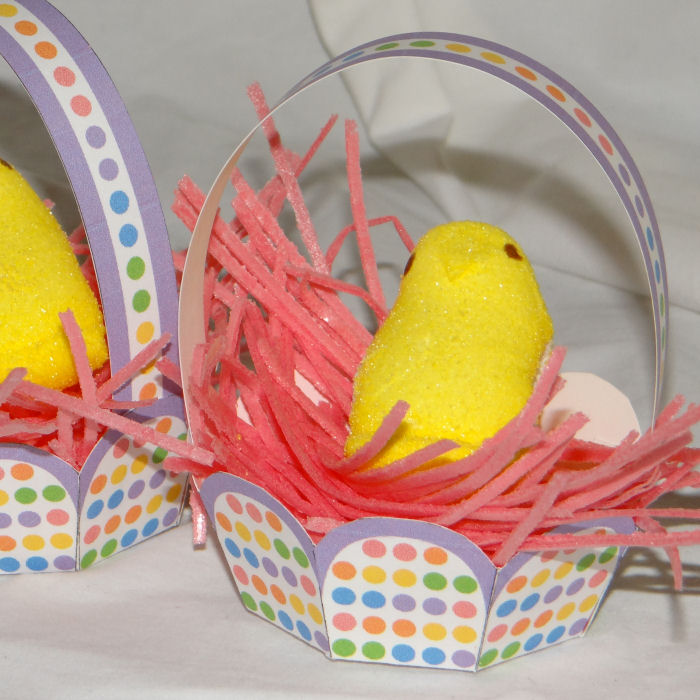
Mini Basket for Easter

These mini baskets print two to a page and easily fit one plastic egg, or a Peep! The grass used in the photo is an edible Easter grass (Kroger brand). I also like using paper grass sometimes.

Click the image below for a large version to print and make. Follow the instructions in the corner to assemble it.


Sunday, April 13, 2014

Book Review- More Felt Friends from Japan

Congratulations to Susan, the winner of the Origami Flowers giveaway. I hope you're enjoying the book!

More Felt Friends from Japan- review and giveaway #sewing


Kodansha is a Japanese publisher with a US division for great translations and I'll get back to this review in a second, I'm kind of lost in their website.... Oh, I need The Decorative Art of Japanese Food Carving, and my husband might like one of the sword books, and my kids love manga.. oh SHINY! Clothes, embroidery and textile.. need to get back to the review... 

Ok, I'm back now, it's just awfully distracting. How long did it take you to stop browsing the link and come back to read the review?

Felt mascots, toys appliques and accessories, all of them super cute. The projects are wonderfully photographed. Like a lot of Japanese craft books, the first part of the book is photos of items, with the instructions in the back of the book. Page numbers are given on the photos to find the instructions.

The photos are adorable. They are captioned and done on good backgrounds to show them at their best. It takes minimal supplies to make them. Craft felt for beginning sewers is an economical choice, then switching to wool felt for a higher quality finished item when you're comfortable with the hand stitching.

So with this book, before you start a project, read the tips at the END of the book. They will show

  • how to do the stitches including the embroidery accents
  • tell you what kind of supplies to use
  • how to use a wire armature, 
  • how to use the patterns
  • how to stuff the toys
The projects are good for a wide range of skills. There are some very easy applique projects, coasters and pouches which are perfect for beginners. They are whimsical and sweet. The Happy Coasters include a fish, a frog face and a chick, with easy embroidered accents. You might like to make the pouches and eyeglass cases as gifts.

A little more complicated are the lightly stuffed but still mostly flat Face Brooches, which are a bunch of cute animals and can be made with small scraps, the finger puppets and the charms which are strung with beads into darling hanging curtains.  My favorite of those types of projects is the Little Forest Birds charms because it reminds me of the felt ornaments my Great-Aunt Elizabeth made. 

The most complicated are the fully dimensional stuffed toys. These are more of a challenge because it's a small scale, but they are made using the same basic stitches, just more parts to create things like a giraffe, elephant or posable retro dolls that look like they came right off the set of an old stop motion movie. There are also dolls like Miss Kitty from the cover that have a full wardrobe you can sew for them. 

Some of the patterns you'll copy out of the book, the more involved patterns are printed on the inside of the dust jacket. 

The diagrams in the instructions are clear and show how to put the items together. 

This is a lovely book, and a must for anyone who really enjoys Japanese crafts.

Kodansha USA gave me an extra copy to give to one of my readers! Giveaway is open to people in the USA only because of shipping costs.
  a Rafflecopter giveaway
I received a complimentary copy of this book to review, I received no other compensation, and my review is my honest opinion of the book. You can read more about my review policy here.

Saturday, April 12, 2014

Goldfish Mandala to color

Goldfish mandala

I hope you enjoy this goldfish mandala to color. The fin and tail lines are very fine and just there for definition. Coloring the fins and tail a solid color would be a lot easier than trying to color them in the way the example is colored!
Click the images below for larger versions to color.

Small JPG version:
Goldfish mandala to color- also available as a transparent png

Transparent PNG version:
Goldfish mandala to color- also available as a jpg


I'm going to post a couple of book reviews in the next day or two, and work on a new youtube mandala video. Have you seen my first one?

Thursday, April 10, 2014

Mason Jar Lamp

LED Jar Lamp tutorial


The jar lamp above was so simple to make, it only takes knowing three knots. The simple overhand knot that everyone uses, and how to tie a good square knot, and a lark's head.

I use one of my Ball Heritage Blue jars for this, a strand of battery operated LED fairy lights, and inexpensive cotton cord from the local grocery store. The most expensive part is the strand of LED fairy lights at 10 dollars a strand, but they operate off of standard AA batteries so it's easy to swap out batteries. I also used aluminum foil to cover the battery case, and provide reflection. You can also use little LED tea lights.

This is the kind of cord I used- you can find it at Menards, Fred Meyers, and hardware stores- but it doesn't have to be this kind, any kind of medium weight household twine will work. Don't use yarn, it's too stretchy.


You will need:
  • cord
  • a jar (doesn't have to be a Ball Heritage jar, but isn't that pretty? This year they have GREEN jars!)
  • scissors
  • glue- I used Tacky Glue
  • strand of LED fairy lights (optional- could use a battery operated tea light instead)
  • foil


Cut 10 strands of cord 30 inches long- about an arms length from the center of your chest out to your finger tips if you don't want to measure! 

Then cut a piece that's about 14 inches long, fold the 10 long cords in half, and tie them in lark's head knots along the length of the 14 inch piece. Lark's head means you'll hold the loop on one side of the cord, then pass the ends around the cord through the loop and pull to tighten.

Take the lid and band off the jar, tie the 14 inch piece tight around the top of the jar under the threads, securing with a square knot.
A good square knot is a strong knot, accidentally switching the orientation of one side of the knot makes a granny knot which isn't a good knot. So always remember, right over left and twist, left over right and twist. 

Count 3 cords out from both sides of the knot, arrange those so they are directly opposite each other and the same distance from the center knot.Tie those two sets of cords together for the hanger. Tuck them into the jar for the time being.

Arrange the rest of the cords so they are spaced evenly around the jar, and take one right hand cord from pair, and a left hand cord from the cord pair to the left and tie a square knot about an inch down from the anchor cord. Repeat all the way around. If it helps to use a piece of cardboard to space them, do that.

Keep repeating that around, until you've made a set of knots that's about an inch past the bottom of the jar. 

Now for the trickiest part. Except it's not really tricky. Knotting the bottom so it will be flat enough to put on a flat surface if you don't want to hang it.
Please ignore the hair in the picture. I know better than snap these shots without putting my hair up first, but I was too excited about how good it looked with the fairy lights in it!

Tie the right hand cord from one pair to the left hand cord of the next pair in a square knot that's directly under the last row of knots. Repeat around.
Then do that again. Seal all the knots with a bit of glue and let the glue dry and trim the ends.

If you are going with the same set of battery operated fairy lights I used, make a loose pouch of the foil to put the battery case in, and stuff the whole thing in the jar. You'll need to be able to get to the switch so make sure it's on the open end of the pouch.

 These are the lights I used- they also come in blue so The Amazing Turnip Girl is making a jar lamp for her room using the blue lights.