Printing Tips

Check out my printing tips if you're having problems printing to the right size
If you'd like to support this site and all the free things I post- please check out my Don't Eat the Paste Mandala collection coloring book for 9.99 at Amazon.
Showing posts with label paper crafts. Show all posts

Monday, October 6, 2014

Printable paper gemstone rounds

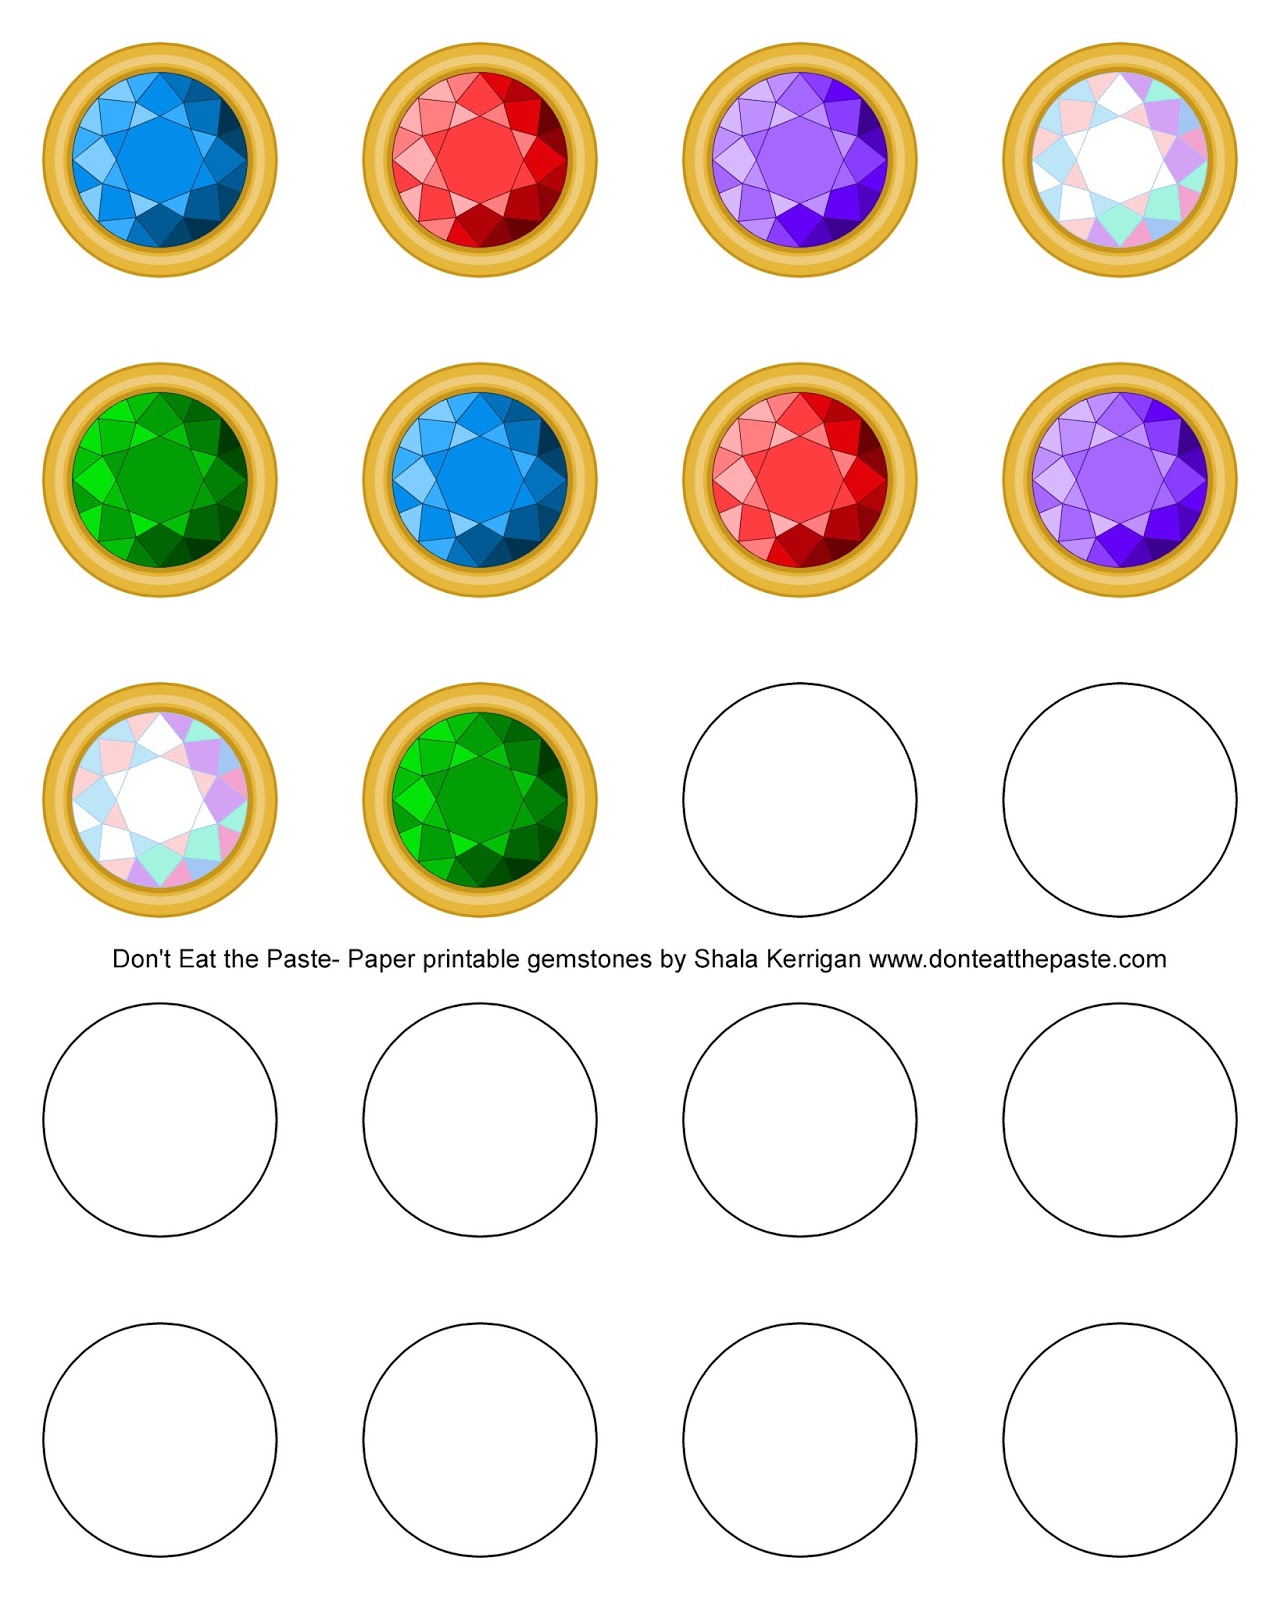
Printable gemstones for costumes or decorations- with a file for hand cutting and PNG files to use with the Cricut Explore!


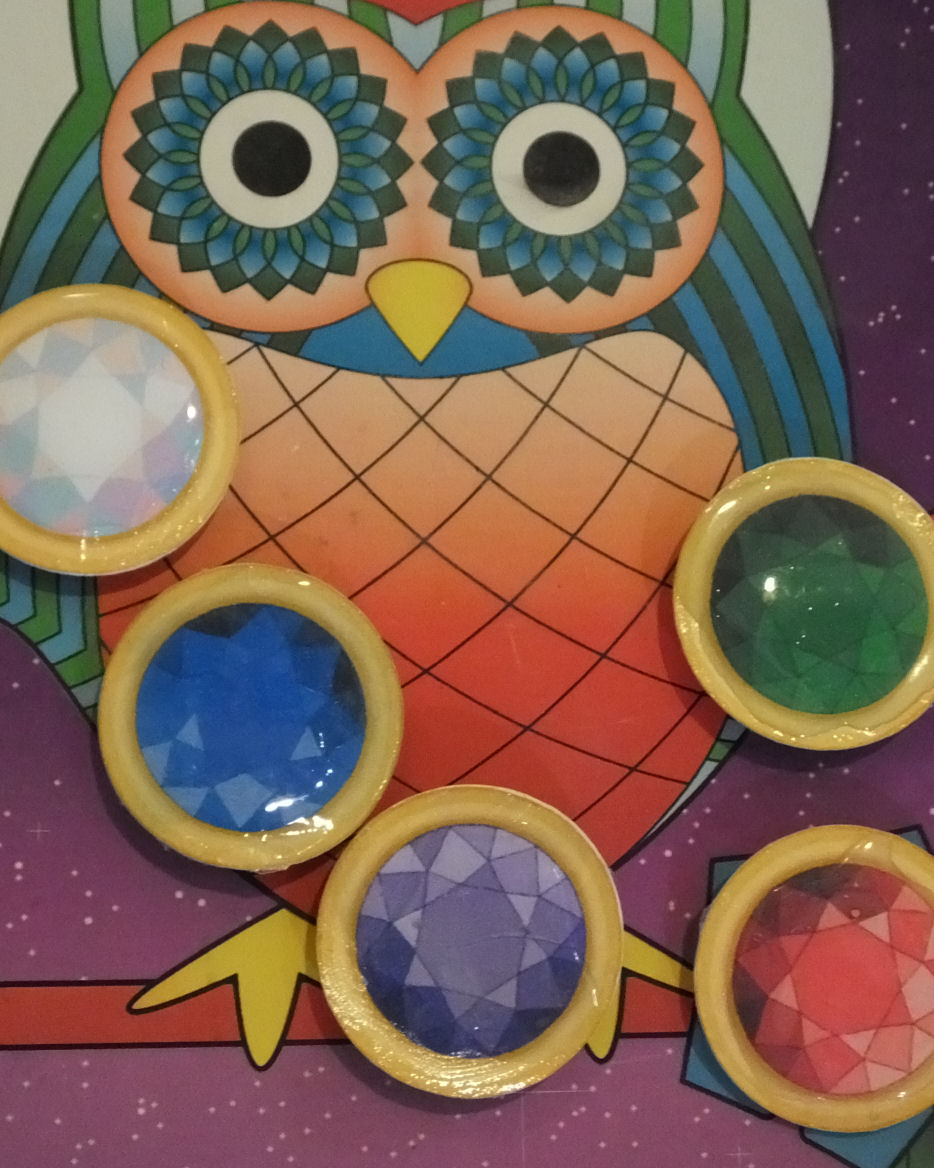
I love magnets, especially the ones that are made by members of my family. These are super easy, but you don't have to use the paper gemstones for magnets. They can also be used as decorations on cards, glued on to bobby pins that have a glue pad, or turned into jewelry for part of a Halloween costume.

So for people who like to print and cut, you'll click below for the larger image, print out this page on card stock and cut out.
Printable gemstones

Now in a minute, I'm going to tell you how I did them. but the finishing methods for both versions are the same. 2 layers of cardstock are pretty stiff which is why they work as magnets and accessories. If you use any kind of ink that might smudge- spray the color printed disks with a clear sealing spray. After that dries, use Mod Podge to adhere a blank disk to the back of a colored disk. Mod Podge over the top, and let dry. Mod Podge on the bottom and let dry. Now you can choose if you're going to use Dimensional Magic. I did, and I like the look but the finish did crack on a couple. Let that dry for 24 hours, and use a strong glue to attach it to what ever you're using them on! (Small round ceramic disk magnets on mine!)

So what did I do different? Print and cut with the Cricut Explore. Have I mentioned how much I LOVE this thing? The new update allows you to print using your home printer and then cut out your image. So all of my disks were perfectly cut and so were the blank backs. So when you update, and go into Design Space, you'll calibrate and watch videos that show you how to use the new update. 

The new update works with PNG files!! So here are those files for you to use (and you have my permission to use them in other Cricut projects)- click on them to download and save the transparent PNGs
Green gem

Printable diamond

blue gem

red gem

purple gem

So I went to edit, and put them all at 1.5 inches in size- this is what my print preview looked like after getting them laid out. It shows the bleed of my outside color so if the alignment is even a little off, it still looks great. 


Then after I printed and cut that, I flattened all the images, and switched them to cut and cut them from another sheet of card stock. 

Yes, it does work with more detailed cuts. I'll show that later this week! 


Using my Amazon links helps pay for this site and helps fund my book addiction.

Wednesday, October 1, 2014

Book Review- Travel Origami

A review of Travel Origami by Cindy Ng, a book with fun and functional projects to fold

I love functional origami, and paper crafting with unexpected materials. So this book is a perfect fit for my interests, and hopefully for yours as well.

The projects are for novice to advanced beginner folders. They are fairly quick with some modular designs and some single sheet designs which use materials like paper money, postcards, maps and comic books. Because the paper styles are adaptable and sourced from things you can find easily, you could also use glossy magazines or sometimes newspapers.

The models are diagrammed in a modified traditional style and laid out right to left with a clear back and front of the paper done in bright colors that's easy to see and read. The guide to the folds is clear and easy to follow which makes it good for novices.

The models themselves are mostly functional. Lots of wearable projects like rings, a bracelet and a necklace. The suggested papers are just that- suggestions. You can cut any paper to fit the dimensions which are clearly stated.

There are picture frames, little dishes to hold small things in, envelopes, gift wrap bag and decorative items like the modular postcard star on the cover. My favorite project is the modular money bowl which is a cute bowl with feet. It does require adhesion so you can just use a dollar as a pattern on a different type of paper to make it if you'd like.

I love the idea of saving your memorabilia in a way that it can be used and displayed daily, and this book is a way to do that.

Follow Tuttle Books on Facebook!


Not related to this wonderful book- Don't Eat the Paste looks like it's going to reach 5 MILLION page views this month. So I got some coins made up to celebrate.

I had them made by Gainsville Mint, and recommend them if you ever want things like this made. They were easy to work with, my original art include the logo heart and the ring with my URL in it using the same font that's in my header. They put in the create it text and the quote on the front which reads "Ubicumque homo est, ibi beneficio locus est. - Seneca", translated Ubicumque homo est, ibi beneficio locus est means "Wherever there is a human being, there is an opportunity for kindness" 

Amazon.com affiliate links don't affect your cost, and provide extra income to me personally, which helps support this site.

I received a complimentary copy of this book to review, I received no other compensation, and my review is my honest opinion of the book. You can read more about my review policy here.

Thursday, September 11, 2014

Flower Origami Book Reviews

I'm reviewing 2 books today because I'm backlogged and they are both pretty great books with a couple things in common.
They each have step by step diagrams for folding flowers. One is a kit with instructions for more traditional, stylized flowers including some modular designs. The other is a book with lots of instructions for making fairly realistic flowers and stems to create paper/origami ikebana. Both books come with dvd instruction!
Books provided by Tuttle Publishing- check them out on Facebook!!


So let's get started-
Review of LaFosse and Alexander's Origami Flowers
This kit has paper, a dvd and a book full of traditional style flowers. The paper is a standard kami paper, brightly colored on one side, smooth, thin, and easy to fold. The book diagrams are in standard origami notation, but have instructions in English under each step to clarify the steps. The dvd is very well done, with the focus on the folding and brightly lit.

The models are a mix of fairly simple one page models like the lily, more complex models like a rose, and modular models. There are also a few leaf models and instructions for adding calyxes and stems to the flowers for displays or gifts.

I'm rose impaired, and A Rose for Irene is a lovely, complex model with a lot of layers. Trying it just from the book, I messed up a couple steps. So I tried the dvd. Just delightful. Each step was explained, and using it in conjunction with the book, it all made sense. It was like having a private class in how to fold that rose. I tried a few other models using the book and dvd together and it helped out considerably for fitting in the last piece of a modular flower. The lily model, as shown on the DVD actually showed me a faster way to fold it than I've been doing for the last several years.

If you're more than a casual folder- this kit may be too basic for you but I'd strongly recommend it to beginning folders. The video instructions are well explained, and in conjunction with the book will teach you how to do origami. The models are well chosen too. The flowers can be use as ornaments or gifts.
Review- Origami Ikebana by Benjamin John Coleman


Ikebana is the art of flower arranging. Japanese flower arrangements are based on form, Instead of a bouquet of bright flowers all together, it's an elegant, minimalist arrangement based on a triangle of elements that draw the eye to the shape, form and feeling. It's a lot like sculpture with flowers.

This book and video teach you how to create more realistic flower form to use in your long lasting paper arrangements. Everything in the arrangements is made with paper. This method doesn't use floral wire or tape. You'll need different kinds of paper, glue and paint. It's a very comprehensive book. He covers materials, how to choose and cut paper, how to find the grain of the paper and how to paint it. The models themselves are based around some common shapes and forms with enough difference to make different kinds of flowers and leaves. The flowers have enough layers to handle a fair amount of sculpting.

The branches and stems are done using makigami, which is a rolled paper form that's really pretty simple once you've gotten the hang of it. That uses newspaper instead of more expensive paper, and a solution that's inexpensive to make so you can practice until you have the technique down.

There are even instructions for making a rock base from newspaper for your arrangements!

The video is very well done. The author is clearly enthused, and some parts he explains while looking into the camera and there are displays of ikebana hanging on the wall behind him so you can see the forms. For the folds, it's focused in on his hands and the paper. Some of the folding is more complex, but easy to understand when you see it done.

So here's the part that made me really happy with this video- my family watched it with me. Not just "in the room while I watched" but actually watched it. We are all at different levels of folding ability, so parts that I grasped quickly needed to be paused and played again for some of them, but that could be done. These are projects that my whole family can enjoy.

Because of the complexity of some of the flowers, I'd recommend this to people who have some experience with origami and are comfortable with the traditional, simple models. Advanced beginners will find it inspiring and probably get hooked on it.


Amazon.com affiliate links don't affect your cost, and provide extra income to me personally, which helps support this site.

I received a complimentary copy of this book to review, I received no other compensation, and my review is my honest opinion of the book. You can read more about my review policy here.

Tuesday, August 26, 2014

Book review- One Minute Paper Airplanes

Review- One Minute Paper Airplanes
This book and kit includes a book which has a good amount of information about making and launching paper airplanes, how to trouble shoot to get them to fly well and a bit about the dynamics of gliding flight in a fun way.

The include planes are printed in bright, smooth color on lightweight card stock, and can be popped out easily. They are not pre-scored, so you'll have to fold them yourself. Following the instructions in the book it's very easy. The book recommends using a ruler to fold, and I used a thin metal ruler and it made the straight folds. After doing the folds, I burnished them with a craft stick for very sharp folds, some parts are multilayered. There was an issue on the punch out of one of them where not all of the little V shaped areas to create the launching groove were punched, but a quick nip with small scissors fixed that. You can use either a stapler or glue to assemble them, but they are designed to be assembled using a stapler. Little lines indicate where the staples go.

The planes are all different shapes and themes. Some are very simple, some are a bit more complicated and might take longer than a minute to make. The big fun is in launching them. All the planes are designed to be launched using a rubber band launcher. You give the plane a light test throw which won't send it more than 10 feet to see if you need to adjust anything- tips in the book tell you how to adjust for drag and various other issues. After you have it ready, take it somewhere you have room and let it fly with the launcher!

So it's a bit of education, and a lot of fun. You get to make the planes, and some people will be inspired to design their own after trying the planes in the book. Then you get to launch them and see how far the different models fly and how well they fly.

My son and I had a lot of fun making and launching planes. It's a fun paper craft kit, the planes are well-designed for flight and appearance with a bold graphic appeal.

Like Tuttle Publishing on Facebook to find out about their other books.


Amazon.com affiliate links don't affect your cost, and provide extra income to me personally, which helps support this site.

I received a complimentary copy of this book to review, I received no other compensation, and my review is my honest opinion of the book. You can read more about my review policy here.
Wednesday, August 6, 2014

Designing a quote bracelet with Cricut Explore

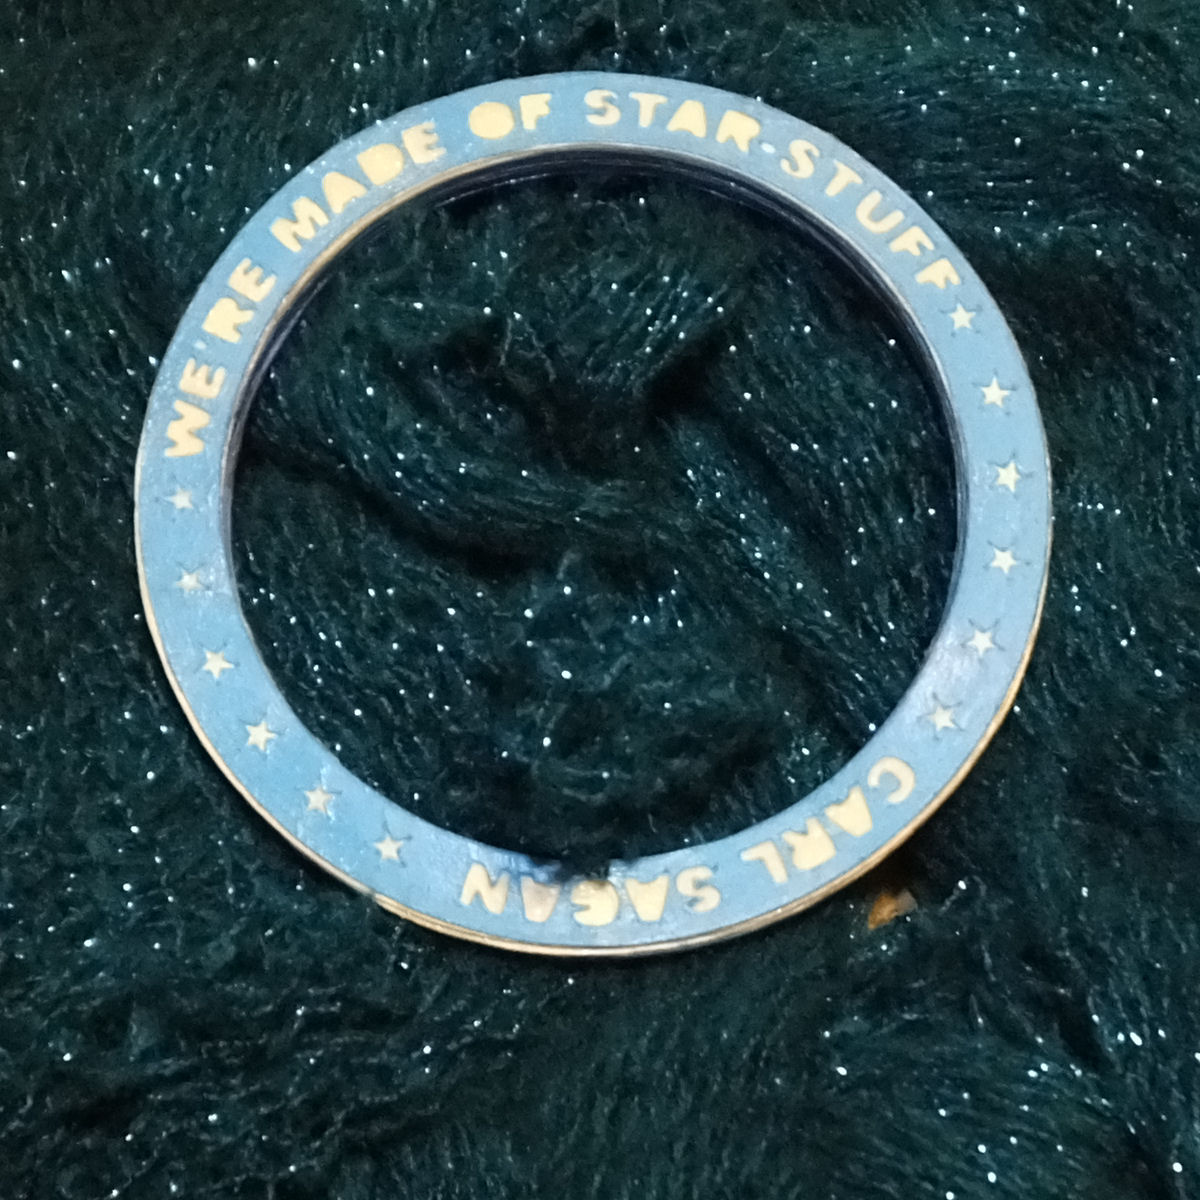
We're made of star-stuff bangle bracelet made using Cricut Explore #Cricut #papercrafts #jewelryproject

Recently I got a Cricut Explore to review and wow- I love this machine. What I like about it is how easy it is to use with my own graphics. I'm not limited by cartridges, and you don't have to use a vector program to design your own projects. Work in whatever program you're most comfortable in then create your project in the cloud based Design Space application.

The Cricut Explore will make very fine cuts easily. There is a huge library of shapes so if you don't want to draw your own, you can create projects using the shapes available. An inexpensive monthly membership gives you access to a lot of it, but I haven't really looked yet because yay! It cuts my own art easily.

So to make a bracelet using the Cricut, you will need a few things-

  • the inner diameter measurement of a bangle bracelet that you like the fit of- in my case, I prefer larger, looser bangles that slide partway down my hand. 
  • graphics program
  • 3 sheets of 12x12 card stock with at least 1 in high contrast
  • cutting mat
  • glue
  • Mod Podge
  • Cricut Explore!
  • Internet connection to use Design Space
So if you have those things, you'll open your graphics program and start putting together your quote bracelet.

Start by drawing a circle that's the same size as you want the inner diameter of your bangle, then decide how thick you want your bracelet to be. Double that number and add it to the inner diameter to figure out the outer diameter. 

Then you're going to start placing your letters for the bracelet. I chose a short quote " We're made of star-stuff" with Carl Sagan's name at the bottom edge. You'll notice my guide lines in blue for centering the letters. 

The little islands are going to be eliminated because it just adds to the cutting time and they won't be in the final project. I also added some stars. 
So now it's time to create the rest of the pieces. The outside pieces are the ones with the quote, the rest are solid. So this is what my final layout looks like. It's a transparent PNG with pixel clean lines. 

So then you upload it to Design Space, get it sized on the canvas, and cut it out of 3 sheets of card stock (and wind up with lots of circles that can be used in other projects)- Cricut has a bunch of YouTube videos that show exactly how to use Design Space. 

After it's all cut out, you start gluing it together. This is what my final edge looks like with all the stacked layers. Use thin layers of glue to prevent warping!

After the glue is dry, cover it in Mod Podge and let the Mod Podge dry completely. 

I'm having entirely too much fun with my Cricut Explore. Remember that wand and wizard hat mandala that I posted the other day? I used the components to make a decal for my husband's laptop.


Review item provided at no cost, this is my honest experience and opinion.

Monday, April 7, 2014

Book Review- Pretty Quilled Cards

Review- Pretty Quilled Cards by Cecelia Louie

I enjoy the delicate look of paper quilling, and it's something that my daughter and I do together.

If you are a quilling enthusiast, or just getting started quilling, this book is a nice addition to a library. The author has created cards to cover a lot of occasions, and a few all occasion cards and tags with well written patterns. There are designs for Easter, Christmas, bridal showers, baby shows, housewarmings and weddings as well as components and designs that can be used for other things.

The introduction includes a list and description of tools you'll use and basic techniques and tips for working with the strips of paper. It also explains gluing the design elements in place.

Her style is uniquely clean, almost like drawing with curls, spirals and open shapes. The designs are open, spacious and stylized. Each pattern starts with a rating for difficulty. Under that is a supply list for paper, which shows how long the strips need to be and where they will be marked for folds. Great photos and instructions will help you create the designs exactly as shown.

My favorite designs are:
Songbird Greeting which would make a good housewarming card, or a card for spring or bird lovers. It features a cute bird singing on a branch with a little bird house hanging underneath.
Dragonfly All-occasion, a delicate filigree that makes a pretty and elegant dragonfly card.
Mother's Day Vases which has 3 vases with stylized flowers

All of the cards are suitable for framing, which makes them a nice gift. The end of the book includes some patterns for entertaining like a wine glass charms and place cards.

This is a lovely book, full of designs that can be used for all sorts of projects, not just cards. It's very easy to follow and one that I happily recommend.

Cecelia Louie's webpage- Paper Zen
Follow Lark Crafts on Facebook for lots of ideas, giveaways, and projects.

U.S.A. U.K.
Amazon.com affiliate links don't affect your cost, and provide extra income to me personally, which helps support this site.

I received a complimentary copy of this book to review, I received no other compensation, and my review is my honest opinion of the book. You can read more about my review policy here.
Thursday, March 6, 2014

Book Review and Giveaway! Origami Flowers

Origami Flowers- Fold Beautiful Paper Flower Bouquets by Kazuo Kobayashi
Vertical Inc. is one of my favorite publishers around because they translate Japanese books to English- include a growing number of craft and cookbooks. To make things even better- they sent me an extra copy of this book to giveaway! The giveaway is for US residents only. I'm sorry about that. Whoever wins will also get some Alaskan postcards- mostly because I love picking them out to put into packages that I'm sending down south! The winner will get the English version shown above. The version shown below is to show the original book that was translated!

Origami Flowers is an English translation of Hana No Origami. It features a lovely collection of blossoms. Some of them are abstract and stylized and some are very realistic. Like a lot of Japanese books- there are scissors used in some of the models. Mostly they are to create decorative edges that further define a type of flower.

The diagrams are traditional style, but this is a good book for beginners. It features a full guide to reading traditional diagrams and each of the models is marked for difficulty level.

Beginners will get comfortable fast, folding the simpler models, and building up to the trickier models. A lot of the models use several sheets of paper. The gorgeous rose in the center of the book cover reminds me quite a bit of stained glass roses. It's sculptural and it's one of the simplest models in the book, it gets it's many petaled look by using several sheets of paper. This could become one of my all time favorite models pretty easily.

Card makers will enjoy the elegance of several of the flat flowers, and jewelry paper crafters will also see a good use for a lot of these pretty flowers.

More practical models include a couple decorated envelopes, and there is a whole section dedicated to "Practical Flowers". I'm wild for practical origami, in fact one of my favorite origami books ever is Practical Origami (also published by Vertical Inc), so this is one of my favorite sections of the book. Pretty bowls that look like sculptured flowers that are made using paper napkins, decorated chopstick cases and dishes. These are very pretty models that would work very well for entertaining.

Want your own copy? You can get it on Amazon and help out this page, or you might be able to win a copy!

a Rafflecopter giveaway U.S.A. U.K.
I received a complimentary copy of this book to review, I received no other compensation, and my review is my honest opinion of the book. You can read more about my review policy here.

Wednesday, March 27, 2013

Printable Mandala Clock

Printable Mandala Clock Project

I bought 5 clock movements from Klockit when I ordered the movements. Originally the plan was to make a mandala clock, but then the other clock projects happened first. I also should have ordered more movements because this is fun and I love clocks that tick.

Like the comic book clock, I did this one using lamination, but you don't have to. The project will work just fine using cereal box weight cardboard, heavy printer paper or cardstock and ModPodge. I have a laminator though and enjoy using it.

For this one, you'll need to print a mandala. This is the colored version I used. Click on the image for a larger version.

Or you can print and color your own version of this mandala HERE. 

This mandala was designed to be used as a clock dial. The divisions are by 12 and 60 for hours and minutes. Any mandala will work, but I do recommend one with 4 sections of radial symmetry or with 12 sections of radial symmetry to make it easier to tell time. 

You will need:
Scissors
Clock movement
Clock hands
mandala

For the ModPodge- you'll need Mod Podge and a second piece of card stock or other lightweight cardboard

For the laminated- you'll need a thermal laminator and a letter sized lamination pouch

For a cardboard/card stock lamination, you'll take one colored mandala (either your own coloring or the version above) and cut it out around the mandala then cut out the second circle. Trace that mandala and the center circle on a piece of card stock or cereal box cardboard, and then trace the inside of the larger hex nut in your clock movement kit in the center of the small circle. Cut it out just outside the tracing and check it on your clock movement to make sure it fits. Trim only a little off at a time until it does fit. Then use a black permanent marker to color the center of the backing. Spread the back of the mandala with Mod Podge and glue it carefully into place on the backing piece, then cover the surface with more ModPodge. Let dry. Follow kit instructions to install clock movement.

For a laminated version, you'll follow the same steps as the comic book clock basically.
Print the mandala, color it if you chose the blank version.
Cut out the center circle and cut out the mandala so it's round.
Laminate using a letter sized 3 mil or 5 mil pouch
Trace the inner circle of the large hex nut using a permanent marker
Cut out, check on movement shaft, trim to fit
Cut out carefully around the mandala leaving a small laminated edge all the way around.
Follow kit instructions to install clock movement.

So why is this so addictive? Because it's easy and because I really, really love clocks. How easy?


These are the pieces from the Klockit clock movement kit and the instructions. It's only a few pieces. I used the #10043, which is a quartz battery operated clock movement that uses a standard double A battery and has a very short shaft which is perfect for paper clock projects. It has maximum dial thickness of 1/8th inch. Most craft store movements are designed for thicker dials. The only tricky part of installing the movement is getting the hands set just right. For that reason, I don't recommend the hands I used above for absolute beginners. The delicate scrollwork is a little too easy to bend. The spade shaped hands are really easy to set though and have a classic look to them! The rubber ring goes between the movement and the face and holds the face in place fairly well once you screw down the large hex nut. After the large hex nut, you set the hour and minute hands. The holes on them are shaped specifically to fit in different places on the movement so it's really hard to make a mistake except when you are setting both hands to the right positions. You can't accidentally push the minute hand down to where the hour hand supposed to be, and they are spaced so as long as the hands are straight, they won't lock up together going around the clock. Then you will either put on the final closed nut, or if you're using a second hand, a small open nut, then the second hand. Then it's done. Set it to the right time, put a battery in it, and tick tick tick! You can also order movements for other dial thicknesses, so if you have a clock that has a lot of sentimental value but no working movement, you can replace the movement yourself.

The back of the movement has a hanger on it, which is perfect for the paper clocks.

Wednesday, October 10, 2012

Book Review- Pop Up Cards by Mari Kumada

Mari Kumada's Pop-Up Cards- Over 50 Designs for Cards that Fold, Flap, Spin and Slide is an English translation of a book originally written in Japanese and part of Roost Books' Japanese Craft Style line of books.

The book is all about making cards with great 3d features that are elegant and playful. The designs themselves are very clean looking. For example the card on the cover, with it's simple colors and fun spiral connecting the hearts is a colorful, fun design and one of my favorite techniques in the book.

The book has gorgeous photos and several projects for each technique. The techniques include simple pop-ups, spinner cards and cards that have sliding features. The basic technique for the moving or pop-up part of the card is well explained with good photos.

The shapes are wonderful. The author doesn't show you the front of the cards, that could be plain, or just a simple sentiment, then you open it to the surprise. The pops include geometric 3 dimensional shapes like cones and boxes as well as flat pop-ups that just pop when the card is opened.

My favorite projects are:
Strawberry and Pear Mini Cards- basic pop up technique with a sweetly elegant look that makes a nice note card.
Spring's Arrival- like the card on the cover, it features a spiral, the spiral looks like the flight of a butterfly and it's pretty pastel colors make it a lovely option as a card for a friend.
A witch hat Halloween pop-up has a cone shaped hat. The same technique could be used to make wizard hats as well.
The adorable Love Bunny tab card. This one reminds me most of children's pop-up books. 2 cute bunnies, a heart and a pull tab to make the heart flip to reveal a message.
For a more challenging card, and my favorite in the whole book, Magic Show has a dove coming out of a top hat when it's opened.

It's set up like classic craft books, so most of the projects are in the back of the book with instructions and the first part of the book is full color photographs with the page number listed for instructions. There are also full sized , full color templates in the back that can be copied and cut out or copied and used as a patterns for your own paper. It does not include basic instructions for paper crafting, so it's best audience are people who know paper basics like mountain and valley holds, cutting paper and gluing it.

It's simply a charming book, and I'm loving this series.

Published by Roost, an imprint of Shambhala Publications.

I received a complimentary copy of this book to review, my reviews are always my personal and honest opinion. You can read more about my review policy here.

Tuesday, October 2, 2012

Book Review: Craft-A-Day by Sarah Goldschadt

Craft-A-Day by Sarah Goldschadt

Quick note from me: I post my reviews from this site and the bead site to Amazon, as well as reviewing a lot of other things there. The last week I've been at 898 reviews, then today reviewed a set knitting needles to bring it up to 899 so this could be my 900th review. Simply because for that personal milestone, I wanted to review something truly special. This was it.

Craft-A-Day: 365 Simple Handmade Projects by Sarah Goldschadt lives up to it's title. The projects are simple. They don't take a big investment in time or materials. They fit into busy lives well, and are ideal for craft parties or crafting with young people.

It's a lovely book, the projects are very well photographed, not crammed all together on the pages, at 426 full color pages, each project gets it's own page with well written instructions. They are charming and put me in mind of zakka type crafts from Japan, which makes sense. A lot of the zakka craft movement is inspired by Scandinavian crafts and the author of this volume draws a lot of her inspiration from the same background. Simple shapes, bright folk colors and easy techniques done well make simple projects. The style is a clean, bright appealing look. Or if I can stop being a grown up for a minute-It's so cute! I lovelovelovelove the projects in this book.

She breaks down the year into weeks, and each week has a theme. Some of the themes are shapes, and she does clever things with just circles or squares. But a lot more of them are things. Animals, flowers, rainbows, mustaches, ghosts and trees for example. 52 weeks to the year, so 52 different themes. The projects come with complete instructions and templates you can trace or copy for patterns. For the sake of simplicity, the projects use similar construction methods which make it easy, you could work through this whole book in an hour or less a day every day for a year.

The projects are very simple, and great for all level of crafters. Like I said above, it would be a great book to pick a project for a craft themed party with friends, or an evening with a young person. It's also got great quick projects that make fast gifts. Hand stitched felt stuffies, lots of cupcake toppers, card making projects, wall decor projects and jewelry projects. I didn't see a single project in the book that would cost more than 5 dollars to make, and since most of the projects use small amounts of materials, that 5 dollars would cover making a few of each. The projects are really cute, handmade looking, and charming. It's very current and DIY trendy.

I have a friend who was telling me recently that she can't craft. I'm personally going to recommend this book to her. I'm also recommending this to a friend with a crafty daughter, I think they would enjoy this a lot together.

Published by Quirk Books.

I received a complimentary copy of this book to review, my reviews are always my personal and honest opinion. You can read more about my review policy here.


Monday, July 2, 2012

Book Review- Practical Origami


My favorite kinds of origami are practical models, models which can be used in every day life. It's the first thing I look for in any origami book, the tatos (flat containers) and boxes. My favorite model is the traditional masu box.

So a book full of practical origami projects is very exciting. This book is full of boxes, envelopes, wrappers and little pouches. A lot of them start with a sheet of paper that's in A1 proportions but can be folded using US letter size. Most are based on the more traditional square.

The diagrams are very easy to follow, with written instructions to help. Where a fold might be tricky, there is a diagram to show what the model should look like at that point.

Getting straight to my favorite projects, there are several tato style flat pouches that can be used to hold seasonings for bento, small gifts or small items like needles or paper clips. The herb pouch, folded out of thin, translucent paper is secure enough to hold seeds. Several of the other pouches would make nice needle packets. I really like the pepper pouch as well. Folded it has a small gap on the top to use as a shaker.

Many of the boxes are very easy to fold. My favorite project is the bag. It uses no glue or cutting, except for adding the handle. Using a square of paper, you wind up with a little bag that looks like a shopping bag. It's easy to fold, and a model that I'll be using often. My other favorite is a bento box folded from a single sheet of rectangular paper to make a lidded, biodegradable box. There is a section on how to resize box models to fit different sizes of paper. There are also measurements given where necessary for some boxes.
There are card cases, chopstick wrappers, chopstick rests, a picture frame, and lots of great envelopes. There are also a few models that are just for decoration.
This is the origami book I've always wanted, and one that I'll refer to often. There are a few intermediate projects, but most of the projects are easy enough for an absolute beginner.I think scrapbookers will enjoy the envelopes. The food serving ideas are wonderful for people who entertain. People who bake gifts will enjoy the range of boxes that could be used to give people cookies. It's a great collection of practical projects.

Published by Vertical Inc. 


I received a complimentary copy of this book to review, my reviews are always my personal and honest opinion. You can read more about my review policy here.

Tuesday, June 12, 2012

Paper Bangle Bracelets- Tutorial


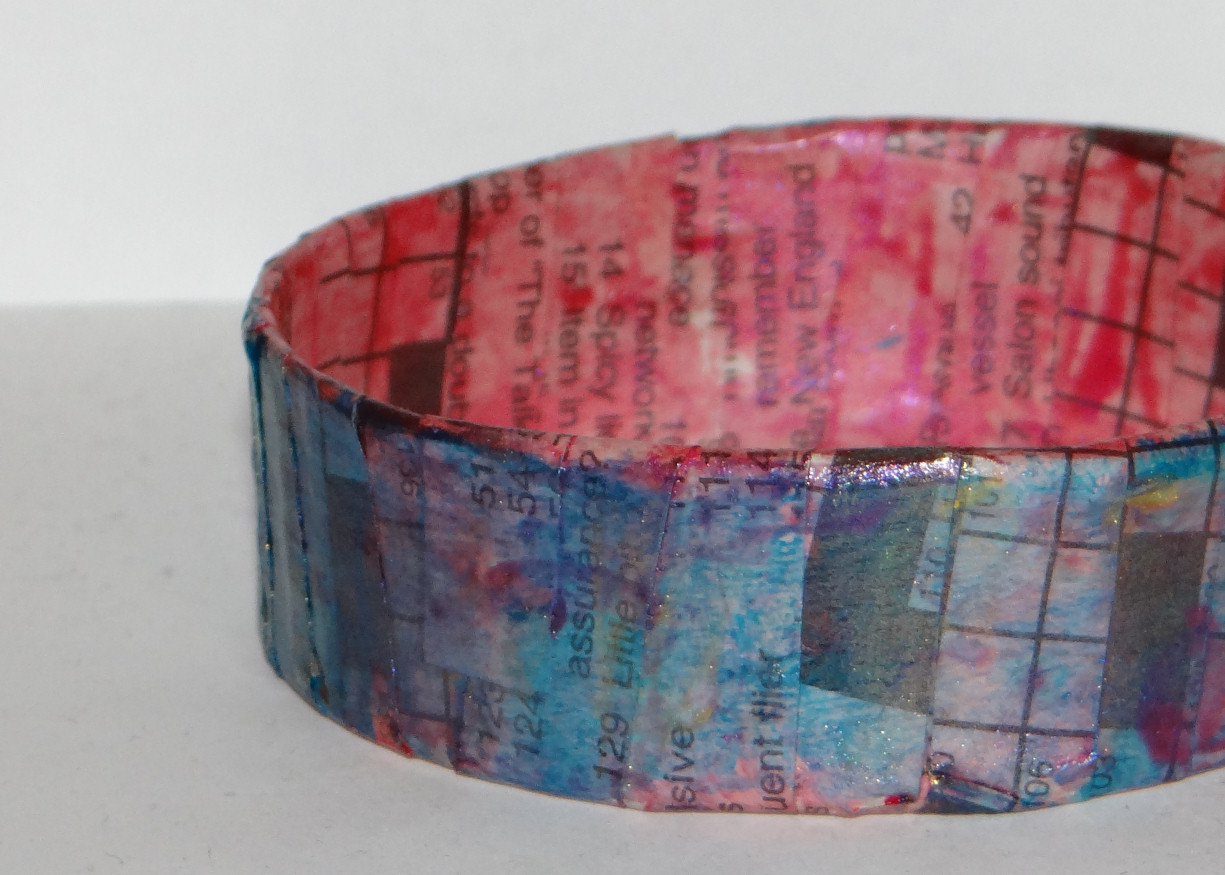
I'm really excited about these super easy upcycled paper bangles because there are so many possibilities for them, using a strip of paper for the outside I could put images or type a quote using one of my typewriters on it. They are made very easily using things would normally be thrown into the recycling bin and a new kind of paint which I won from the weekly drawing at Craft Test Dummies.

Luminarte's Silks Acrylic Glazes makes the perfect paint for these because they are sheer but well pigmented. You can use them wet on wet or wet on dry. I thought of doing stripes or something more ordered, but I really like the look of the layered random effect of the paints.

You will need:

  • Thin cardboard
  • strips of paper- I used newspaper for the one above.
  • White PVA glue- I used Aleene's Tacky Glue 
  • Silks Acrylic Glazes- I used Sky Blue, Watermelon Mist and Solar Gold
  • Acrylic Spray Sealer
  • Scissors
  • Paint Brushes
  • foam brush
This made much like paper mache, but using straight PVA glue instead of a paper mache mix. 
The base of the bracelet is a strip of cardboard from a cereal box or something similar. The easy way to size it is to cut a strip and wrap it around your hand at the widest part, then add an inch for the overlap.
For a quick reference though-
8 inches for a small bracelet (7 inches in circumference, 2.22 inches in diameter)
8.5 inches for a medium bracelet (7.5 inches in circumference, 2.38 inches in diameter)
9 inches for a large bracelet (8 inches in circumference, 2.54 inches in diameter)

Cut the cardboard the width you want the finished bracelet to be, and measure a 1/2 inch in from both ends. Cut slits on both ends to overlap them together on opposite edges.

Glue the overlapping pieces down. Cut lots of 1/4 inch wide strips of your paper. Put a thin layer of glue on the base, an inch at a time, and wrap on a slight diagonal, overlapping the edges. Apply more glue, and keep wrapping. Do at least 3 layers of paper, and set it aside to dry.

After it's dried, decide what you want the outer layer to be, and apply that. You can either cut a strip that's the same width and circumference around, or you can do what I did and cut more 1/4 inch strips to wrap around it. Apply with a thin layer of glue. Let dry.

Then the fun part, painting! The glazes are gorgeously pigmented, and work on a lot of different mediums. I wish I could properly photograph how they look on black rubber! They are very sheer and add a nice sheen of color to the rubber. On paper, they look a lot more like they do in the jar, but in sheer layers. Just paint, have fun layering colors. I put on the pink first, then put the blue on the outside. Let that dry, and added more pink and gold in spots. The end result is a lot of subtle shades of purple and green on the blue.

Let the glaze dry, and spray with an acrylic sealer. The end result is a lightweight, inexpensive bangle bracelet.