Printing Tips

Check out my printing tips if you're having problems printing to the right size
If you'd like to support this site and all the free things I post- please check out my Don't Eat the Paste Mandala collection coloring book for 9.99 at Amazon.

Friday, January 29, 2016

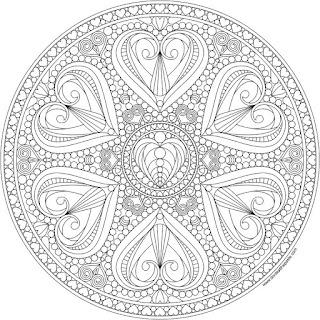
2016 Valentine Mandala to color!

Valentine mandala with a blank version to color
This took such a long time to draw, but it was so satisfying. I was thinking of those readers who really love the intricate mandalas to color the entire time, so this is my Valentine to all of you with the cramped hands and clipboards and super sharp pencils. I hope you like it!

To download this hearts mandala to color, click on the image below for a larger version.

Small JPG version:
Hearts mandala to print and color- available in jpg and transparent PNG format

Large transparent PNG version:
Hearts mandala to print and color- available in jpg and transparent PNG format

Want more heart mandalas? Free to print and color!

Want to help support this site? Click on link to buy the Don't Eat the Paste coloring book! 

Thursday, January 21, 2016

Mr. Rogers cross stitch pattern

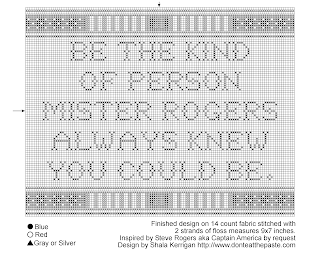
Be the kind of person Mister Rogers always knew you could be- cross stitch pattern

So I was thinking about Mister Rogers lessons of kindness and encouragement to be yourself, and decided this would make a good cross stitch design. I did the design, made my computer stitched version (I haven't stitched it yet in real life) and posted that version to my Facebook page. A lot of people liked it.

Here's the pattern for that- it stitches up to 9 inches wide and 7 inches tall on 14 count, takes only 4 colors of thread, and can be framed in a standard 8x10 frame. Click for a larger version, print on landscape mode.
Be the kind of person Mister Rogers always knew you could be- cross stitch pattern

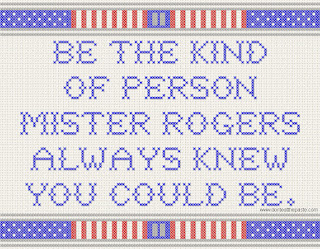
My son saw me working on it, and suggested I do a Steve Rogers (Captain America) version, TG saw it, and gave it her approval. I didn't change the text, but added a bit of stars and stripes and a captain insignia. 
Be the kind of person Mister Rogers always knew you could be- cross stitch pattern (Captain America)

Here's the digitally stitched version of that one. 
Be the kind of person Mister Rogers always knew you could be- cross stitch pattern (Captain America)


Tuesday, January 19, 2016

Printable Valentine Rose Box

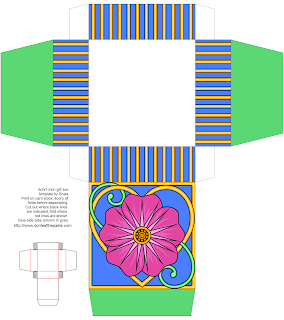
Rose and heart printable from Don't Eat the Paste
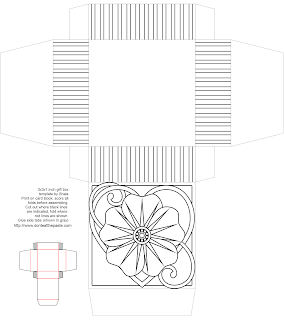
I hope you enjoy these printable rose and heart gift boxes! One of them is all colored and ready to go, the other one is blank and ready to color.

Print the boxes on card stock, cut out, score folds, fold, glue!

Colored version:
Printable rose gift box from Don't Eat the Paste

Printable box to color- 
Printable rose gift box to color from Don't Eat the Paste

If you want a bit of a giggle, there's been a running conversation between my husband and I about if I should have a Super Soaker or not- and that conversation inspired me to make a wishlist at Amazon of things my husband doesn't want me to have- 


Monday, January 11, 2016

The first mandala of 2016

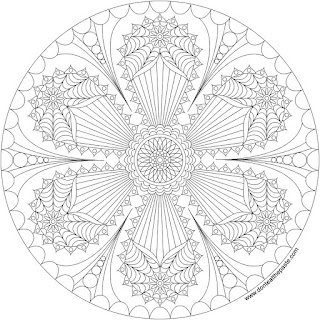
Flower mandala with a blank version to color

Well, actually, the second one. But the first one I drew is for my upcoming book- Everyday Mandalas.

I hope you enjoy this, and I hope you have a grand 2016!

Click the images for a larger version of this mandala coloring page to print and color!

Small jpg version:
Mandala to print and color- available in jpg and transparent png format
Large transparent png version:
Mandala to print and color- available in jpg and transparent png format


Thursday, January 7, 2016

Book Review- Origami Flowers Super Pack and Origami Boxes Super Pack


My origami loving heart is just thrilled with these books/kits.

They are both by Maria Noble, who also wrote How To Make 100 Paper Flowers (read my review here)

The books have a double handful of projects each. The flowers book is a little more difficult than the boxes book, and some of the projects do involve cutting and/or gluing.

They also come with HUNDREDS of sheets of paper in different patterns with colored backs. So you can choose a plain color to accent a pattern in a model that requires 2 sheets of paper. Like using a solid base for a lidded box, and a pretty pattern for the lid. Of course, I'm wild for patterns so I'm mostly pattern side out. That's okay too, because a lot of them coordinate very nicely. There are over 200 papers in each set, and different patterns for each set.

The paper is a bit heavier than traditional origami paper, but it holds folds well and stands up to quite a bit of abuse. Unfortunately, taking a picture of the tulip I made, it did not hold up to be dropped twice. Eek! So my tulip looks a little crushed here. That's my own fault!

The projects are easy to follow, the directions aren't in traditional format with symbols, they are carefully explained step by step with very clear photos. 

My favorite of the two books is the box book because I really like boxes. It has my favorite- a traditional masu style box, with a divider.The boxes are all very functional and decorative, so they make a lovely way to package a small gift. 

More advanced folders might prefer more challenging projects, but for casual folders and beginning folders, this is a great set. The inclusion of so much paper to work with makes it a wonderful deal, 

Check out Maria Noble's webpage- St. Jude's Creations . 

Available at Amazon and other booksellers. 

I received a complimentary copy of this book to review, I received no other compensation, and my review is my honest opinion of the book. You can read more about my review policy here.


Saturday, January 2, 2016

2 Glove Edgings - crochet

Both of these patterns are from my old blog- pictures and text from 2006 (wow! Was it really that long ago??)

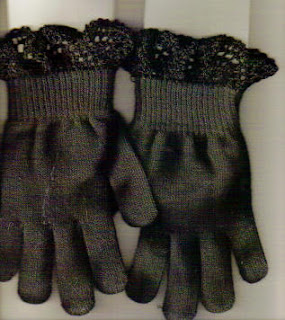
Easy Lacy Scalloped Edging
Glove edging- crocheted

  • Size 10 crochet cotton
  • Size 9 hook- gauge isn't really important, so if you're more comfortable with a larger hook size use that.
  • scissors
  • a pair of "magic stretch gloves" - also works on socks.


Working into the top of the glove, or sock, or whatever you are adding your edging too..

Rnd 1= Attach thread to glove, chain 4, first chain counts as sc, sc just a bit away. chain 3, sc into glove, ch 3, sc into glove, repeat for a multiple of 5 loops counting the first one. In my example, I used 35 loops. For last loop, ch 3, slipstitch to join in first ch, slipstitch to top of chain 3.

Round 2= ch 1, *sc in loop, ch 3, sc in next loop, ch 3, sc in next loop, ch 3, sc in next loop, 5 dc in next loop*, repeat from ** around. On last 5 dc shell, slipstitch to join to the first sc, slipstitch to top of chain 3.

Round 3= ch 1 *sc in loop, ch 3, sc in next loop, ch 3, sc in next loop, ch 1, dc in first dc, ch 1, dc in next dc, ch 1, dc in next dc, ch 1, dc in next dc, ch 1, dc in next dc, ch 1* repeat ** on last ch 1, slipstitch to join with first sc, slipstitch to top of ch 3. (5 dc per scallop)

Round 4= ch 1, *sc in loop, ch 3, sc in next loop, ch 2, dc in first dc, ch 2, dc in next dc, ch 2, dc in next dc, ch 2, dc in next dc, ch 2, dc in next dc, ch 2* repeat around, slipstitch to join to first sc, slipstitch to top of ch 3. (5 dc per scallop)

Round 5= ch 1, *sc in loop, ch 1 dc in ch 2 sp, ch 1, dc in dc, ch 1 dc in ch 2 sp, ch 1, dc in dc, ch 1 dc in ch 2 sp, ch 1, dc in dc, ch 1 dc in ch 2 sp, ch 1, dc in dc, ch 1 dc in ch 2 sp, ch 1, dc in dc, ch 2* repeat around. Slipstitch to join last ch 2 to first sc, slipstitch into chain 1 space. (11 dc per scallop)

Round 6= ch 1, sc in ch 1 space, ch 3, *sc in next ch 1 space, ch 3* repeat around, slipstitch to join, break off thread, weave in ends.


Another Easy Glove Edging

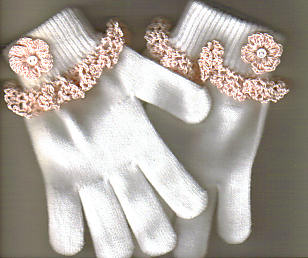
Glove edging- crocheted

  • size 10 cotton
  • size 9 hook or whatever your most comfortable with.
  • 2 buttons
  • tapestry needle that will fit the size 10 cotton and still go through the button holes. I've got no clue what size I used.
Rnd 1-The first row is spaced with the ribbing on the gloves, I placed each sc right under the "down" rib in the top of the glove, ch 3, sc right below the next down rib.Insert the hook into the gloves right below the cuff vertically to work the first row of net. 
When you get to the last ch 3 , instead of chain 3, ch 1, dc in first ch. 
Rnd 2-Now you are on top of the last loop you made, ch 1,(does not count as first sc) sc in that loop, ch 3, *sc in next loop, ch 3* repeat around until you reach the last loop, ch 1, dc in first sc.
Rnd 3- ch 1,(does not count as first sc) sc in the last loop of the previous row, ch 3, sc in the same loop, *ch 3, sc in next loop, ch 3, sc in same loop* repeat around. End by ch 1, dc in first sc (double the number of loops for the first round)
Rnd 4- ch 1,(does not count as first sc) sc, ch 3, *sc in next loop, ch 3* repeat around. This round you do end with a chain 3, slipstitch it to the first sc. Weave in ends.
That's the ruffle.

Now make the flowers. Oh so easy! 
Rnd 1- Ch 6 tightly, slipstitch to form a ring.
Rnd 2- working into the ring, ch 1,(does not count as first sc) sc, ch 3, sc, ch 3, sc, ch 3, sc, ch 3, sc, ch 3, sc, ch 3, slipstitch to join to first sc. (6 ch 3 loops)
Rnd 3, ch 1(does not count as first sc), *sc in sc. Ch 2, 5 dc in ch 3 loop, ch 2,* repeat on each ch 3 loop, slipstitch to join. Weave in ends.

Thread the needle with a bit of the cotton, and attach the flower to the glove with the buttons.

Of course, like the first one, it would work with socks too, only you'd put the ruffle on the top of the sock and the flower a bit below it on the inside so when you folded down the cuff it would show.