Printing Tips

Check out my printing tips if you're having problems printing to the right size
If you'd like to support this site and all the free things I post- please check out my Don't Eat the Paste Mandala collection coloring book for 9.99 at Amazon.

Sunday, September 29, 2013

Circles Mandala to color

This actually started as a background to one of the mandalas I'm drawing for the coloring book. But it looked too busy. Because I thought some of you might enjoy it, I nested the rings to create this mandala. There is a lot of room for playing with colors.
Click the images for larger versions to print and color.

Small PNG:

Large transparent PNG:


Currently on deck:
Lots more work on the coloring book. Also my recipe for The Amazing Turnip Girl's Favorite Chili, a Deco Laminate project, Pom Poms! and a crocheted lip balm holder pattern.

Wednesday, September 25, 2013

Witches coloring page


This isn't quite a true tessellation because it has overlap in the design. But it's very much like a tessellation.

This coloring page actually came from a design I was working on for my Spoonflower collection, and I posted the design to my FB page and asked if people would like to see it as a coloring page. Several people said they really would. So here it is, Halloween witches to color!

More Halloween projects, coloring pages and printables


Click on the images for larger versions to print and color.

Small JPG version: I have no idea why this is appearing grayed out. Because it's the image that I used for the pin, I'm leaving it up, but also posting a non-transparent small png version to print.

Small PNG:


Large transparent PNG:


Monday, September 23, 2013

Product Review- My Image Button Maker

As you all know, I'm a big fan of stuff from My Friendship Factory. They started with a friendship bracelet maker that replaced tape on counters or pins on jeans, was truly portable and made it possible to make very complex patterns by keeping the strands separate.

The My Circle of Creativity is kumihimo made easy and is sturdy with lots of storage for flosses, and you can use it to weave lanyards.

My Image Button Maker is the quality and attention to detail that you'd expect from this company. A sturdy plastic box with 2 drawers holds the things you'll need to make either buttons or magnets.
It also comes with photo cards that have 6 designs each that are funny, cute, or messages. But if you want to make you're own design you can go to MyPhotoSizer.com or download the free app on iTunes. Then print your images yourself or take them to a photo center to get them printed.

The top part of the My Image Button Maker is a die cutter to perfectly cut out the image to use on the button. You could use all sorts of images. Pages from magazines, comics or your own images. This example is my daughter's Turnip Girl logo.
 Center the image, push the lever on the right hand side, and the image pops right out. Then you place it face down into one of the covers and decide if you're going to make a pin or a magnet, following the instruction leaflets instructions. Pop it all together with your fingers, and you have a button!

So this is absolutely a hit in my home. My daughter can make instant buttons to celebrate her fandoms or to share with friends. It's easy to use and the sky is the limit for design possibilities. Refill kits are available.

Learn more at My Friendship Factory. Like Choose Friendship on Facebook for ideas, quotes and projects.

The products reviewed in this article were provided to me at no cost for the purposes of review. I received no other compensation, and my review is my honest opinion of the product.


Saturday, September 21, 2013

Magpie and Moose (and a squirrel just because)

We went to Best Buy to pick up Supernatural season 8 because it's Show 2 in our home (Doctor Who is Show) and on the way, in the wooded lot by our house, I saw a moose. So I ran back in the house to get my camera.

So right before I snapped the photo above, we watched a magpie land briefly on the moose's butt then fly off. Michael and I laughed about it. When I take photos, I'll usually take a few, and choose the best one. The second photo that I took was this one.

Does it look like that magpie was looking for a landing spot? It was there with a couple of it's buddies. They were trying to look innocent but watching the moose carefully.
We saw a magpie land again on the moose's butt, then fly off. I missed that photo. But we stuck around as the moose ambled off into the woods to see if it would happen again, if this was a game the magpies were playing.
Sorry for how blurry it is. But yes, that's a magpie. On the moose. The magpies followed the moose into the woods. They really kind of reminded me more than a bit of Rosemary, who is one of my very dearest friends. She loves sparkly things, and also is a fan of Supernatural and her favorite character is the one they sometimes call "Moose".

This photo was taken yesterday, and has nothing to do with the photos above, except I was able to focus more carefully and wasn't laughing while trying to take the picture.

Thursday, September 19, 2013

William's Basketweave Scarf Pattern (crochet)


This is the scarf I made for my son last week. Now, my son is just a hair over 6 feet tall or if you count his hair, 6'3" and most of his height seems to be in his long waist.  Which means that for him, this scarf had to be at least 6 feet long or it would look miniaturized and very short.

If you're a beginning crocheter, basketweave uses some techniques you may not have tried yet. It looks like it's all switched and turned to crochet, but it isn't, it's crocheted back and forth using front and back post crochets to create the effect.

Front post double crochet (abbreviated fpc)- yarn over, insert the hook from the FRONT of the fabric behind the post of the stitch and back through the other side of the post.  Yarn over, pull loop through, yarn over, pull through 2 loops, yarn over, pull through 2 loops.

Back post double crochet (abbreviated bpdc)- yarn over, insert hook from the BACK of the fabric behind the post of the stitch  and back through the other side of the post, yarn over, pull loop through, yarn over, pull through 2 loops, yarn over, pull through final 2 loops.

Because this is worked flat, to make the squares you'll be working fpdc in bpdcs and vice versa.

single crochet- sc
double crochet- dc
chain- ch
stitches- sts

To make the scarf you will need:

  • worsted weight yarn- about 522 yards at a guesstimate. I used just under 1 and half skeins of Lion Brand Fisherman's Wool in Birch Tweed for the scarf shown above. 
  • Size H (5mm) hook
  • scissors
  • yarn needle (to weave in ends)
Chain 20 loosely

Row 1: ch 1 to turn, sc in each stitch across
Row 2: ch 2 (counts as first stitch), dc in each stitch across.
Row 3: ch 2 (counts as first stitch), fpdc in next 4 sts, bpdc in next 5 sts,  fpdc in next 5 sts, bpdc in last 5 sts
Row 4: ch 2 (counts as first stitch), bpdc in next 4 sts, fpdc in next 5 sts, bpdc in next 5 sts, fpdc in last 5 sts
Row 5: ch 2 (counts as first stitch), fpdc in next 4 sts, bpdc in next 5 sts,  fpdc in next 5 sts, bpdc in last 5 sts

The switches to the next set of "blocks" are every 4 rows. 

Row 6: ch 2 (counts as first stitch), fpdc in next 4 sts, bpdc in next 5 sts,  fpdc in next 5 sts, bpdc in last 5 sts
Row 7: ch 2 (counts as first stitch), bpdc in next 4 sts, fpdc in next 5 sts, bpdc in next 5 sts, fpdc in last 5 sts
Row 8: ch 2 (counts as first stitch), fpdc in next 4 sts, bpdc in next 5 sts,  fpdc in next 5 sts, bpdc in last 5 sts
Row 9: ch 2 (counts as first stitch), bpdc in next 4 sts, fpdc in next 5 sts, bpdc in next 5 sts, fpdc in last 5 sts

Row 10: ch 2 (counts as first stitch), bpdc in next 4 sts, fpdc in next 5 sts, bpdc in next 5 sts, fpdc in last 5 sts
Row 11: ch 2 (counts as first stitch), fpdc in next 4 sts, bpdc in next 5 sts,  fpdc in next 5 sts, bpdc in last 5 sts
Row 12: ch 2 (counts as first stitch), bpdc in next 4 sts, fpdc in next 5 sts, bpdc in next 5 sts, fpdc in last 5 sts
Row 13: ch 2 (counts as first stitch), fpdc in next 4 sts, bpdc in next 5 sts,  fpdc in next 5 sts, bpdc in last 5 sts

Repeat rows 6-13 25 more times for a scarf that's just about 6 feet long. You can make it longer or shorter, just end it at the end of one of the 4 row block sections.

End it with a row of single crochet. Break off yarn. Weave in ends. 

My son LOVES this scarf so much. He tried to take it before I got photos or did my final count to see how many repeats it took to make it long enough. 


Wednesday, September 18, 2013

Brilliant Cut Mandala to Color

There is something very mandala like about a faceted gemstone. The cuts are designed to show off a stone in the best way possible and are generally radially symmetric. Done in miniature scale on small rocks that can be ruined so easily. So this simple mandala is inspired by that fine art.

But first a bit about shading diamonds that can also apply to other things. It's hard to color something "white"- the paper is already white! But things like diamonds get their beauty from the way they refract light and break it up into rainbows. If you look at the example above, I used a bunch of shades in gradients with white. You can get the same effect smudging your art media. But even just laid in plain pastels you still get the diamond effect if you use a spectrum of colors rather than just a few. So just an idea for shading them to look like diamonds. You could also just used monochromes to make your own favorite gem stone. Personally, I like emeralds!

Click the images for a larger version to print and color.
Small JPG version-

Large transparent PNG version:


Sunday, September 15, 2013

My Favorite Easy Potholder crochet pattern

This is another one from my old blog. It's taking me a while to get all the crochet and knit patterns transferred. Mostly because I'm kind of forgetful. Please excuse the quality of the photos. They are from a few years ago. (2007 to be exact) These potholders are the kind that are in daily use in my home. They are completely functional and work even with things like TG's new cast iron waffle iron that gets very, very hot handles.


This is a great scrappy project. When I'm giving them as gifts, I plan them out by the recipients favorite colors and work with striped patterns that are interesting. But when I make them for my own home? It's bits and scraps from other projects. Although I haven't made any for myself in a long time (since about 2007!) because we have several and they last really well.  

You will need:
Cotton worsted weight yarn- the cheap stuff is fine as long as it's all cotton and worsted weight.
Size G hook
Scissors

Pattern is in American terminology. But really, you don't need a pattern. Just crochet a big square.
sc=single crochet
sl st=slip stitch
st= stitch

Magic ring start, 8 sc in ring, pull ring closed, sl st to join.
Ch 1, sc in same st, 3 sc in next st, sc in next st, 3 sc in next st, sc in next st, 3 sc in next st, sc in next st, 3 sc in next st, sl st to join.

Keep working in rounds, working plain until you hit the center of the 3 sc corners in the previous rounds, and do 3 sc in that st. Yep. Like I said, it's just a square.

At the end of mine, I had 37 sc on a side plus the 3 sc corners.


Fold the corners into the center on the lines marked in black, and pin them, then join the edges in the middle with single crochet, add a loop at one corner if you want one. You'll have to do it in 2 passes, one corner to the other, break off, weave in ends, then the other set of corners.
Thread a yarn needle with whichever color you want, and stitch down on both sides of the sc row through both layers. I used a running stitch, then went back down the stitch to fill it in a make it a solid line of stitching.
See? Easy peasy, and functional. Michael has big hands, and most potholders are too small for him, plus you know how sometimes if your hands are even the tiniest bit moist, you'll burn yourself through regular potholders? Doesn't happen with these. 

Math note for sizing if you like such things:
You can figure the diagonal of a square by multiplying the sides by the square root of 2. Because crochet is inexact, it's okay to round the number to 1.4 - but how do you figure the size of the base square for one of these kinds of potholders? Figure out how big you finished potholder to be- that will be A, then divide that by the square root of 2, or by our rounded number, 1.4, then multiply that number by 2. 
A /1.4 x 2= finished length of one side
So if you want a finished 8x8 inch potholder it would be 8/1.4= 5.7 (still rounding) x 2= 11.4, so anything just about 11.5 inches on one side will give you a potholder that's approximately 8 inches. 

You can check out the project gallery for this on Ravelry here

Saturday, September 14, 2013

Rainbow Circles Box and a new bead project


I hope you enjoy this printable geometric rainbow colored circles box. The pattern occurred to me while I was reading a sword and sorcery adventure novel (I love Simon Green, it's one of my secret guilty pleasures) and worked out just right on the first try for the 3 inch repeat with the colors.

Currently (9-19-2013 to 9-25-2013) voting in Spoonflower's geometric contest. I'd love to see this pattern made into shoes if you want to vote for me, but there are a ton of great designs to choose from and you can vote for all of your favorites by signing into your Spoonflower account.

Click on the image for a larger version, print on card stock, cut out, score folds, fold, glue!

You can find instructions for this faux arm candy memory wire bracelet HERE. It's super easy and a great way to use leftover beads from other projects.

Thursday, September 12, 2013

Alligators, King Tut, coloring books and other things that are keeping me busy


I'm sure some of you have noticed that I haven't been updating as frequently lately. The last month got very, very busy.

There was the state fair, I wasn't a vendor, but did win tickets. The photo above is from a great educational exhibit about reptiles. As you can see, William and TATG had exactly opposite reactions to having a live alligator in their laps. TATG was tickled and amused. William was considerably more cautious and nervous.

The fair also had an exhibit of King Tut replicas. It was educational and interesting, and they both read every single placard in the exhibit that explained something. I took a whole bunch of photos, including one of a crook and flail for TG to turn into a cosplay item. My favorite is this one.

Big news? I recently signed a contract to do a mandala coloring book. The theme is paisley mandalas. It's a lot of fun drawing the mandalas.  I hope you all enjoy it when it comes out!

Other huge, wonderful news is that my husband is finally out of the hospitality industry. He's still doing the same job- running a housekeeping department, but for a company that he can really believe in. I don't know about other places, but executive level management in hotels can be a horrible, high stress, lots of hours job. His new job, he's working hard, but he's working a 40 hour week instead of 50-60 in the off season and up to 80 in tourist season. His boss seems to appreciate him, and he's liking the job quite a bit. I'm loving having him home more.

Also I have a couple product recommendations if you're looking for a good pomade or good suspenders. I'm not affiliated with these companies except for being a very happy customer-

First- pomade- My husband had a military cut for years after leaving the Army, but he grew out his hair for me. For him, long hair means still military short around the ears and neck, but the top is a couple inches long. It makes him nuts at work so he slicks it back with pomade. Except about 3 years ago the company that made the pomade he liked stopped making it. In those 3 years, we've used so many different products trying to find a good substitute.
Lockhart's Light Hold is perfect. It slicks his hair back and can be combed throughout the day to keep his straight, fine, thick hair in place. It smells great too, and it's non-drying and because it's a pomade, it doesn't flake. A little bit of Lockhart's Medium Hold works great on my hair for very sleek pony tails.

Suspenders- HoldUp Suspender Company- This has been a favorite of mine for years. My son needs suspenders and Michael prefers them to belts. They have the wide widths both of them of them prefer and in years of use, they have never had a problem with the suspenders coming undone. The clasps have a tiny pin in them to lock them into the pants. If you know someone who needs suspenders, but doesn't want to put buttons in their pants for a really good hold- this is the best option I've found. My son likes the "under ups" which are almost like an ace bandage, very soft and fairly stretchy. He can wear them under his Hawaiian shirts or tee shirts. Michael prefers the 2 inch wide ones. Both take the extra long ones because they are both so tall. They've been using the same sets regularly for years and it was only yesterday that I had to order more for them and a new clip for one set. Because they are so secure, I also ordered some clips to turn into sock garters for OTK socks for myself.

It's been busy, but it's been grand. TATG has made many jars of jelly and jam. I'm working on a scarf for William. It's pretty simple, basket weave crochet. I'll post the pattern when I'm done. At this point it's about 4 feet long and it needs to be at least 6 feet long. So it's almost there.

Monday, September 9, 2013

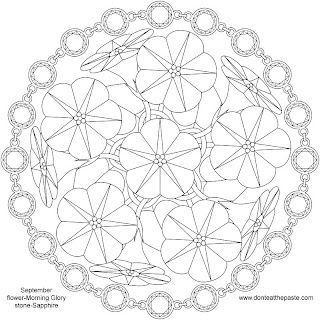
September Birthstone and Flower Mandala

Morning glories and sapphires for September

Happy Birthday to everyone born in September! Choosing a flower for this month was hard. The choices are asters, forget-me-nots and morning glories. Morning glories won because they are a personal favorite. They also come in a lot of colors and because the shape of them is fairly ornate, a simple gem setting for the sapphires made sense.

This is part of my Birth Flower/Birthstone series of printable mandalas to color. You can see the rest of the series here-
The Birthstone and Flower series of Mandalas

Click the images for the larger versions to print and color.
Small JPG version:
September birthstone and birth flower mandala- jpg version

Large transparent PNG version:
September birthstone and birth flower mandala- png version

Some gift ideas for September birthdays:


Amazon.com affiliate links don't affect your cost, and provide extra income to me personally, which helps support this site.

Thursday, September 5, 2013

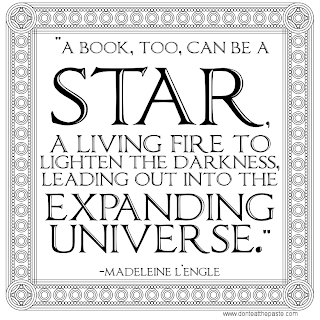
Madeleine L'Engle printable quote about books

"A book, too, can be a star, a living fire to lighten the darkness, leading out into the expanding universe." Madeleine L'Engle
"A book, too, can be a star, a living fire to lighten the darkness, leading out into the expanding universe."
Madeleine L'Engle

I do love to read, and hope you enjoy this printable quote about reading. Print at 8x10 inches on your choice of papers! Click the image below for a larger version. The version above can be shared at my Facebook page.


Wednesday, September 4, 2013

Book Review- Soap Crafting


Anne-Marie Faiola is The Soap Queen, with videos, websites, a store and all sorts of soapy goodness going on in her life. So a soap book by her is something to get enthused about, because you know it will be carefully written with great projects and good, solid recipes and safety instruction.

The beginning covers safety when working with the chemicals involved making soap. Okay, chemical, because the major safety issue is working with lye. She explains how to work with it safely in a non-scary way that will help you feel confident about using it. It also explains the difference between types of soap crafting, from making hot or cold process soap, rebatching and using melt and pour bases. There is a vocabulary section that explains the terms used in soap making. This section also covers some of the ingredients, supplies, colorants, fragrance and the equipment you'll need.

Then the recipes- the recipes are for cold process soap, and it's so far beyond those bars you can buy in the store that it's a completely different product. Using oils you can buy in a lot of different places for specific features in a soap, and having gorgeous swirls, whirls and stripes of color that turn the soap into a work of art.

The recipes focus on ingredients with amazing color techniques. Castile soap, soap with yogurt, beer, coffee grounds and clay, using techniques to make the soap look like stained glass, tie dye, marbleized techniques and high and low contrast effects.

It's spiral bound to lay flat, and the photos are in full color with lots of photos to show how each coloring technique is done. The recipes are well-written. While a lot of soap books that involve color use aren't good for beginners, this one is good for many levels of soap crafter. From the absolute beginner to someone confident in soapmaking who wants to learn new color techniques and recipes.

Like Storey on Facebook for recipes, crafts and chances to win books from them!

I received a complimentary copy of this book to review, I received no other compensation, and my review is my honest opinion of the book. You can read more about my review policy here.


Sunday, September 1, 2013

Spirals, dots and stripes printable gift box in 4 colors


I need to post more things on other templates and apologize for using my 2 "plain" templates so much lately. It's been super busy working on the new coloring book(!!), going to the state fair and well, life! But it should be quieting down soon so I can focus more on this page.

I hope you enjoy this box set. 4 colors of the same pattern. Click image for larger version, print on card stock, cut out, score folds, fold, glue!