

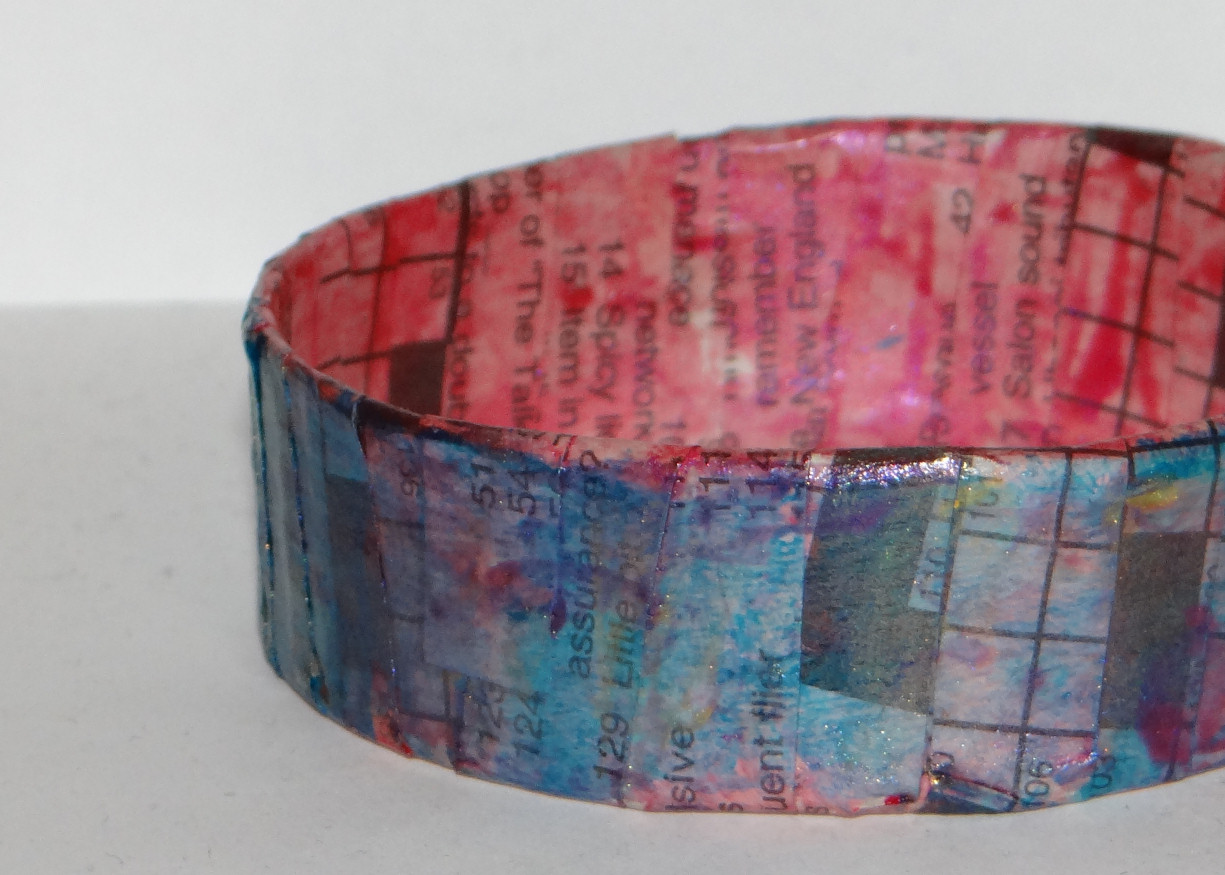
I'm really excited about these super easy upcycled paper bangles because there are so many possibilities for them, using a strip of paper for the outside I could put images or type a quote using one of my typewriters on it. They are made very easily using things would normally be thrown into the recycling bin and a new kind of paint which I won from the weekly drawing at Craft Test Dummies.
Luminarte's Silks Acrylic Glazes makes the perfect paint for these because they are sheer but well pigmented. You can use them wet on wet or wet on dry. I thought of doing stripes or something more ordered, but I really like the look of the layered random effect of the paints.
You will need:
- Thin cardboard
- strips of paper- I used newspaper for the one above.
- White PVA glue- I used Aleene's Tacky Glue
- Silks Acrylic Glazes- I used Sky Blue, Watermelon Mist and Solar Gold
- Acrylic Spray Sealer
- Scissors
- Paint Brushes
- foam brush
This made much like paper mache, but using straight PVA glue instead of a paper mache mix.
The base of the bracelet is a strip of cardboard from a cereal box or something similar. The easy way to size it is to cut a strip and wrap it around your hand at the widest part, then add an inch for the overlap.
For a quick reference though-
8 inches for a small bracelet (7 inches in circumference, 2.22 inches in diameter)
8.5 inches for a medium bracelet (7.5 inches in circumference, 2.38 inches in diameter)
9 inches for a large bracelet (8 inches in circumference, 2.54 inches in diameter)
Cut the cardboard the width you want the finished bracelet to be, and measure a 1/2 inch in from both ends. Cut slits on both ends to overlap them together on opposite edges.

Glue the overlapping pieces down. Cut lots of 1/4 inch wide strips of your paper. Put a thin layer of glue on the base, an inch at a time, and wrap on a slight diagonal, overlapping the edges. Apply more glue, and keep wrapping. Do at least 3 layers of paper, and set it aside to dry.
After it's dried, decide what you want the outer layer to be, and apply that. You can either cut a strip that's the same width and circumference around, or you can do what I did and cut more 1/4 inch strips to wrap around it. Apply with a thin layer of glue. Let dry.
Let the glaze dry, and spray with an acrylic sealer. The end result is a lightweight, inexpensive bangle bracelet.


Beautiful!
ReplyDeleteThis is wonderful! Posted on Pinterest and plan to make one soon. Thanks!
ReplyDeleteI love it. Thanks for sharing the tutorial.
ReplyDelete