Printing Tips

Check out my printing tips if you're having problems printing to the right size
If you'd like to support this site and all the free things I post- please check out my Don't Eat the Paste Mandala collection coloring book for 9.99 at Amazon.
Showing posts with label sponsored post. Show all posts

Monday, May 15, 2017

Movie Night with G.H. Cretors popcorn (sponsored)


When I got an email asking if I'd like a couple bags of G.H. Cretors "Obsessively delicious" popcorn and a couple fantastic movies for a movie night- I'm going to admit that I didn't hesitate.

I probably wouldn't have hesitated even if the movies weren't movies that I wanted to see because the popcorn is just that good- but one of the movies was one my family really wanted to see and the other was one that people have recommended repeatedly. Both movies were nominated for Best Picture at the Academy Awards.

So the package came and the popcorn flavors were going to be a surprise. G.H. Cretors has the following flavors available:

  • The Mix
  • Organic Chili Jalapeno White Cheddar
  • Organic Dill Pickle
  • Just the Cheese
  • Just the Caramel
  • Organic Extra Virgin Olive Oil
  • NEW Organic White Cheddar
  • NEW Organic Honey Butter Kettlecorn
  • NEW Organic Salted Butter
I got The Mix and Just the Cheese

So for the first night, we watched Moonlight- which was the movie that TG and I really wanted to see, the one that Mahershala Ali won the Academy Award for Best Supporting Actor.  That night, we opened the bag of The Mix- which is a perfectly balanced, not too sweet, not too salty mix of cheddar popcorn and caramel popcorn. 
Look at that! The shiny candy caramel and the perfect cheddar! It was delicious. 
My daughter curled up under the blanket they sent, and I curled up with the tissues. It's a really beautiful movie, a coming of age movie that's gorgeously done in 3 parts. 

The other movie was Arrival, which also won an Academy Award for the Best Sound Editing, and that night was watching with my husband. I opened the bag of Just the Cheese and my husband and I were just wild for it. 
Isn't that pretty? Yes. I took both popcorn pictures out in the sun to get the best lighting possible and cropped them but didn't otherwise edit the photos. 

It's a fantastic cheese popcorn. It's not too salty or bitter, just cheesy with just the amount of cheese. My fingers didn't turn orange eating it. 

Arrival was lovely too, and watching it with my husband was very nice. He's so used to my love for action-adventure, that he enjoyed watching a thoughtful science fiction movie that actually had a plot with me. It's a gorgeous film, with a lot about language and communication and making choices. 

Both movies were about love, without being romantic films. 

The popcorn! Oh my gosh. It's perfectly popped. Nice sized roundish pieces with fantastic flavor. 

And it's easily available. You can find it at Walgreens, Target and loads of other places. Check here for a list of retail locations near you. 

I absolutely recommend both movies and the popcorn. Grab tissue. You'll need it.

G.H. Cretors Popcorn supplied the movies, blanket, tissue and popcorn at no charge. I was not otherwise compensated for this post and all opinions are mine. 

Monday, July 6, 2015

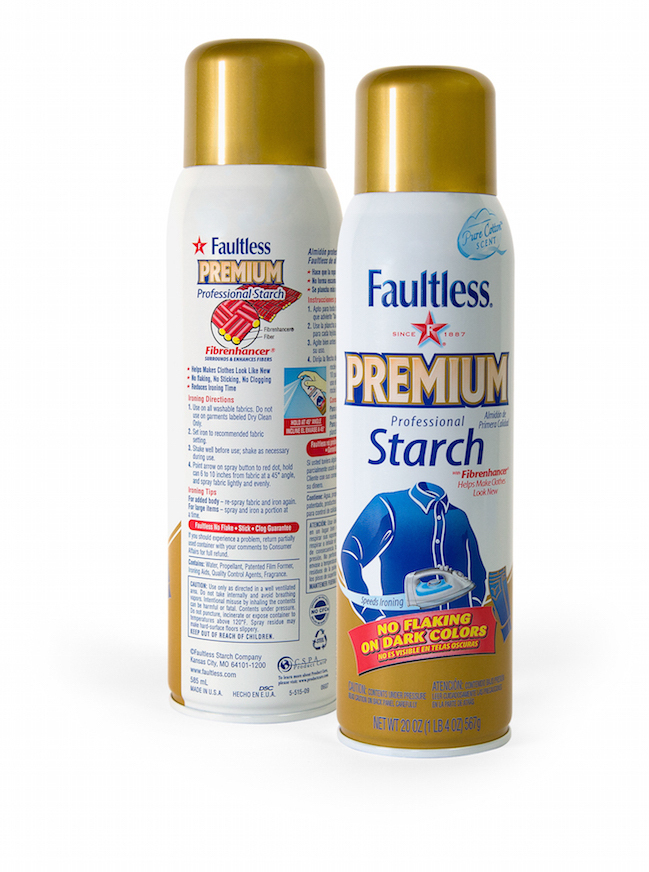
Faultlessly crisp gorgeous creases with Faultless Premium

This is a sponsored post written by me on behalf of Faultless/Bon Ami Company    for IZEA. All opinions are 100% mine.
Faultless Spray Starch

I remember my mother ironing her cotton dresses with Faultless Spray Starch when I was a kid. Those beautiful dresses always came out looking so crisp and gorgeous, the skirts were beautifully full with perfect pleats, the collars were smooth and sharp. She looked so gorgeous and made it look so effortless.

My daughter doesn't wear tailored cotton dresses, but she does wear button down shirts. She wants them just as crisp and clean though, with nice creases down the arms. The shirt above is a cotton sateen shirt that's dark enough that flakes would show if Faultless left flakes. It doesn't though. Check out this sleeve!
Ironed, starched sleeve.

It's easy to use, keeps clothing looking new and sharp, it doesn't clog and it absolutely won't leave flakes on your clothing. Spray, press, and wear. The little bit of extra time to make sure your pleats are pleated and your creases are sharp and your clothes look their best helps you feel like you look great and you're ready to do your best to impress. It's also easy to find, fabric stores, drug stores, grocery stores, a lot of major retailers carry Faultless Premium.

Just gorgeous! It's really easy to use, and comes in convenient sizes, including a good travel size. The large can is the one I used, and it's lightly scented with a clean cotton scent. It's easy to find a store that carries Faultless Premium Spray Starch, and they have a coupon available to download- Faultless Premium Coupon 

Faultless Premium can also be used in crafts. One of my favorites is super quick, bright summery necklaces. All you need is some lace that can be cut into motifs, some jump rings, some cord and Faultless Premium.

Lace Motifs

Spray lightly, iron, flip, spray lightly, iron, flip, repeat a couple times. It won't get super stiff, it will get crisp. Attach a jump ring, then string it on a cord.
Lace necklace
undefined
Faultless Premium Starch is giving away $1,000 along with a year’s supply of Faultless Premium! It's easy to enter to win  the Faultless Starch Giveaway  for this fantastic prize package. 
  • Visit the Faultless Starch Giveaway  page
  • Watch the video of Ironing Board Sam singing the “Wrinkle Blues”
  • Enter your information
  • Share this link with your friends: http://bit.ly/1FP5Up4


Follow Faultless on Facebook for lots of tips, tricks and ideas.

Is Faultless a part of your wardrobe routine? I love how my tailored clothes look when they are starched and like to starch my hair ribbons as well. I think they tie into bows better that way. My daughter likes having knife sharp creases for some of her shirts. How do you use Faultless Starch?
 
Visit Sponsors Site

Monday, September 15, 2014

Upcycled Briefcase into a Stenciled Art Case with FolkArt paints and stencils

How to stencil a stylish case for art supplies using FolkArt Multi-Surface paints #plaidcraft

This is a sponsored post, which means I got free products and paid for writing it. All opinions are my own and based on my experience. 

Getting the chance to use FolkArt Stencils and Paints for a project was a lot of fun. So first I'd like to talk about the supplies because they are incredibly nifty. Find FolkArt® stencils, paint and more at Michaels.


FolkArt Multisurface Paint- If you're a craft painter, you want this paint. It comes in a bunch of colors and some really gorgeous finishes. I got to use a pearl finish and some metallic finishes in my project. In 3 weeks it air cures on smooth surfaces like glass and ceramics, it works on plastic, on paper, on every surface that gets painted in my home. We are using it this weekend on some white cups, and possibly on some white blankets. As much as everyone in my family likes to upcycle, this is our new favorite paint.


FolkArt Stencils- laser cut precise stencils, these have perfect sharp edges that are smooth, lots of detail and are reusable. They also come in lots of trendy designs, like the jaguar stencil that I used.

FolkArt Stencil Adhesive- I love this stuff. You apply it to the back of your stencil- it daubs on. Then your stencil is lightly adhesive and won't move around. If you make sure to get the fine details that might come up when you pounce your paint on, they don't move either. Then you can peel up the stencil easily and it doesn't leave a sticky residue. Best part? Even if you're re-using the stencil in your project, you only have to apply it once. It stays sticky for a few uses.

So I had a lot of ideas, but decided on making the art case for my daughter because she can keep a lot of her supplies nice and neat in it. So many people have switched to using laptops and bags that briefcases are all over thrift stores and garage sales. They are perfectly designed for paper and art supplies with a hinged lid and rigid build to keep everything very flat. So you'll need to find a briefcase in good condition in a thrift store.


You'll also need your favorite paint applicators, foam plates and painter's tape. I used a larger sponge for stenciling and a foam roller. My photos show a sheet of vinyl for the first part instead of painters tape because the vinyl was damaged and convenient.

The colors I used are
Metallic 14K Gold
Metallic Bright Gold
Metallic Chocolate Brown
Mandarin Satin Pearl

So the first thing you'll do is block off the middle top of your briefcase.
Put some paint on the foam plate. I put on a few colors, starting with the golds, and adding a few small spots of the other two colors. Paint the edges of the case. Pull up the tape and let it dry.

While it's drying, daub the back of the stencil with the FolkArt stencil adhesive. After the FolkArt paint is dry, put the stencil in place in the center of the case.
You can tell that I tried out the stencil first! Make sure the small areas that might come up while your pounce are well adhered. Because of the texture of the case, using a nearly dry brush and going over it twice worked better than using a lot of paint and helped prevent bleeding into the texture. Pounce the brush, and shade your colors from lightest down to the bottom with darkest. As you can see, the stencil needed to be moved to finish. I let the paint dry, then put the stencil on the bottom to put in the last little bit.

The final step is the stripe edging. Make sure all your paint is dry before taping.
As you can see- I used just the gold for the inner stripe, and gold and brown for the outer stripe. The difference between the stripe and the edging is subtle and looks really good.

My daughter is thrilled with the case, and even my son said it looks neat. I think he plans to pinstripe a case for himself using the same colors. The finishes are so nice looking.

Want a LOT of great project ideas? Check out these links.
Check out The Plaid Palette blog
Sign up for their  newsletter
Follow on Pinterest
Like Plaid on Facebook
Follow on Instagram
Follow on Twitter
Watch Plaid on YouTube
Follow Plaid on Google+


Sunday, September 14, 2014

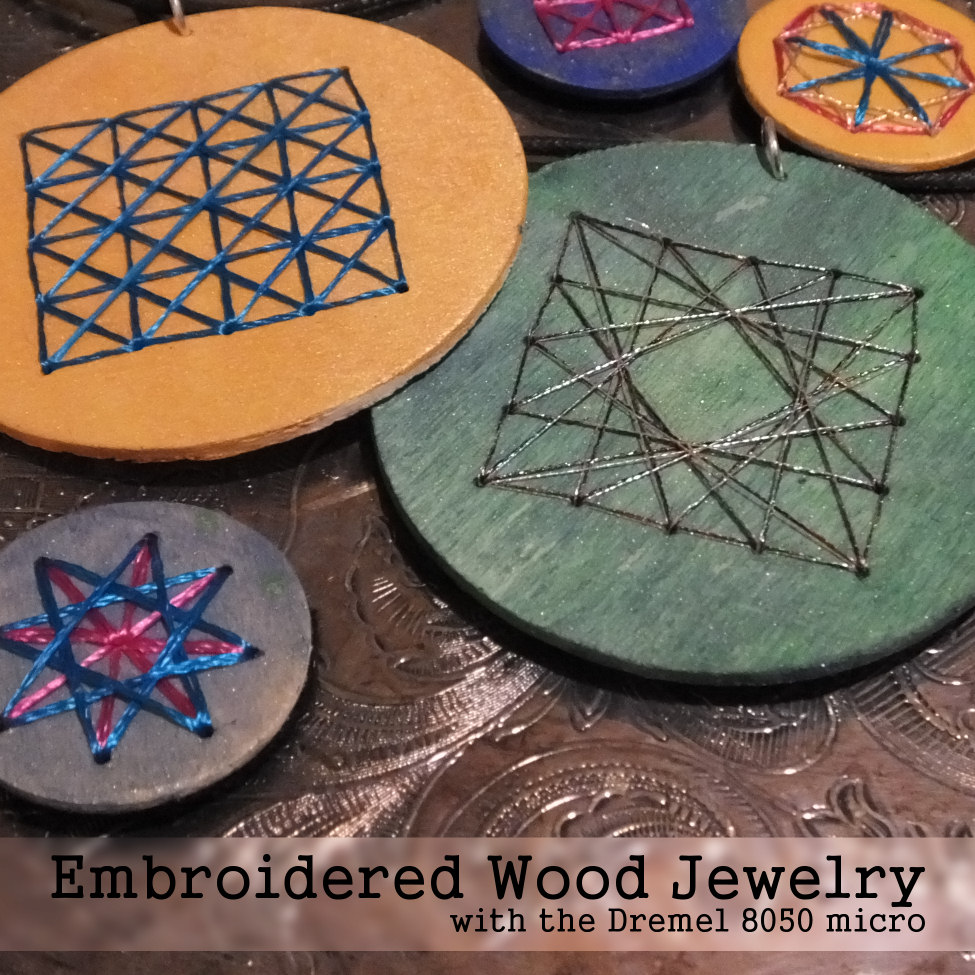
Embroidered Wood Jewelry using the new Dremel Micro 8050 (and why I LOVE this Dremel)


Embroidered Wood Jewelry tutorial using the Dremel 8050 Micro #MyBrilliantIdea #CleverGirls #sponsored
Dremel is awesome, you all know the. The first name in small power tools has the perfect new tool for crafters and hobbyists. The Dremel® Micro™ 8050 tool.

It looks like this, and it's available in all the usual places. Home Depot, Amazon, and it's 89 dollars USD.
So what makes it the perfect tool for hobbyists?

  • It works with standard Dremel bits, grinders, burrs and collets
  • Lots of power in a cordless that can be left on the charger until needed- it automatically stops charging when the battery is full. 
  • Light weight and ergonomic design is easy to hold and control
  • TASK LIGHT! When it's in use, it has a little directed LED that shines right on the project to really see what you're doing. 
  • It does everything you expect from your Dremel Rotary tool, it drills, grinds, sands, sharpens, engraves and carves
In fact, the only thing that's not perfect about it in my family is that we have only one. We plan to remedy that soon. My daughter loves it for making hard wood knitting needles. She whittles down to the basic shape for the point, then uses a sanding drum to finish shaping for a nice taper. My husband thinks it's the best thing in the world with a small collet and drill bit to put nice neat holes in leather without having to line up punches. Using the 8050 Micro, he can mark where the holes need to be then zip zip zip and they are done. My son likes engraving glass.
It's designed to fit well into small areas, and to work on small projects.

Check out Dremel on Twitter, Facebook and Pinterest for lots of ideas and projects.

To make the jewelry shown, you'll need a Dremel 8050 Micro, a collet and 1/8th inch drill bit- both are available from Dremel, and if you want to bevel the edges, a sanding drum.
You will also need:
Wood disks, embroidery floss- this is a great use for specialty floss, paint, glue, needle to fit the floss, and jewelry findings. 

This is a good project for craft nights and if you pre-drill, a fantastic project to do with children because there are so many ways to embroider designs and paint the disks.


Plan your holes. I went with a couple layouts for the small disks, and one layout for the large pendant disks- I made marks on one of the wood disks.
Then instead of marking each disk, I taped a few together- these are fairly thin disks of wood. 
Then drilled the holes. So fast, so easy.
Now, you paint them. Remember to contrast the paint with the floss so the floss shows up well, and start stitching. The fun part is that the same hole layout can be used in different ways. 
Spread a layer of glue on the back to seal all the knots and thread. You can back the disks with paper, felt or even another disk. Then attach all your findings. I'm going to glue the small ones to barrettes and ring blanks. The large ones are fun pendants. 

Dremel wants to celebrate its fans’ brilliant projects, work and ideas! Now through October 12, share, tweet or post photos on Facebook, Twitter and Instagram that depict your brilliant ideas using the hashtag#MyBrilliantIdeaSweeps for the chance to win weekly prizes, including free tools and handmade gifts, or the grand prize: a custom-engraved Honda scooter and a Micro 8050. Visit www.facebook.com/dremel for rules and to learn more.

I was selected for this opportunity as a member of Clever Girls Collective and the content and opinions expressed here are all my own.