Printing Tips

Check out my printing tips if you're having problems printing to the right size
If you'd like to support this site and all the free things I post- please check out my Don't Eat the Paste Mandala collection coloring book for 9.99 at Amazon.
Showing posts with label costumes. Show all posts

Tuesday, September 3, 2024

DIY Craft Foam Crown Headband


diy craft foam crown project photo woman in a blue craft foam crown


I really meant to get in progress photos but it's harvest time up here and my family is doing a LOT of harvesting of wild plants and stuff. 

I've started selling some of my salves in partnership with a good friend. You can follow her page and see what are doing together at Da Love Bazaar on Facebook

So instead of in progress photos, you get the printable pattern and a written explanation. That said, I plan to do more styles of these and will get photos of them in progress and it's the same method. 

You will need: 

  • The printable pattern! 
  • Sheets of a flexible but firm material to cut them from- I used craft foam
  • appropriate glue for your material- hot glue works well with craft foam
  • sharp scissors
  • a blank headband 
  • stuff to decorate it with- I used rhinestone tape with this one 
  • clips to hold it while glue is drying if necessary
  • pen that will mark on your material
  • bottle or narrow glass that the base of the crown will fit on. 

    Click the image below and print it out at 100% or fit to page. This is pieces to lay out two crowns to cut them.
crown template


Cut out the pieces, then lay them out on your foam and trace them. 

Cut out the foam. 

Glue the two disks together, if you're using a glitter or textured foam, it's better to have the smooth/wrong side against your hair. 

Curve the crown piece around, and use the small tab to connect the edges in a circle. 

Trim a SMALL amount off the disks so they fit tightly in the base of the crown piece and run a bead of glue inside the crown to attach it. 

Now is where you need the bottle that it fits over. I used a tall amber pill bottle. I put the crown upside on that, then used the larger tab to attach the headband. That protects the points from being crushed while you're attaching the headband. Align the headband on the crown base so the seam/connecting piece is in the back. That puts the center point in the front. 

After all the glue is set, it's time to decorate it!! 

It's really easy to make one of these. 

The rhinestone tape is really easy to use and it's fun. It cuts easily with scissors and I have a lot of it because I use it for props frequently. These are Amazon affiliate links. Using them will not affect your cost but will help support this site. 

Rhinestone Tape
Multi-colored Tape Set

I've been having a "Tiara Tuesday" on my FB page for a few month now and plan to have more crown and tiara projects this next year. 

Saturday, August 2, 2014

The Turnip Girl's newest costume

The Amazing Turnip Girl as The Winter Soldier - creative upcycled costume making

So The Amazing Turnip Girl has been working for weeks on a new costume. Now, if you've been following The Adventures of a Turnip Girl , you know that all her costumes are what's called "closet cosplay". It's an inexpensive form of cosplay that uses things that are easily available in creative ways. She's not casting rubber, or spending hours drafting patterns to sew. She starts with an idea, and heads to thrift stores and garage sales to pick up the pieces she needs. It takes a fair amount of creativity, and involves sees possibilities in the shapes of things. For this particular costume, the only brand new items in it are the buttons, spray paint, glue and a zipper.


The shirt is a lightweight sweater, that was modified heavily. she removed one arm to make room for the armor, and created tac style pockets for it and added a full length zipper. All hand stitched in. The knee pads were a huge find. She got those at a local garage sale- 50 cents for the full set of pads. The others are set aside for other costumes. The armor on her arm is made using paper mache, so is the knife and gun.

The glove was a good find too. She found that actually alone in my things and asked if I was going to do anything with it. Um.. not so much. A pair of gloves, I might crochet an edging for, but a lone glove? She happily took it.

All those straps? She bought a lot of belts. One was the wrong color, but a quick coat of paint fixed that! She used fabric to make a harness back piece for some of the belts. The holster and sheath are hand stitched from black vinyl.


She's getting really good at paper mache isn't she? 

The mask is paper mache glued to fabric. The star was stenciled on, using Frog Tape to get a really clean edge.

So in the process of working on this costume, we found out that part of Barnes and Noble's Pop Culture Nights was a Marvel night! She was excited, no waiting to wear her costume, she even had to hurry to finish it! There were a LOT of Captain Americas, it was hero night at B&N.

The Winter Soldier won, and people stopped and complimented her costume.

Monday, June 16, 2014

Catching Up with June


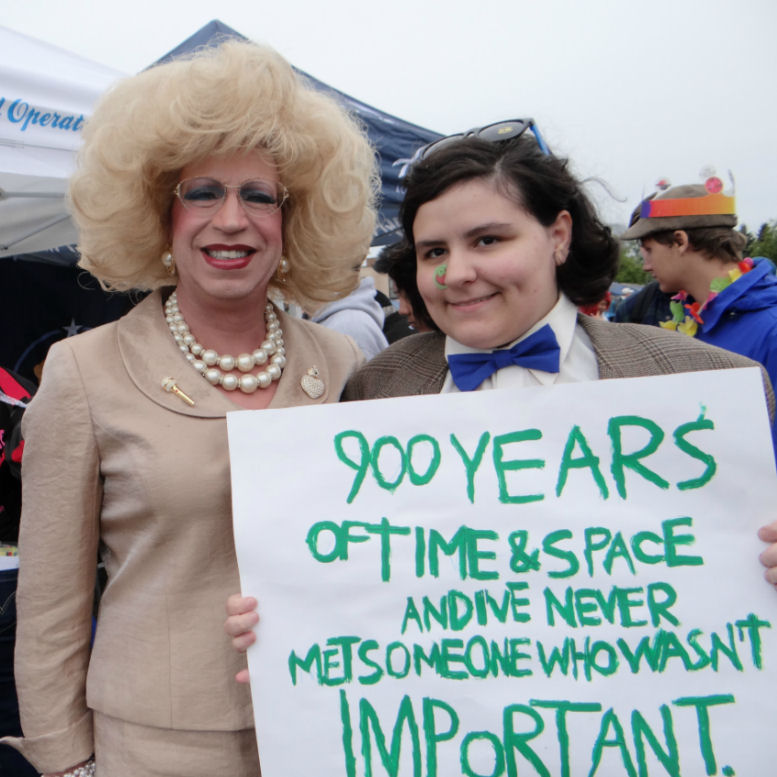
Daphne DoAll LaChores and The Amazing Turnip Girl "900 years of time and space and I've never met someone who wasn't important."

June gets to be really busy really fast. With festivals and fairs, and with things growing in the garden and other stuff that needs to be done. The photo above is from Pride Fest 2014. The woman to The Amazing Turnip Girl's left is Daphne DoAll LaChores- a short film about her was nominated for an Emmy in the Cultural category, and you can see that here. If you've never been to your local Pride Fest- it can be a whole lot of fun. It's been a family event for us since TG was very little, and it's something she looks forward to every year. The last couple of years, instead of having a parade, there is an Equality March, and TG dressed up like the Doctor and painted that sign to carry.

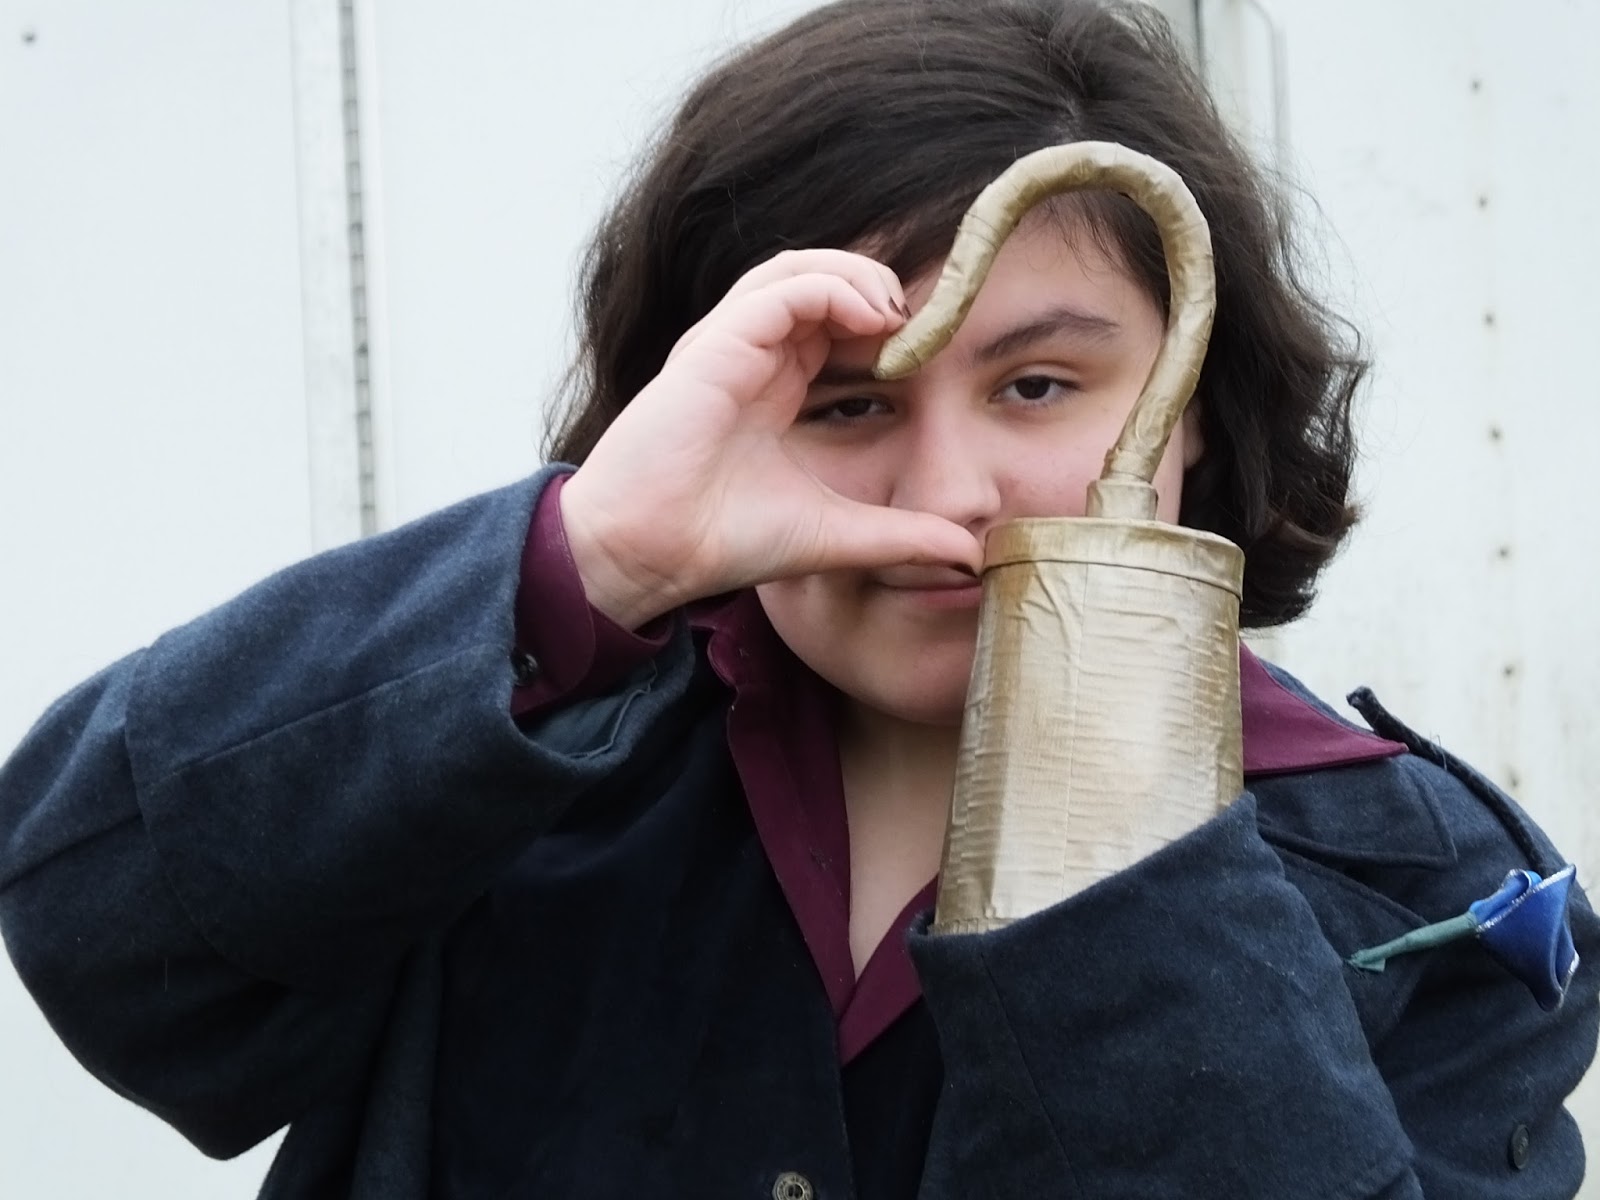
Captain Hook- OUAT, closet cosplay by The Amazing Turnip Girl

More Amazing Turnip Girl! This time at our local ren faire. The first day, even though she didn't know it, was a PIRATE theme. She had decided on her costume without knowledge of that, and closet cosplayed Captain Hook from Once Upon a Time. For people as seriously non-cosplay as I am- closet cosplay is when you put together a costume using what you have on hand, and what's in your closet rather than going all out for an exact replica. The hook is made from a plastic cup, a "gigantic twist tie" (I didn't see it, that's what she told me), layers and layers of the ends of various rolls of Duck tape, and spray painted. 

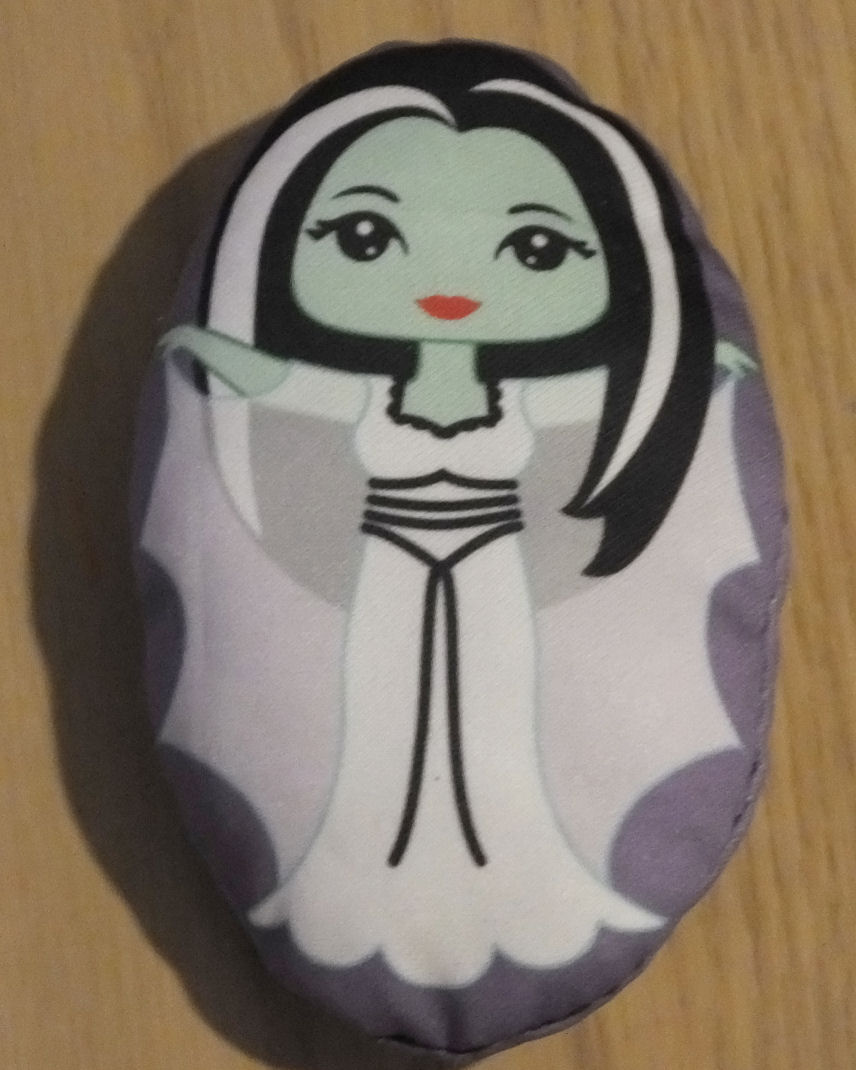
Lily swatch doll

The newest of my swatch dolls. Recently Spoonflower let people who ordered one of their knit fabrics try a swatch of their performance pique. I really love this stuff for swatch dolls, it prints gorgeously, and it's very soft feeling. A little trickier to sew, but worth the extra care. You can get this swatch here.

Today was dandelions- but what we did was gather seeds.
Just wrapped our fingers around the puff balls, pull, dump the little seeds and fluff into a gallon zip bag. Then after we had denuded a lot of dandelions of fluff and gotten some very odd looks from the neighbors- I brought the bag inside, closed it tight, and just started playing with it. Rolling it in my fingers, rubbing it, and shaking it. After a bit I wound up with about a 1/4 cup of seed defluffed. So now we are going to try sprouting the seeds. Also, somehow I wound up covered in dandelion fluff.

OH!!! and the BIG news!!!


Look look!!! Pre-orders are available now on Amazon, and the books are coming out in November and December.

Affiliate links help pay for this site, and seeing these ordered would also be personal exciting. Really.

So how is your month going?

Thursday, April 11, 2013

Duck Tape® Prom Queen (Mini Crown Tutorial)

This is a Sponsored post written by me on behalf of Duck® Brand for SocialSpark. All opinions are 100% mine.
Duck Tape® Mini Crown
I remember when my daughter was little and she discovered Duck Tape®. She created clothes for her fashion dolls and stuffed animals, purses, bags and covered notebooks. She's still making purses, accessories and notebooks even though she's (mostly) outgrown fashion dolls.
Duck Tape® has an annual scholarship fashion contest for with great prizes for people who attending their proms. Stuck at Prom® is open to students from U.S.A. and Canada except for Maryland, Vermont, Colorado, Puerto Rico and the Province of Quebec. You need to be at least 14 to enter and going to an school sanctioned prom of some sort. You can find the full rules HERE and an f.a.q. HERE. Check out the gallery of previous winners and entries!
I was talking to a reporter about Duck Tape® after winning the contest, and he was surprised to find out that there were patterns for Duck Tape®. I'm sure he would be really astounded to know just how many. Like Duck Tape® on Facebook (I do!) , right now the cover image is a whole bunch of different designs and colors of tape. The Duck Tape community on there is helpful and supportive.
Duck Tape Patterns
Here are just a few patterns and colors just to give you some idea what's available.
The metallic  Duck Tape®  that I used for the base is also available in silver.
To make a mini crown you will need:
Duck Tape®
Non stitck scissors- These things are the best thing in the world for Duck Tape® crafting! I like Westcott Titanium Coated Scissors
my pattern for a crown
ball point pen or permanent marker
elastic- cord or narrow elastic
bobby pins
optional- parchment paper (a tip that I got from Cathy who designs applique bags and purses, look for DuckTapeVillage on FB)

The basis for almost all Duck Tape® crafting is making a sheet, and you can find instructions on their site for doing that. You'll start by making a sheet big enough to fit the crown pattern. Click the pattern for a larger version, print and cut out.
Duck Tape® Crown Pattern
After you make the sheet and check it on your crown pattern- outline the pattern with the pen.


Cut out the crown. Tape it closed. You don't actually need the tab, but it does make it a little easier. One of the nice things about Duck Tape® is that seam allowances aren't necessary! You can just butt edges and tape them.
After you cut out and assemble the crown, you can tape over the edges to make sure they are all covered, or use a marker on them or just leave them plain. I taped over them.

Tape a  piece of elastic inside the crown across the diameter at the bottom . This provides a base to clip it into your hair.  You could also do an X in elastic if you want to pin in down in your hair with more security.
Then the fun part, decorate it. There are all sorts of tapes, all sorts of ideas. This is where the parchment paper can come in handy. If you lightly adhere tape to the slick side of parchment paper, you can cut out appliques and motifs from tape to decorate your crowns and other items more easily.
Even if you aren't the official Prom King or Queen, you'll have your very own crown from your prom.
Go get Stuck at Prom®
Visit Sponsor's Site

Saturday, May 5, 2012

Happy busy day

Anubis Mask- duct tape
Duct tape Anubis mask on TG
Today was a book signing with Rick Riordan. Since my family are fans, we had decided as soon as we heard about it that we were going. TG made herself a costume using cardboard boxes and some of her yarn and fabric stash. She decided she would be Anubis. Her mask and pectoral are completely her own design and execution.
Anubis- Rick Riordan in Alaska

While she didn't win the costume contest, she did get an honorable mention. 
You know, major writers very rarely come to Alaska. Our local best selling authors do book signings up here of course, but we rarely get NY Times best selling authors who aren't Alaskan. 1200 people had shown up at least. Probably more. The book store, which started handing out wristbands for a place in line at 9:00am had a line around the store when we go there about 10 minutes to 9. 
There were craft tables, and like with the Harry Potter book release parties, a sorting area. Only instead of finding out what your house was, you got to find out your God parent and special power. Eyes closed, pulling out slips from a basket.
The 4 of us all picked. William and TG both got Healing as their special gift. William had Ares chosen as his parent. He thought that was hilarious. TG picked Hestia, which triggered her doing the Xena-lookalike Hestia thing. (my family of geeks!). I got Divination and Aphrodite, Michael got Necromancy and Hephaestus. 
TG had fun strutting for the costume contest, and lots of people asked to take her photo. While some people came dressed as the Kanes, she was the only one who chose to be an Egyptian god. 
It was so crowded, but the store handled the fact it was so much busier than expected very well, and Mr. Riordan was wonderful and said he would go over the number of autographs he had originally agreed to. Since we were in the 3rd group of 100 people, we finally got out of there around 2. Mr. Riordan complimented TG's costume, and told her that he hoped she got lots of photographs of it. She'll probably be posting more information about how she made the mask on her Cut Out and Keep page

After that, we went to Free Comic Book Day at Bosco's Comics. John announced yesterday on the FB page that the store would allow 10 comics instead of the usual 5 to anyone who came in costume. My darling husband found his Green Lantern mask, which he wore with his GL shirt and ring. TG's costume of course counted, and she had a blast picking out her free comics.

After hours of standing in various lines and doing so much, we are all pretty wiped out now, but it was a lot of fun! 

I like Mr. Riordan's books because they are full of action from the start, the female characters are pretty strong and independent and he keeps very true to the original mythology while writing in an entertaining, contemporary way that engages modern juvenile readers. The current Olympian series is exploring the differences between Greek and Roman myth, and the Kane series is about Egyptian mythology. I'm a big fan of anything that can get youth reading the classics. It will help them to appreciate English poetry as well since so much classic poetry and plays references Greek, Roman and even at times, Egyptian mythology. 


Sunday, October 31, 2010

Fezzes are cool - bead patterns and Halloween pics


I've mentioned before that my daughter is all about Doctor Who right? I mean, the rest of the family likes it of course. But her favorite color is TARDIS blue, she can name everyone who played the Doctor in order, including the people who were on Comic Relief. So her costume was decided ages ago.
She made the fez, and the bow tie, for the bow tie, she took apart a clip on we got at a thrift store and used the pieces for the pattern. The fez is made with broadcloth over buckram. The jacket and shirt are both from thrift stores, and she added the patches to the elbows. The sonic screwdriver is purchased from ThinkGeek.
I graphed out these two bracelet patterns. I'm going to make both for her for Christmas this year. I hope you enjoy them too. Odd count peyote. First picture is a preview, second picture is both bracelets vertically oriented for printing out the patterns. Click on the second image to download the full size pattern.


Saturday, October 24, 2009

Duct Tape Shield

My son needed a shield to go with his Captain America teeshirt to turn a teeshirt and a pair of jeans into a very casual costume. We planned on getting him one from Hot Topic but they were sold out. So his sister and I talked and decided we could do something with duct tape.
We got rolls of duct tape and went through the boxes we've saved for such things to find ones big enough that we could make it. It turned out the largest base we could make using one box was about 27 inches in diameter using two half circles taped together.
We talked and decided that doing duct tape appliques was probably beyond both our skills. But we are both fair hands with covering things in duct tape, so we planned it out that way. This is what the shield is supposed to look like.
 
So after consideration, we decided the easiest way was in 4 shapes. The large round red base, a ring in white, a round piece covered with blue and the star.
 
So we started cutting up and assembling boxes into the necessary pieces. The ring because of box size limitations had to be done in 4 sections, so we used a pencil and a piece of yarn to mark the initial quarter ring and then used that very carefully to make the other 3. Butted the ends and taped it together.

 
The first part we covered the back first using a roll of black duct tape we had and going across the length, turning, and going across until we had the whole thing covered. Then we flipped it over and did the red the same way turning the ends of the tape over to the back side of the shield.
Then we taped up the ring using short strips and wrapping them around one at a time until the whole thing was covered. We covered the blue circle the same way we did the big red circle. Then taped up the star.
After we got all the pieces covered, we used double sided duct tape to put everything together, but foam tape would have worked as well. We burnished it down tightly.
The straps are strips of doubled duct tape taped securely in place.
The basic technique will work for any shield I think. You could also do cresty type cut outs or hot glue designs then cover the shield with used aluminum foil and burnish it down to make a fancy decorated metal shield.

William was very happy with his shield. I know my son, 18 or not, he will hang it in his room and display it with pride for years. My dad was absolutely impressed with it.


Thursday, September 3, 2009

Links

First, if you haven't already heard of it elsewhere, Yasmine Surovec from the brilliant A Print a Day blog has a new magazine especially for crafters called Parasol Craft. It's only 2.50 USD, and full of gorgeous things, interviews with artists and pictures of the beautiful things they create, it also comes with some things for scrapbooking, a darling doll project, instructions for creating and using Illustrator brushes with vector files to practice with, and some really lovely embroidery designs. 111 pages of goodness.

Rachel at Instructables has great step by step instructions for making your own panties and bra. Since you make the pattern by using one you have that you kind of like the fit of, you can adjust the fit to be perfect, and unlike some bra projects I've seen on the net, it WILL work for something more than a B cup. Oh how we envy you ladies with the high and perkys! (perkies?)(Umm.. *blushes and waves to the guy in Canada and the guy in Japan* you can ignore that whole last paragraph!)
If you can draft patterns, The Canton of Gleann nam Feòrag Dhuibhe has instructions for making all sorts of garb.
I reposted my pirate eye patch pattern here

This bat mask is a costume all in itself with a gorgeous little black dress. For this? I'd start wearing contact lenses again.
If you are more the Winter Queen type, check out this necklace.