Printing Tips

Check out my printing tips if you're having problems printing to the right size
If you'd like to support this site and all the free things I post- please check out my Don't Eat the Paste Mandala collection coloring book for 9.99 at Amazon.

Saturday, May 16, 2009

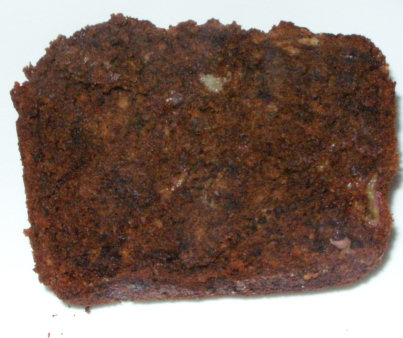
Chocolate Banana Bread


Sugar Free Chocolate Banana Bread
4 large ripe bananas, a little overripe is fine for this. Mine were just edging into "banana bread" only stage.
1 egg
1/3 cup melted butter
1 cup Splenda
2 Tbsp vanilla extract (your mileage may vary, but I like a lot of vanilla)
pinch of salt
1 Tbsp. baking soda

1/3 cup unsweetened cocoa
1 1/2 cup flour -I used Bob's Red Mill whole wheat pastry flour

Preheat oven to 350°F.
Mash up bananas well with a wooden spoon. You don't have to be too picky, you can see banana chunks in mine. Mix in butter, Splenda, egg, vanilla and mix it to a really disgusting gloppy looking mess.Stir in baking soda and salt, then mix in the dry ingredients. Cocoa first to get it well mixed in, then the flour.
Pour into greased loaf pan.It will just fill a greased loaf pan to 2/3rd full or thereabouts.
Bake for 1 hour. Let rest for about 10 minutes, and turn out.

With Sugar Chocolate Banana Bread-
4 large ripe bananas (same, overripe is fine)
1 egg
1/3 cup vegetable oil (I used canola, you could use melted butter. It might make it too rich though)
3/4 cup sugar- any kind, I used white because it was convenient. I think if I were using maple or brown I'd use 3/4 plus 1 Tbsp.
2 Tbsp vanilla extract (your mileage may vary, but I like a lot of vanilla)
pinch of salt
1 Tbsp. baking soda

1/4 cup unsweetened cocoa
1 1/2 cup flour I used my old standby organic white unbleached (also Bob's Red Mill)


Preheat oven to 350°F.
Mash up bananas well with a wooden spoon. You don't have to be too picky, you can see banana chunks in mine. Mix in oil, sugar, egg, vanilla and mix it to a really disgusting gloppy looking mess. Stir in baking soda and salt, then mix in the dry ingredients. Cocoa first to get it well mixed in, then the flour.
Pour into greased loaf pan. It will just fill a greased loaf pan to 2/3rd full or thereabouts.
Bake for 1 hour.
Let set for 10 minutes or until the teenager in the house figures out something just came out of the oven and comes into the kitchen sniffing and looking like you've starved her for weeks. Or maybe that just happens here?

Your cake may turn out lighter in color if you use white flour. I think since the leavening is baking soda no gluten flours will be fine.

The differences- I used more sweetener for the sugar-free version because coming up with sugar free icings is difficult. I love that you can bake with Splenda, but there just aren't good replacements for powdered sugar, and a lot of icing recipes depend on the crystalline structure of sugar, so instead of making an icing for it, I just gave it to my Uncle with a tub of whipped cream cheese. I also used a bit more chocolate, because Splenda dissolves a lot more throughly than sugar does in this recipe, and the liquid could handle more chocolate. I used butter instead of oil for the extra richness and to help mask the slightly off taste of the Splenda.
The sugar version was a HUGE hit in our house, and the sugar free version was a hit with my Uncle, who didn't look like he felt bad at all while we ate cake. After all, we had to share the cake, and he had a loaf of banana chocolate-y goodness all to himself.

Cottage Cheese Pancakes

I made pancakes for breakfast using a slight modification of the classic cottage cheese pancake recipe and.. YUM. If you've not had cottage cheese pancakes, they are rich and moist and amazing with fruit. Or if you're lazy like me, still pretty good with maple syrup!

Cottage Cheese Pancakes
Serves 4
These are super rich and creamy tasting but can be a little sticky to flip. Be patient!

4 eggs or 1 cup egg substitute
1 cup cottage cheese
1/2 cup milk
2 Tbls vanilla (I use homemade double strength vanilla because I really love vanilla, your mileage may vary, adjust to taste)
2 Tbls canola oil
1/4 tsp salt
1/2 tsp baking soda
1/4 cup sugar or sugar substitute
1 tsp. cinnamon (again, adjust for taste, and I'm guesstimating. I let Emily sprinkle in the cinnamon and she likes a lot)

1 cup Whole Wheat Pastry Flour (my preference, I'm sure white would work, or buckwheat would probably be amazing)

Mix everything except the flour, whisk it together with fork, then mix in the flour until it's incorporated.
Oil a non-stick skillet and heat at a high medium setting, when the skillet is hot, pour the batter in by the quarter cup full, and let it cook for a few minutes, check edge with a spatula, and turn when browned on one side, brown on the other side. These are SOO good, and the only pancake I've *ever* had I didn't think needed butter. They are really rich without it. It's a natural for a fruit topping. If you can't have sugar, I recommend a no-sugar jam. Yum yum!
I actually didn't measure my batter because I use a 3.5 quart melamine batter bowl from Lehman's to mix my batter in, and then I just pour it into my pan. This made 12 4 inch pancakes for me. Like I said, they are really rich. Only E could eat more then 4. I ate 3, and when I asked if anyone wanted my last one, she said yes. Since they are pretty low fat/carb, I didn't mind letting her have extras. Also, lots of calcium! And for the record? E HATES cottage cheese, she thinks it's just gross. And she loved these pancakes.

I also made up some chocolate banana bread for my uncle using Splenda, so I'll let you know what he thinks of it and post the recipe modifications I made to it when I get home tonight. I also asked if he'd be willing to try vanilla infused Splenda in his coffee. Since he uses it regularly, he's a better judge then I am about how it turns out. I mixed 1 vanilla bean, with about half the caviar in it with about a half cup of Splenda. I'll let you know next week what he thinks of it.

Thursday, May 14, 2009

Crocheted Bun Cover


This is a crocheted bun cover I made for myself, so size wise, it's reasonably large. I have waist length, straight medium thickness hair, so if you have very curly or very full hair, it will probably be too small for you, and if you have shoulder length medium thickness hair,it may be too big, but bun covers are easy to resize, more or less rounds will make them larger or smaller as you need to. What I like doing is using the center of a doily I really like, or just designing as I go to make the top part of the bun cover something pretty and more involved then just a round mesh to cover my bun, then I work mesh as needed to increase the size to what I need, and decrease the mesh for the back of the bun cover.
For this one, you will need size 10 cotton
Steel size 8 or 1.5 mm hook
A medium sized covered elastic hair band. I use the ones that are about 2.5 inches and come carded at my local supermarket.
Needle to weave in ends
scissors
Chain (ch) 8, slip stitch (sl st) to join
Round 1: Chain 3- counts as first double crochet (dc), 23 dc in ring sl st to join (24 stitches (sts) made)
Inverted V shaped cluster stitch: first dc, yarn over(yo), insert hook in st, yo, draw through first two loops, yo, draw through one loop leaving 2 loops on hook, skip 1 st, yo, insert hook in st, yo, draw through first 2 loops, yo, draw through one loop, yo, draw through all 3 loops on hook.
Round 2: Ch 6- counts as first dc and ch 3, *starting in the same st, work a v shaped cluster (one loop, 1 v formed), chain 3* repeat ** around, dc in same stitch as last stitch on v cluster, sl st to join to 3rd ch of starting ch 6. (12 loops/Vs made) (edit- sounds lot more complicated then it is. Try it)
Round 3- Sl st to middle of first ch 3 loop, sc in ch 3 loop, *dc in next loop, ch 2, dc in same loop, ch 2, dc in same loop, ch 2, dc in same loop, sc in next loop* repeat ** around, on last loop, dc in loop, ch 2, dc in loop, ch 2, dc in loop, ch 2, dc in loop, sl st to join with first sc (6 petal made)
Round 4- Ch 1 (doesn't count as first sc), sc in same st, *sc in first ch 2 sp, 2 dc in same space, 5 dc in next sp, 2 dc in next sp, 1 sc in same space, sc in sc* repeat ** around, on last petal, continue in pattern and sl st to join to first sc.
Round 5: Ch 1 (doesn't count as first sc), sc in same st, *sc in next 5 sts, ch 3, sk st, sc in next 6 sts* repeat ** around until the last petal, sc in next 5 sts, ch 3, sk st, sc in next 5 sts, sl st to join to first sc (6 petals with ch 3 loops)
Round 6:Ch 8, counts as first treble crochet (tr cr) and ch 4, tr in same st, ch 4, *sc in ch 3 loop, ch 4, skip 5 st, tr cr in next st, ch 4, tr cr in same st, ch 4,* repeat ** around,ch 2, dc in 4th ch of starting ch 8. The dc puts you right on top of loop for starting the next round.
Round 7: Ch 1, sc in same st, ch 5, sc in next loop all the way around until the last loop, ch 2, dc in first sc. (18 loops)
Round 8: Repeat round 7.
Round 9: Ch 1 (doesn't count as first st), 2 sc in same loop,sc in sc, * 2 sc in next loop, ch 3, 2 sc in same loop, sc in sc* repeat around, on last loop, 2 sc in loop, ch 3, sl st to join to first sc.
Round 10: Sl st to 3rd sc, ch 6 (counts as first dc and ch 3), sc in ch 3 loop, ch 3, skip 2 sts, dc in next st, ch 3, *sc in next ch 3 loop, ch 3, skip 2 sts, dc in next st, ch 3* repeat ** around, on last ch 3, instead of ch 3, ch 1, dc to 3rd stitch of starting ch 6 loop. (36 spaces)
Round 11: ch 1 (doesn't count as first st), sc in space, ch 5, *sc in next sp, chain 5,* repeat ** around until last ch 5, ch 2, dc in first sc.
Round 12: Repeat Round 11
Round 13: ch 1 (doesn't count as first st), sc in same place, ch 3, *sc in next loop, ch 3, * repeat ** around, when you reach last ch 3, ch 1, dc in first sc.
Rounds 14-16: Repeat round 13
Round 17: ch 1, sc over elastic band, in same loop, sc around elastic band, repeat all the way around, 2 sc in each loop over the elastic band. (72 sts), sl st to join. Break off, weave in ends. Push down stitches as you need to, then when it's all done, redistribute the stitches evenly around the elastic band.
To wear it, I don't like putting my hair in a pony tail if I can avoid it, so I just hold it in place and twist it gently and form a cinnamon roll bun, then I hold the bun with one hand, and pull the cover over it with the other and slide a stick through weaving it in my bun and through the cover to hold it all securely in place.

Wednesday, May 13, 2009

Compass Rose Boxes


Compass rose boxes. I hope you like them. This is a new template, and it makes a box 3x3x1 inches printed at 100 dpi. As usual, click on the images for the full sized versions.